108
FlexFit Pro
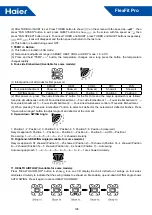
(2) Auto mode will not start HEAT function automatically, but can set or cancel HEAT function.
20. Timer:
(1) TIMER ON
• Press "TIMER ON" button, character "ON" is flashing, press "+/-" button to adjust, then press "OK" button to
confirm, if "OK" button is not pressed within 10 s, TIMER ON function is cancelled.
• If time of TIMER ON is the same as that of clock at present, character "ON" is always flashing and can not be
verified, it is necessary to readjust time.
• When the time of TIMER ON is end, the setting time and character "on" disappear.
(2) TIMER OFF
• Press "TIMER OFF" button, character "OFF" is flashing, press "+/-" button to adjust, then press "OK" to confirm, if
"OK" is not pressed within 10 s, TIMER OFF function is cancelled.
• If time of TIMER ON is the same as that of clock at present, character "OFF" is always flashing and can not
verified, it is necessary to readjust time.
• When the time of TIMER OFF is end, the setting time and character "OFF" disappear.
(3) TIMER ON/OFF
• After TIMER ON/OFF is set, remote will automatically judge sequential order of ON/OFF, arrow indicates that the
one performed first points to the one performed second.
• After the time of clock performed first is end, corresponding characters of timer "ON/OFF" disappear.
• If time of TIMER ON is the same as that of TIMER OFF, and can not be verified, corresponding character of the
latter of setting time is always flashing, it is necessary to readjust time and confirm again.
• If time of TIMER ON/OFF is the same as that of clock at present, and can not be verified, it is necessary to
readjust time and confirm again.
(4) After setting timer, display the setting of timer first and then display time all the time, when timer is active,
character "ON/OFF" is always displayed.
21. /-:
• Press button "+/-" time will change in terms of 1 min as unit, pressing and holding the button will change quickly.
22. Clock:
• Press "Clock" button, "Morning" or "Afternoon" displayed at present are flashing to enter the state of clock
adjustment, adjust clock and then press "OK" to confirm.
• It is valid under the state of ON/OFF.
23. LIGHT:
• No display on remote controller LCD, which is processed by indoor unit.
24. RESET:
• Perform one power on reset operation when RESET button is pressed.
25. LOCK:
• Press button Lock, display Lock symbol on LCD display, buttons on remote controller can not be used, press
button Lock again to unlock.
26. CODE:
• Function reserved.
27. INQUIRE
• Processing by Indoor unit
Содержание FlexFit Pro AL24LP2VHA
Страница 1: ...SYJS 04 2017REV B Edition 2017 04 FlexFit PRO ...
Страница 8: ...FlexFit Pro 6 ...
Страница 9: ......
Страница 10: ...AW24LP2VHA AW36LP2VHA ...
Страница 11: ......
Страница 12: ...10 ...
Страница 13: ...11 ...
Страница 14: ...12 ...
Страница 15: ...13 ...
Страница 16: ...14 ...
Страница 17: ...15 ...
Страница 18: ...16 ...
Страница 19: ...17 ...
Страница 20: ...18 ...
Страница 37: ...35 FlexFit Pro ...
Страница 53: ...49 FlexFit Pro Part 5 Outdoor Units 50 2 Dimensions 53 3 Piping 55 4 Wiring diagrams 55 5 Installation 58 ...
Страница 72: ...68 FlexFit Pro 3 Outdoor PCB PCB 0151800054B Power module 0150401824 ...
Страница 90: ...86 FlexFit Pro Fig 4 1 ...
Страница 91: ...87 FlexFit Pro Fig 4 2 ...
Страница 108: ...104 FlexFit Pro 7 Controller External View of Remote Controller 7 1 Remote Controller YR HBS01 ...
Страница 121: ...Haier Commercial Air Condition Web Http www haier com Haier reserves the right to make change without any notice ...


