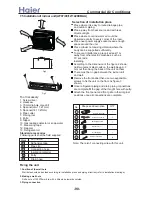

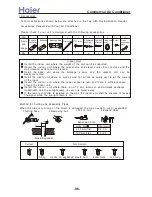


When the mounting plate is firstly fixed
1. Carry out, based on the neighboring pillars or lintels, a proper leveling for the plate
to be fixed against the wall, then temporarily fasten the plate with one steel nail.
2. Make sure once more the proper level of the plate, by hanging a thread with a
weight from the central top of the plate, then fasten securely the plate with the
attachment steel nail.
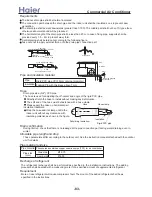
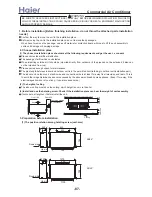
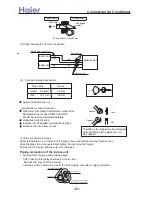
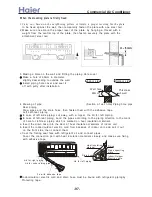
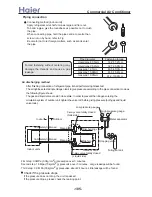
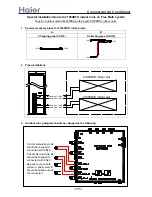
3. Making a Hole on the wall and Fitting the piping Hole cover
Make a hole of 60mm in diameter,
slightly descending to outside the wall.
Install piping hole cover and seal it
off with putty after installation.
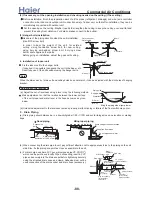
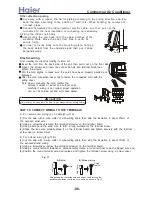
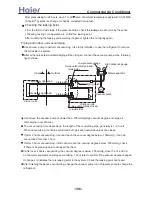
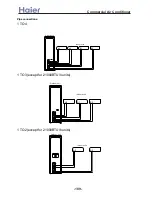
4. Drawing of pipe
Rear piping
Draw pipes and the drain hose, then fasten them with the adhesive tape.
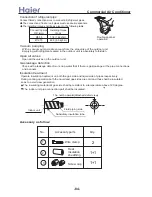
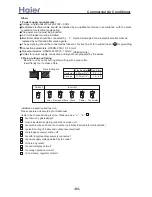
Left Left-rear, piping
In case of left side piping, cut away, with a nipper, the lid for left piping.
In case of left-rear piping, bend the pipes according to the piping direction to the mark
of hole for left-rear piping which is marked on heat insulation materials.
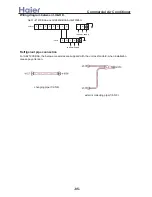
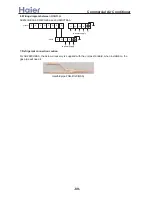
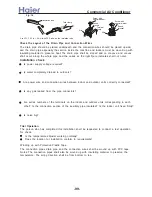
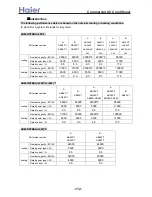
a. Insert the drain hose into the dent of heat insulation materials of indoor unit.
b. Insert the indoor/outdoor electric cord from backside of indoor unit, and pull it out
on the front side, then connect them.
c. Coat the flaring seal face with refrigerant oil and connect pipes.
Cover the connection part with heat insulation materials closely, and make sure fixing
with adhesive tape.
Indoor/outdoor electric cord and drain hose must be bound with refrigerant piping by
Protecting tape.
Indoor side
Outdoor side
Wall hole
Thickness
of wall
60mm
(Section of wall hole) Piping hole pipe
Indoor/Outdoor
Electric cable
Pipe supporting
plate
Heat insulation
material
Drain hose
Lid for left piping
Lid for right piping
Lid for under piping pipe
Fix with adhesive tape
Piping
>a__WcU[S^ <[c >a`V[e[a`Wc
-97-
Содержание AB072XCBAA
Страница 21: ... a__WcU S c a V e a Wc AU84NXTBAA 66 33 1 23 4 43 33 61 2 3 160 2 15 3 52 21 ...
Страница 28: ... a__WcU S c a V e a Wc w y z x wt9 61 xt 98 96 816 yt5861 zt256 1 o MRWMHI p t9 61 2v xB r 2v xB r 2wzxB 28 ...
Страница 138: ... a__WcU S c a V e a Wc AU282XHBAA AU422XIBAA PCB printed diagram 138 ...
Страница 141: ... a__WcU S c a V e a Wc AU84NXTBAA PCB printed diagram 141 ...
Страница 144: ... a__WcU S c a V e a Wc AB AE AD units PCB printed diagram 144 ...
Страница 149: ... a__WcU S c a V e a Wc AF07 142XCBAA PCB printed diagram 149 ...
Страница 180: ...MEMO Commercial Air Conditioner ...