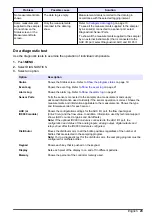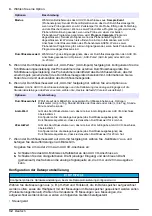
1.
Push
MENU
.
2.
Select Hardware Setup>Liquid Detect>Status. Make sure that the liquid detector is disabled.
3.
Put the intake tubing into the sample water or tap water.
4.
For the AWRS sampler, put a graduated cylinder under the distributor outlet or composite tube
support inside the AWRS cabinet.
5.
For the refrigerated sampler, put a graduated cylinder under the distributor outlet or composite
tube support in the refrigerated cabinet.
6.
For the portable sampler, put the tubing from the outlet side of the pump into a graduated
cylinder.
7.
Push
CALIBRATION
, then select Volume>Sample Volume.
8.
Push
Next
. The pump operates in reverse to purge the intake tube. The pump then operates in
the forward direction and starts to collect the sample.
9.
Push
STOP
when the volume that is specified in the sampling program is collected.
10.
Push
Finish
to complete the calibration or
Retry
to do the calibration again.
11.
Connect the outlet tubing to the tube fitting on the sampler.
12.
Push
Exit
to exit the volume calibration menu.
Verify the sample volume
To make sure that the sample volume is accurate, get a grab sample. Do not go back into calibration
to check the volume since the volume compensation is reset to zero at the start of a calibration.
1.
Push
MANUAL OPERATION
.
2.
Select Grab Sample.
3.
Put the intake tubing into the sample water.
4.
Put the tubing from the outlet side of the pump into a graduated cylinder.
5.
If the liquid detector is enabled, enter the volume to be verified.
6.
If the liquid detector is disabled, enter the volume that is specified in the sampling program.
7.
Push
OK
. The pump cycle starts.
8.
Compare the volume that was collected in the graduated cylinder to the expected volume. If the
collected volume is not correct, do the volume calibration again.
Calibrate the sensors
Calibrate the sensors connected to the sampler.
1.
Push
CALIBRATION
or push
MENU
and select Calibration.
2.
Select the sensor to calibrate.
3.
Obey the screen prompts to complete the procedure. Refer to the sensor documentation.
Calibrate the cabinet temperature—AWRS sampler
Refer to the service manual available on the manufacturer's website for the calibration procedure.
Start or stop the program
Start the sampling program to collect samples. Temporarily stop the sampling program to remove
samples, do manual operation or do a calibration. Stop the sampling program to change the
sampling program, the data log settings or the channel alarms.
Note: When data logging is configured, data logging is done even when the sampling program is temporarily
stopped.
18
English
Содержание AS950 AWRS
Страница 235: ...2 1 3 5 2 4 6 1 MENU 2 Programming Sample Programming 3 235...
Страница 300: ...1 1 5 9 2 6 10 3 7 11 4 8 1 301 3 301 3 301 317 2 pH 322 300...
Страница 301: ...3 3 AUX AUX I O AWRS 1 2 3 301...
Страница 302: ...12 24 12 24 12 24 50 1 10 99 999 0 2 1 2 3 16 0 3 0 3 303 AUX I O AUX I O AUX I O 306 1 302...
Страница 305: ...5 US900X 0 13 3 96 5 25 150 75 0 13 3 96 10 50 156 00 2 30 10 6 AV9000S 0 00 0 30 0 00 12 00 0 61 0 61 24 00 24 00 305...
Страница 308: ...d 4 a 15 15 15 15 b c OK 1 2 3 5 6 10 12 15 20 30 60 pH 307 1 2 3 a b 4 a Temp 2 2 IO IO9000 308...
Страница 309: ...5 2 6 OK IO9000 AUX IO9000 307 2 1 3 5 2 4 6 309...
Страница 310: ...1 2 3 4 1 2 3 3 3 310 310...
Страница 311: ...6 33 9 5 3 8 15 100 1 2 3 15 1 999 100 100 AUX I O AUX Flow 1 IO9000 IO 1 IO9000 307 50 1 2 3 10 10 000 1 2 311...
Страница 313: ...AUX I O 313 7 12 7 1 12 7 AUX AUX AUX I O Flow 1 2 1 2 IO 1 IO 2 IO 1 IO 2 IO9000 IO9000 1 2 3 AUX AUX I O 313...
Страница 314: ...4 308 7 313 5 AUX 7 313 1 2 3 1 999 1 2 314...
Страница 315: ...3 4 AWRS AWRS 5 6 7 8 9 10 11 12 13 14 200 1 2 AWRS 3 3 4 5 3 6 100 200 202 1 7 8 315...
Страница 316: ...9 1 OK 10 AWRS a b c 3 5 11 3 5 12 2 11 5 1 2 3 4 AWRS AWRS 5 6 7 8 9 10 11 12 1 2 3 4 5 6 316...
Страница 317: ...7 OK 8 1 2 3 AWRS 1 2 312 1 2 317...
Страница 318: ...3 4 AWRS 4 318...
Страница 319: ...1 2 3 307 1 2 3 319...
Страница 320: ...1 2 3 4 5 308 1 2 3 4 5 6 USB USB 5 USB USB USB 5 FSDATA 320...
Страница 322: ...pH 307 AUX I O AUX I O 1 2 3 317 320 320 AUX IO9000 AUX I O 0 4 20 ADC IO9000 AUX I O IO9000 322...
Страница 323: ...323...
Страница 430: ...2 1 3 5 2 4 6 1 MENU 2 Programming Sample Programming 3 430...
Страница 440: ...Program Halted Program Complete 3 Select Waiting On None Delay Schedule Setpoint 4 AWRS 4 440...
Страница 445: ...Sensor Ports AUX IO9000 AUX I O 0 4 20 mA ADC AUX I O IO9000 IO9000 Distributor Keypad Display Memory 445...
Страница 470: ......
Страница 471: ......


