

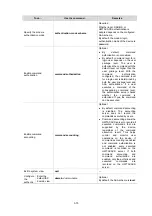


3-78
The device supports three SNMP versions: SNMPv1, SNMPv2C and SNMPv3. For more
information about SNMP, see
SNMP
in the
Network Management and Monitoring Configuration
Guide
.
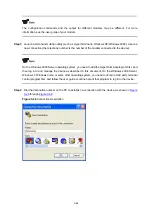
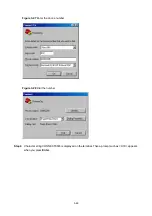
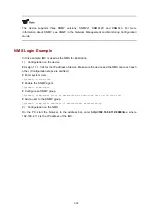
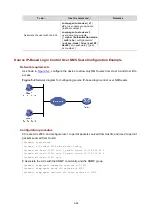
NMS Login Example
In this example, iMC is used as the NMS for illustration.
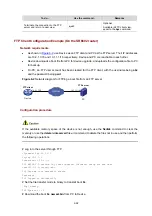
1) Configuration on the device
# Assign 1.1.1.1/24 for the IP address of device. Make sure the device and the NMS can reach each
other. (Configuration steps are omitted.)
# Enter system view.
<Sysname> system-view
# Enable the SNMP agent.
[Sysname] snmp-agent
# Configure an SNMP group.
[Sysname] snmp-agent group v3 managev3group read-view test write-view test
# Add a user to the SNMP group.
[Sysname] snmp-agent usm-user v3 managev3user managev3group
2) Configuration on the NMS
On the PC, start the browser. In the address bar, enter
http://192.168.4.112:8080/imc
, where
192.168.4.112 is the IP address of the iMC.