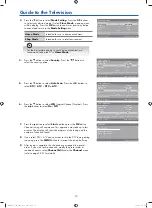
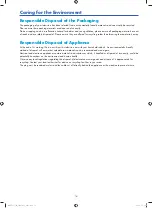
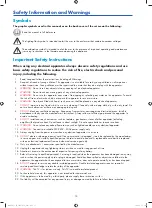
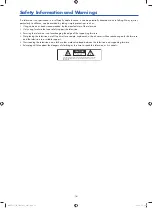
background image

23.6” (60cm) HD LED LCD TV

with Built-in DVD Player

G24HTC16

G24HTC16_IB_160630-V2_Annie.indd   1

30/6/16   下午6:05

Содержание G24HTC16

Страница 1: ...23 6 60cm HD LED LCD TV with Built in DVD Player G24HTC16 G24HTC16_IB_160630 V2_Annie indd 1 30 6 16 6 05...

Страница 2: ...G24HTC16_IB_160630 V2_Annie indd 2 30 6 16 6 05...

Страница 3: ...to a Wall 19 Advanced Connection Diagrams 20 Making Video and Audio Connections 20 Connecting an AV Device Using an HDMI Cable 20 Connecting a Computer Using a VGA Cable 21 Connecting an AV Device Us...

Страница 4: ...58 DVD Operation 60 Using the Built in DVD Player 60 Compatible Disc Types 60 Supported Formats 60 Basic DVD Playback Functions 61 Playing the DVD 61 Menu Playback for DVD 61 Stopping Playback 61 Pre...

Страница 5: ...ide facing towards the front of the TV 12 cm discs only Don t insert 8 cm discs 4 Press to eject disc DVD mode 5 Press to start playback or pause DVD mode 6 VOL Adjusts the volume Press to select and...

Страница 6: ...5 1 audio system 5 RF Connects to the aerial socket on the wall with the RF coaxial cable 6 VIDEO AUDIO L R Connects to the Composite output sockets on external video devices 7 USB Allows the insertio...

Страница 7: ...t between different repeat modes DVD mode 11 GUIDE Displays the EPG Electronic Programme Guide DTV mode 12 i Display the present channel information such as the current time and channel name ATV DTV m...

Страница 8: ...applicable when the TV programme has this feature DTV mode Select different Audio mode on DVD mode DVD mode Select Stereo Dual Sound Reception ATV mode 24 HOLD No Function To start the timeshift playb...

Страница 9: ...DTV mode DVD MENU Display the DVD menu DVD mode 32 TV RD A short cut to switch input source to TV Digital radio channels ANGLE Select different angles for the video DVD mode 33 TITLE Display the DVD t...

Страница 10: ...battery type indicated in this manual When the batteries are exhausted the remote will not function Replace both batteries at the same time with new ones Do not install new batteries with used ones an...

Страница 11: ...First Time Setup OSD Language English Mode Setting Home Mode Country Australia Auto Scan DTV LCN Move Adjust MENU Return EXIT Exit On Start Please connect your aerial change any settings you wish and...

Страница 12: ...First Time Setup OSD Language English Mode Setting Home Mode Country Australia Auto Scan DTV LCN Move Adjust MENU Return EXIT Exit On Start Please connect your aerial change any settings you wish and...

Страница 13: ...list Press the OK button to view the selected channel refer to page 31 for details on Favourite Manager Press the button to return to the previously viewed channel Listening to the Radio Radio Mode I...

Страница 14: ...orking life do not throw this television out with your household rubbish An environmentally friendly method of disposal will ensure that valuable raw materials can be recovered and used again Electric...

Страница 15: ...icient gap around the apparatus to avoid overheating 9 DO NOT install near any heat sources such as radiators gas heaters stoves of other apparatus including amplifiers that produce heat Do not leave...

Страница 16: ...ot placing the television on tall furniture for example cupboards or book cases without anchoring both the furniture and the television to a suitable support Not standing the television on a cloth or...

Страница 17: ...to local regulations The following items are included Instruction Manual Quick Start Guide TV Base TV Stand Support Remote Control AAA Batteries x 2 AUDIO TV Screw TA3 x 10mm x 6 If you require additi...

Страница 18: ...oles then secure with a screw driver not included using the 3 screws provided Screw x 3 TV Front Base Stand Front screw in Screw x 3 screw in The LCD display is very fragile and must be protected at a...

Страница 19: ...you make all connections refer to page 20 23 and page 50 for details before mounting on to the wall Mounting the TV to a Wall Screw x 3 unscrew 200 mm 100 mm Four mounting holes size M4 screw include...

Страница 20: ...he TV or on the remote control to display the INPUT SOURCE List Use the buttons to select HDMI and then press the OK button to confirm Making Video and Audio Connections Not all AV devices have the ab...

Страница 21: ...socket to the computer s audio output socket 2 Plug the connected devices into the mains socket before switching on the TV 3 Press the button on the rear panel of the TV or on the remote control to t...

Страница 22: ...Yellow Video Red R White L Yellow Video Red R White L Connecting a Coaxial Audio Receiver For better sound quality you may want to play the audio through your multi channel audio receiver 1 Use an au...

Страница 23: ...slowly increase the volume until you reach a comfortable listening level Rear Right Bottom View of TV RF Digital Audio Output Coaxial PC AUDIO HEADPHONE VGA Y Pb Pr Earphones Cable not included Long...

Страница 24: ...the screen Colour Temp Select among colour temperature Standard Cool Warm Adjusts the colour components independently to achieve a warm or cool colour for Personal mode Standard Cool Increases blue t...

Страница 25: ...the volume level consistent whenever you change channels if selecting On The volume level may not be consistent due to different signal conditions of broadcasting stations if selecting Off Digital Aud...

Страница 26: ...e to the loudspeakers NICAM DUAL I II Sends the primary and secondary broadcast languages to the loudspeakers Channel Setting Auto Scan Use this to automatically find and store all available channels...

Страница 27: ...nder the channel menu refer to page 29 31 for details DTV Manual Scan DTV Mode Allows you to make manual fine tuning adjustments to the channel under DTV channel 1 Press the MENU button to display the...

Страница 28: ...utton or the OK button Digital Manual Scan Digital Scan Start Frequency Strength CH 8 191 50 MHz 0 MENU Return 0 9 Input EXIT Exit Move Adjust Channel Auto Scan Manual Scan Auto Channel Update Channel...

Страница 29: ...ess the OK button to commence the search of that channel 6 Press the MENU button to return to the previous menu press again to return to the main menu 7 Press the EXIT button to exit the menu Auto Cha...

Страница 30: ...or the button to enter the Channel Edit menu Channel Auto Scan Manual Scan Auto Channel Update Channel Edit Favourite Manager Signal Information On MENU Return EXIT Exit Move OK Select Channel Edit AT...

Страница 31: ...ists of just your favourites 1 Press the MENU button to display the main menu Press the buttons to select the Channel menu and then press the button or the OK button Channel Edit 1 2 S 07 3 S 09 S 10...

Страница 32: ...Manual Scan Auto Channel Update Channel Edit Favourite Manager Signal Information On MENU Return EXIT Exit Move OK Select Channel Auto Scan Manual Scan Auto Channel Update Channel Edit Favourite Manag...

Страница 33: ...r Lock Off MENU Return EXIT Exit Move 2 Press the buttons to select the Enter Password Use the 0 9 buttons to input a 4 digit password to enter the Lock System menu Lock System Enter Password Off No B...

Страница 34: ...s to lock 1 2 3 4 5 6 ABC News TWO NITV SBS GEM SPREE MENU Return EXIT Exit Move Page OK Select Lock System Enter Password Off No Block Enable Channel Block Parental Rating Lock Keypad New Password C...

Страница 35: ...ck System menu Lock System Enter Password Off No Block Enable Channel Block Parental Rating Lock Keypad New Password Clear Lock Off MENU Return 0 9 Input EXIT Exit Move The default password is 0000 If...

Страница 36: ...password If you forget the new password enter the master password 8899 Lock Keypad Lock Keypad is designed to prevent children from pressing the buttons on the TV The Lock System must be set to On fo...

Страница 37: ...Block Enable Channel Block Parental Rating Lock Keypad New Password Clear Lock Off MENU Return EXIT Exit Move 0 9 Input The default password is 0000 If you change the password be sure to remember the...

Страница 38: ...io Languages DTV Mode Allows you to select your desired audio language Available for digital channels if multiple audio languages are broadcast The Audio Language is used to describe the programmes wh...

Страница 39: ...dio Secondary Language MENU Return EXIT Exit English Move Adjust Subtitle DTV Mode Allows you to select your desired subtitle language or turn off the subtitle Only applicable when the TV programme ha...

Страница 40: ...t While watching a DTV programme you can press the S button on the remote control to display the Subtitle Language list and then press the buttons to select the Subtitle Language OFF Press the OK butt...

Страница 41: ...Decoding Page Language MENU Return EXIT Exit English West Move Adjust Setup OSD Language Audio Language Subtitle Teletext Blue Screen Mode Setting MENU Return EXIT Exit English On Home Mode Time Setti...

Страница 42: ...e Screen Mode Setting MENU Return EXIT Exit English On Home Mode Time Settings HDMI CEC Control Move 2 Press the buttons to select Time Settings and then press the OK button or the button to enter Tim...

Страница 43: ...a long period of time turn off the auto standby function To save energy you should always turn the auto standby function back to 3 hours 4 hours or 5 hours Time Zone DTV Mode When you select a Time Z...

Страница 44: ...to enter HDMI CEC Control menu Setup OSD Language Audio Language Subtitle Teletext Blue Screen Mode Setting MENU Return EXIT Exit English On Home Mode Time Settings HDMI CEC Control Move OK Select 3...

Страница 45: ...en the OK button or the button to select Device List Press the buttons to select Reset and then the OK button or the button to update the list 4 Press the MENU button to return to the previous menu pr...

Страница 46: ...g List Scheduled Record 6 Apr 2015 Fri 02 33 Standby Move Up Hot Key Group Frequency Channel Date Start Time Duration Move Down Select OK Return Delete One Delete All MENU Exit EXIT Function 1 Off 2 O...

Страница 47: ...tores all settings to the factory defaults 1 Press the MENU button to display the main menu Press the buttons to select the Setup and then press the button or the OK button Setup OSD Language Audio La...

Страница 48: ...ayed with your preset reminders shown Press the BLUE button to return to the EPG The TV will automatically tune to the selected programme when it starts INDEX Enter to the PVR Settings Recording Timer...

Страница 49: ...ay the main information page You may see slightly different looking pages depending if your TV is accessing the page over air or via the internet 2 Follow the instructions on the interactive services...

Страница 50: ...ew of TV USB HDMI R L AV INPUT VIDEO USB Cable not included USB Adapter Portable hard Disk USB Hub If a hard disk is used make sure its mains adapter is connected to the mains supply If a USB hub is u...

Страница 51: ...ow In player window press the buttons to select the playback function Press the BLUE button to enter the Quick Menu And then press the buttons to select the functions Repeat Background Music 6 Press t...

Страница 52: ...your storage device and then press the OK button Viewing Movies 1 Press the INPUT button on the TV or on the remote control then press the buttons to select the USB mode and then press the OK button...

Страница 53: ...buttons to go to previous or next page Use 0 9 buttons to goto the specified page Press the BLUE button to enter the Quick Menu And then press the buttons to select the functions Repeat Background Mu...

Страница 54: ...current live broadcast press the button The PVR Time Shift Progress Bar 1 Indicates the status of the currently displayed video 2 Indicates the time lagging behind the live broadcast PVR reviewing 3...

Страница 55: ...ss the button to stop recording Recording will stop automatically when the disk is full Delete files from File Manager under Setup menu refer to page 45 for details on PVR Settings If you want to turn...

Страница 56: ...HATCH 004 4V3_MONOSCOPE 005 100 WHITE 006 BBE HD PrevDate Move Record 19 30 Francesco s Mediterranean Voyage 20 00 Return of the Lost Boys of Sudan 21 00 Raymond Blanc s Kitchen Secrets 21 30 MasterCh...

Страница 57: ...se the buttons select the Year Month Day And then press the OK button to confirm Canlendar Year Hot Key Move Up Move Down Adjust Adjust Select OK Return MENU Exit EXIT Month Day Sun 2015 1 Mon Tue Wed...

Страница 58: ...Blue Screen Mode Setting MENU Return EXIT Exit English On Home Mode Time Settings HDMI CEC Control Move Setup PVR Settings OAD Restore Factory Default MENU Return EXIT Exit Move OK Select PVR Settings...

Страница 59: ...EXIT button to return to the previous menu From a USB Storage Device 1 Press the INPUT button on the TV or on the remote control and then press the buttons to select the USB mode and then press the O...

Страница 60: ...c Compatible Disc Types Disc Types Disc Logo Recorded Content DVD VIDEO Digital Versatile Disc AUDIO VIDEO DVD RW Audio Video format or JPEG files DVD ReWritable AUDIO VIDEO JPEG DVD R DVD Recordable...

Страница 61: ...revious Next for DVD CD Multimedia discs Press the button to play the last Title Chapter Track Press the button to play the next Title Chapter Track For DVD discs the above functions may vary due to d...

Страница 62: ...repeatedly to select the different angle you want Only for the discs has this character Zoom for DVD Allows you to select the video size of programme stream Press the ZOOM button to select the size yo...

Страница 63: ...lows entering the order in which the chapters or tracks will be played up to a maximum of 20 Press the PROG button to display the Program Menu According to the highlight input your chapter title numbe...

Страница 64: ...shown in the full screen General Setup Page TV Display Eng Screen Saver On Last Memory Off English 16 9 OSD Language OSD Language Set the OSD language to your language of choice General Setup Page TV...

Страница 65: ...the DVD mode press the DVD SETUP button on the remote control Press the buttons to select the Preference Setup menu and then press the buttons to select the menu options Press the DVD SETUP button to...

Страница 66: ...et will not be played The parental lock can only be changed after inputting the correct password Preference Page TV Type PAL Audio Eng Subtitle Off DiscMenu Eng Parental Password Default Change Passwo...

Страница 67: ...five minutes No or poor colour or poor picture Adjust the settings in the PICTURE menu Try another channel The problem may be caused by the broadcaster Check if the video cables are connected properl...

Страница 68: ...annels You may have you run out of space on your USB storage device Delete some files or use another USB storage device FAQs Frequently Asked Questions Why have I lost some all of my channels It happe...

Страница 69: ...d soft cloth and finish with a dry cloth Do not use any type of solvent such as thinner benzine commercially available cleaners or antistatic spray They may damage the disc Storing Discs Do not store...

Страница 70: ...P 720 x 576 720P 1280 x 720 50 60 1080I 1920 x 1080 50 60 1080P 1920 x 1080 50 60 PC Mode Please check the display settings of your computer before connecting to the TV If the display setting of your...

Страница 71: ...ices up to 2TB USB Media Types JPEG MP3 MPG Power supply for remote control DC 3V 2 x AAA size batteries Power consumption 28 W Dimensions LxWxH TV with stand 554 x 146 x 375 mm TV without stand 554 x...

Страница 72: ...s cannot be held responsible for the accuracy of the information contained herein or any consequences arising from it M E W Australia Pty Ltd 15 Vaughan Street Essendon Fields VIC 3041 ACN 152 719 036...

Отзывы: