Partie générale / General Section
CUC 2033 F / 2035 F
GRUNDIG Service
1 - 22
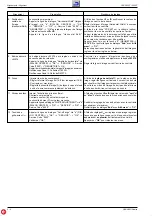
8. Raccordements Audio / Vidéo
Possibilités de repiquage:
AV 1
–>
AV 2 (Euro-AV1 –> Euro-AV2 avec 2 prises Euro-AV)
AV 2
–>
AV 1 (Euro-AV2 –> Euro-AV1 avec 2 prises Euro-AV)
AV 3
–>
AV 1, AV2 (Caméra –> Euro-AV1, 2 avec 2 prises Euro-AV)
AV 2
–>
AV 1 (Caméra –> Euro-AV avec 1 prise Euro-AV)
La fonction de repiquage est activée automatiquement par la sélection
de la touche "0/AV" de la source.
Protection d'un repiquage:
Après sélection de la source par la touche "0 /AV" –> touche "AUX"
–> touche "0/AV", indication "Copie oui" le repiquage est protégé. On
peut alors commuter sur un autre programme. En répétant la séquence
des touches on désactive la protection de repiquage sur "Copie non".
Remarques:
- Si lors d'une sélection AV tous les chemins vidéo sont occupés, par
ex. lorsque "Copie" est activé, ceci est identifié et une commutation
se fait sur la position AV suivante techniquement possible.
- Lors de la sélection du pays, l'Italie par ex., le signal RVB-AV avec
signal d'effacement (Pin 16) est prioritaire.
- Aucun fond d'écran bleu n'apparaît dans aucune position AV.
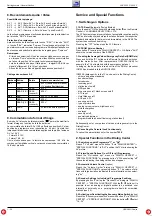
Câblage des embases AV
Embase Entrée
Sortie
Signal de commutation
AV1
RVB
-
6/12V (tension commutation)
+1V analyse (Fastblanking)
FBAS
FBAS
6/12V
SBAS (Y/C) FBAS
6/12V
(converti)
AV2
RVB
-
6/12V + 1V analyse
FBAS
FBAS
6/12V
SBAS (Y/C) FBAS
6/12V
(converti)
AV3
FBAS
-
5V fourni depuis la synchro.
Caméra
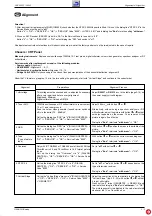
9. Commutation du format d'image
En mode AV, la touche de télécommande "
" permet de modifier le
format d'image en fonction de la taille de l'écran.
La commutation du format 4:3 et 16:9 s'effectue en position AV et par
position de programme avec indexation du bit péri. Ce statut est
indiqué par la tension de commutation appliquée à la pin 8 de l'embase
AV 1 et AV 2 .
- Format 4:3 12V
- Format 16:9 6V
Ceci est nécessaire pour la lecture de camescope 16:9, afin de
compenser l'amplitude verticale, car aucune tension de commutation
16:9 n'est produite.
Service and Special Functions
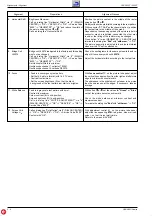
1. Switching-on Options
1.1 ATS Reset (Automatic Tuning System)
Press the power "ON" button while pressing button
Ƿ
on the Remote
Control –> LANGUAGE SELECTION –> OK.
The ATS system stops at every station of acceptable reception quality
(AFC and coincidence) and stores the station data and the respective
standard automatically (data is stored immediately in the NVM). The
system then continues searching.
Pressing the "TXT" button stops the ATS function.
1.2 EPROM Version Number
Press button "
Ǻ
" to call up the "DIALOG CENTER" –> OK. Button "AUX"
shows the version number of the EPROM.
1.3 Loading the Average Values / Emergency Data Set (ROM Data)
Press and hold the "P-" button on the Remote Control and switch on
with the mains button. After replacement of IC82005 (NVM) for
example, the TV set is started with the emergency data set.
In doing so, the basic data is read out from the ROM of processor
IC81050 and loaded into the NVM IC82005:
IC82005: (data specific to the TV can be set via the Dialog Center):
- chroma and audio standards
- decoder settings
- forced mono
- reversing point
- station ident on/off
- OSD position
- blue screen on/off, black screen on/off
- ATS reset
- Hotel Mode on/off
- AGC and AFC
- economy switch
- type of picture tube
- analog values (volume, brightness etc.)
- picture sharpness
- overscan
- security on/off
- geometry adjustment
- programme data (channel finetuning, station ident)
Subsequently enter your personal values, picture geometry via the
Dialog Center.
1.4 Cancelling the Parental Lock Continuously
To cancel the parental lock enter the number 7038.
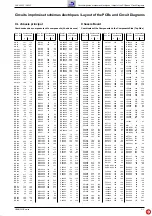
2. Special Functions in the Dialog Center
2.1 Switching on with Programme "1" or "AV"
Reach "TV on with" menu with button "
Ǻ
" via "DIALOGCENTER" –>
"SPECIAL FUNCTIONS". In "AV1" position the TV starts showing the
AV picture.
2.2 Picture/Sound Options On or Off for all Programmes
Reach the "Pict./sound opt." menu via "DIALOG CENTER" –>
"SPECIAL FUNCTIONS" by pressing button "
Ǻ
". When selecting "off"
the scales indicating the analog values do not appear.
2.3 Automatic Volume Control (option)
Reach the "Volume Limiter" dialog via "DIALOG CENTER" –>
"SPECIAL FUNCTIONS" by pressing button "
Ǻ
". The volume of sta-
tions with large deviation is adjusted to normal deviation when select-
ing "on".
2.4 Decoder Settings for Individual Programme Positions
By pressing button "
Ǻ
" call up the "Decoder Pxx" dialog via "DIALOG
CENTER" –> "SPECIAL FUNCTIONS". With the
Ƿ Ǹ
buttons it is
possible to set an analog or digital decoder to be switched over
internally or externally on a per-programme basis for scrambled
stations (see 5.2)
2.5 Activating or Deactivating the Economy Mains Switch (option)
Reach the "Economy mains switch" menu with button "
Ǻ
" via "DIALOG
CENTER" –> "SPECIAL FUNCTIONS". With the buttons
Ƿ Ǹ
select
"1h…3h".

