-22-
Model T32002 (Mfd. Since 02/20)
ALWAYS visually inspect and perform a
“ring test” on a wheel before installing. DO
NOT use damaged wheels!
Installing/Removing
Grinding Wheel
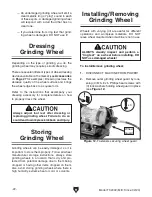
To install/remove grinding wheel:
1. DISCONNECT MACHINE FROM POWER!
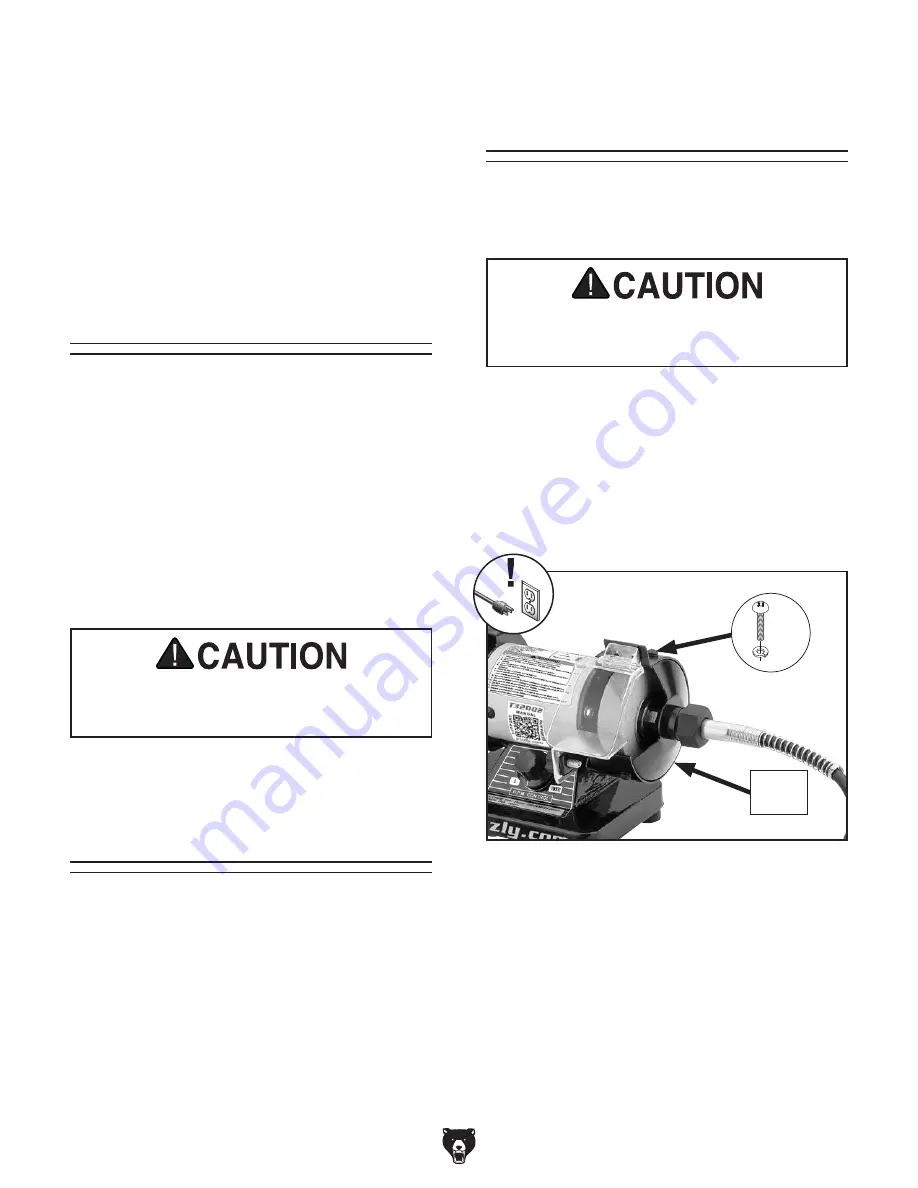
2. Remove outer grinding wheel guard by loos-
ening (3) M5-.8 x 5 Phillips head screws with
(3) lock washers holding wheel guard in place
(see
Figure 12).
Figure 12. Fasteners securing wheel guard.
Wheel
Guard
x 3
— An undamaged grinding wheel will emit a
clear metallic ring or “ping” sound in each
of these spots. A damaged grinding wheel
will respond with a dull thud that has no
clear tone.
— If you determine from ring test that grind-
ing wheel is damaged, DO NOT use it!
Dressing
Grinding Wheel
Depending on the type of grinding you do, the
grinding wheel may require periodic dressing.
There are several different types of wheel dressing
devices available on the market (see
Accessories
on
Page 27 for examples). Dressing restores the
abrasive quality of the wheel surface and brings
the wheel edge back to a square form.
Refer to the instructions that accompany your
dressing accessory for complete details on how
to properly dress the wheel.
Always adjust tool rest after dressing or
replacing grinding wheel. Failure to do so
could lead to workpiece kickback and injury.
Wheels with varying grit are useful for different
operations and workpiece materials. DO NOT
leave wheel mounted when machine is not in use.
Grinding wheels can be easily damaged, so it is
important to store them properly. Follow all wheel
manufacturer storage instructions. Always store
grinding wheels in a location that is dry and pro-
tected from potential damage due to them being
dropped or having other items dropped on them.
Also, avoid storing grinding wheels where there is
high humidity, extreme heat or cold, or solvents.
Storing
Grinding Wheel
Содержание T32002
Страница 36: ......

