


-28-
Model G0853 (Mfd. Since 07/18)
Assembly
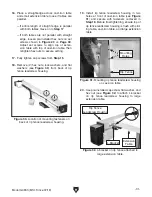
2. Raise sliding table over machine frame (see
Figure 20A), position mounting plates over
mounting holes (see
Figure 20B), and lower
sliding table onto frame.
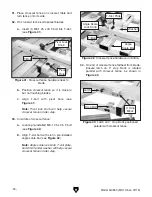
Figure 19. Location of mounting plates for
securing sliding table to machine frame.
Figure 20. Sliding table mounting plates
positioned over mounting holes in machine frame.
A
Sliding
Table
Mounting Plate
(1 of 3)
B
Mounting Holes
(1 of 3)
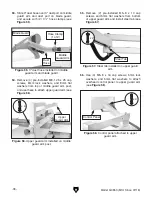
3. Press sliding table against parallelism adjust-
ment bolts at each end of machine frame
(see
Figure 21).
Note: These bolts are set at the factory and
do not need to be adjusted.
Figure 21. Sliding table parallelism adjustment
bolt (1 of 2).
Adjustment Bolt
(1 of 2)
Sliding Table
This machine must be fully assembled before it
can be operated. Before beginning the assembly
process, refer to
Needed for Setup and gather
all listed items.
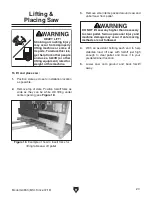
The sliding table weighs nearly 400 pounds. It
must be lifted and carefully positioned onto the
machine frame during assembly. If you are using
a forklift to lift and place it, you'll need to use lifting
slings around the table to prevent scratching the
aluminum surface.
If you are not able to use the described forklift
method, the sliding table can be lifted into place
by four strong people—with one lifting from each
corner.
The only other part of the assembly that requires
additional help is installation of the extension
tables and blade guard arm. It takes approxi-
mately two hours to assemble the saw and make
the required adjustments to prepare the saw for
the test run.
To assemble sliding table saw:
1. Turn sliding table upside down and identify
(3) mounting plates, as shown in
Figure 19.


