GreenWorks 2600400 Скачать руководство пользователя страница 1


Read all safety rules and instructions carefully before operating this tool.

www.greenworkstools.com
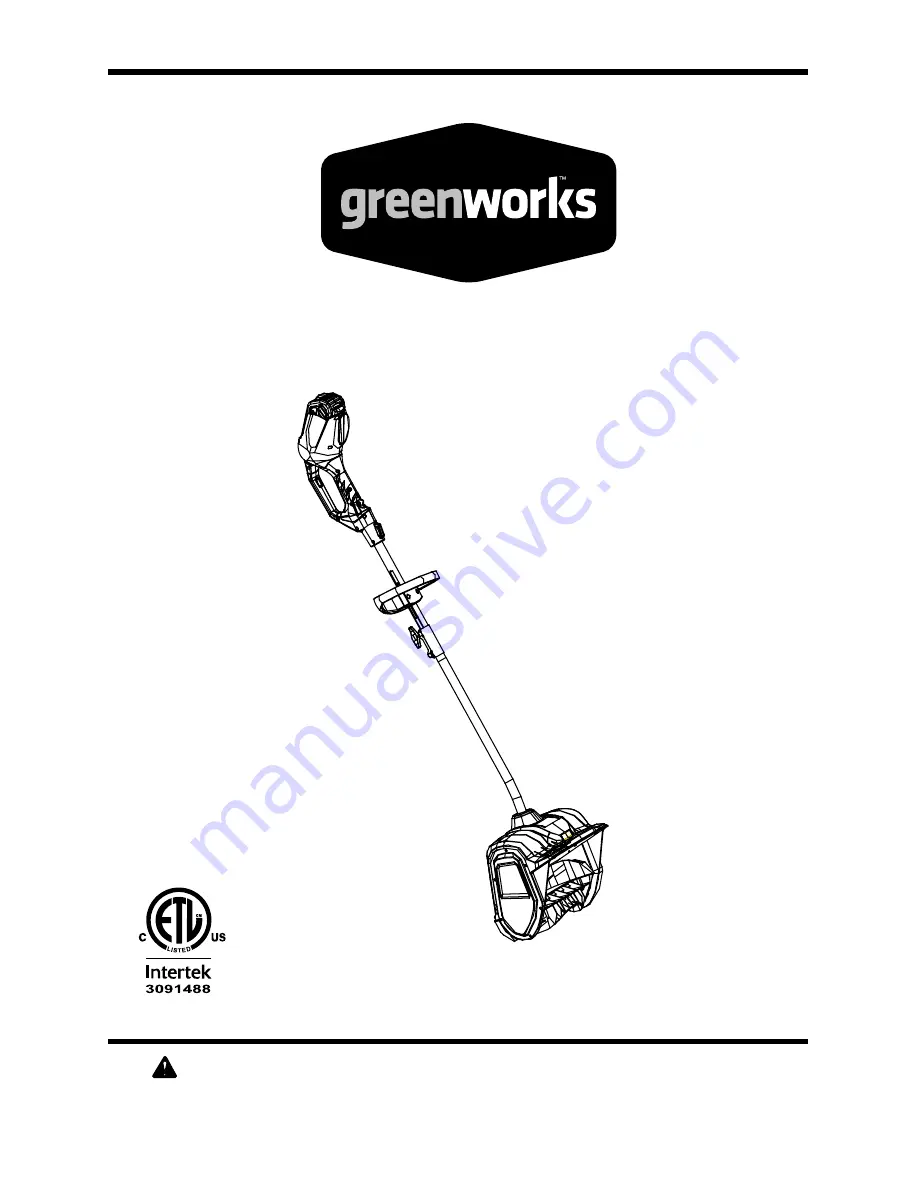
Owner’s Manual

TOLL-FREE HELPLINE: 1-888-909-6757

12" 40V Cordless Snow Shovel

2600400

To order: Battery (Sold Separately)

                (4Ah Model # 29662)

                Charger (Sold Separately)

                (Model # 29692)

Содержание 2600400

Страница 1: ...ons carefully before operating this tool www greenworkstools com Owner s Manual TOLL FREE HELPLINE 1 888 909 6757 12 40V Cordless Snow Shovel 2600400 To order Battery Sold Separately 4Ah Model 29662 C...

Страница 2: ...er size 11 in 27 8 cm Discharge distance Up to 20 ft 6 m Weight with battery 18 3 lbs 8 3 kg CONTENTS Cold Weather Operation Lithium Ion batteries can be safely used from temperatures ranging from 17...

Страница 3: ...sting the angle of the snow discharge Keep children and pets away from the work area Do not force or overload the snow shovel The snow shovel will perform better and safer when it is used at the rate...

Страница 4: ...user or damage the snow shovel and will void the warranty Do not pick up the snow shovel while it is running The snow shovel is designed to travel along the ground Dress Properly Do not wear loose cl...

Страница 5: ...wn to the state of California to cause cancer birth defects or other reproductive harm Some examples of these chemicals are Lead from lead based paints Crystalline silica from bricks and cement and ot...

Страница 6: ...ead and understand operator s manual before using this product Wear ear protection at all times while operating the machine Always wear eye protection with side shields marked to comply with ANSI Z87...

Страница 7: ...ggles or safety glasses with side shields and when needed a full face shield We recommend Wide Vision Safety Mask for use over eyeglasses or standard safety glasses with side shields Always use eye pr...

Страница 8: ...shovel Compare the illustration in Figure 1 to your snow shovel in order to familiarize yourself with the location of various controls and adjustments Save this manual for future reference Lock knob A...

Страница 9: ...ow shovel Owner s Manual W A R N I N G If any parts are damaged or missing do not operate this product until the parts are replaced Failure to heed this warning could result in serious personal injury...

Страница 10: ...ONNECTING THE SHAFTS See Figure 2 3 Align the pin on the handle shaft and the hole on the lower shaft Fig 2 Turn the lock knob clockwise until it is fully tightened Fig 3 Fig 3 Fig 2 Pin Hole Lock kno...

Страница 11: ...he battery is fully inserted into the snow shovel when you hear an audible click TO REMOVE BATTERY PACK See Figure 4 Release the trigger switch The lock out button will pop out and the snow shovel wil...

Страница 12: ...til the auxiliary handle is no longer secured Move the auxiliary handle to the height you prefer make sure the raised points on the auxiliary handle are aligned with the groove on one side of the hand...

Страница 13: ...hold the lock out button Fig 6 While holding the lock out button press and hold the trigger switch NOTE The Snow Shovel will not start if the lock out button is not held until the trigger switch is l...

Страница 14: ...s 8 Start the snow shovel by following the Starting Instructions The depth and weight of the snow will determine the forward speed Push the snow shovel forward so that it rides on the scraper OPERATIN...

Страница 15: ...ks do not recharge it and do not use Dispose of it and replace with a new battery pack DO NOT ATTEMPT TO REPAIR IT To avoid injury and risk of fire explosion or electric shock and to avoid damage to t...

Страница 16: ...f and REMOVE BATTERY before performing any maintenance Use only the manufacturer s original replacement parts Place the snow shovel on the ground or on a work bench Position the snow shovel so that th...

Страница 17: ...vel out of the reach of children CLEANING In order to avoid serious personal injury turn the snow shovel off and remove battery before cleaning or servicing Use a small brush to clean the outside of t...

Страница 18: ...RTING THE SNOW Shovel See Figure 11 Allow the motor to cool down before transporting Secure the snow shovel while transporting When moving the snow shovel grasp it by the top handle and auxiliary hand...

Страница 19: ...e left side cover by removing 6 screws Remove the nut that secures the left side plate 4 6 5 Discard the old damaged impellor Be sure not to lose the shaft sleeve that secures left side of the shaft I...

Страница 20: ...over Place the belt tensioner idler arm back into its place 13 14 15 Replace and tighten the remaining nut to secure the left side plate assembly Replace and tighten the remaining screws to secure the...

Страница 21: ...d Remove battery from snow shovel Place battery on charger and allow to charge for 10 minutes Remove from charger and install in Snow shovel for use The battery is not fully inserted into the housing...

Страница 22: ...ies must be charged in accordance with the operator s manuals directions and regulations in order to be valid ITEMS NOT COVERED BY WARRANTY 1 Any part that has become inoperative due to misuse commerc...

Страница 23: ...23 EXPLODED VIEW 5 4 7 3 2 11 1 10 9 13 6 8 12...

Страница 24: ...Motor assy 1 3 311121468 Belt tensioner assy 1 4 329011468 Belt 1 5 311131468 Impeller shaft assy 1 6 3220401 Screw 4 7 3390198 Spring 1 8 32205877 Screw 4 9 341041468 Scraper 1 10 341031468 Impeller...

Страница 25: ...TOLL FREE HELPLINE 1 888 909 6757 1 888 90WORKS Rev 01 27 07 16 Printed in China...

Отзывы: