background image

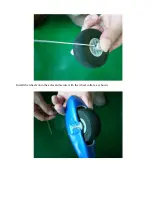
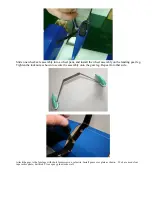
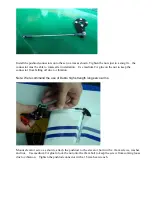
Slide one wheel/axle assembly into a wheel pant, and install the wheel assembly on the landing gear leg.   
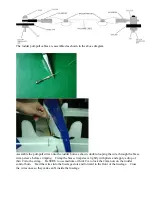
Tighten the locknut as shown to secure the assembly onto the gear leg. Repeat for other side. 

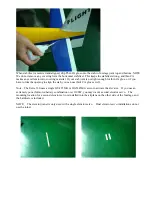
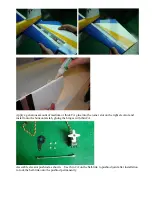
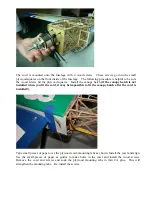
Attach the gear to the fuselage with short 3mm screws, use loctite. Install gear cover plate as shown.    We have used clear 
tape in this photo, but thick CA or epoxy glue works well.   

Содержание Extra-300 50 EP

Страница 1: ...ual First time builders should seek advice from people having building experience in order to assemble the model correctly and to produce its Performance to full extent Assemble this kit only in place...

Страница 2: ...Install the wheels onto the axles and secure with the wheel collars as shown...

Страница 3: ...landing gear leg Tighten the locknut as shown to secure the assembly onto the gear leg Repeat for other side Attach the gear to the fuselage with short 3mm screws use loctite Install gear cover plate...

Страница 4: ...of the rudder This is where we will install the tiller guide for the tailwheel Make a hole in this location using a 1 16 drill bit or the end of one of the wire pushrods in your kit and glue the tail...

Страница 5: ...sembly apply loctite and re tighten Remove a square or two of covering on the bottom of the fuselage behind the wing as shown for cooling Remove covering as shown from horizontal stabilizer opening an...

Страница 6: ...Remove the covering over the wing spar tube hole the wing bolt hole and the other holes in the front of the fuselage as shown Insert the horizontal stabilizer into its slot Do not glue yet...

Страница 7: ...to trim the opening to align the stab you can use thick CA glue as well Note The Extra 330 uses a single HS 225MG or HS 5245MG servo to activate the elevator If you use an extremely powerful motor ba...

Страница 8: ...t as shown opening up the elevator joiner slot in both of the elevators Locate one control horn and modify it as shown to fit in the left elevator We used a small file a Dremel tool also works well Us...

Страница 9: ...the joiner slot on the right elevator and install onto the horizontal stab gluing the hinges with thin CA Assemble elevator pushrod as shown Use thin CA on the ball link to pushrod joint after install...

Страница 10: ...o keep the connector from falling off due to vibration Note We recommend the use of Dubro high strength long servo arms Mount elevator servo as shown attach the pushrod to the elevator horn with a 2mm...

Страница 11: ...hrough the brass crimp sleeve before crimping Crimp the brass crimp sleeve tightly with pliers and apply a drop of thin CA to the crimp Be SURE to use medium or thick CA to lock the 2mm nuts on the ru...

Страница 12: ...nug is all you need Use the X mount for your motor to mark the firewall for drilling Drill the 4 mounting holes The firewall of the Extra 330 is arranged to allow the widest possible selection of moto...

Страница 13: ...canopy hatch is not installed when you fit the cowl it may be impossible to fit the canopy hatch after the cowl is installed Tape small pieces of paper over the plywood cowl mounting tabs as shown In...

Страница 14: ...s locate the servo cutout and aileron control horn slot Remove the covering over both Glue the horn into the slot with a generous amount of medium or thick CA Use the string in the wing to pull the se...

Страница 15: ...ery is firmly strapped down before flight Balancing Balance your Extra 330 108mm behind the leading edge of the wing where the wing meets the fuselage During your maiden flight this is approximately o...

Страница 16: ...Throws Elevator Low rate 15 degrees 1 25 deflection 30 expo High rate 55 degrees 4 deflection 80 expo Rudder max throw just short of touching elevator 80 expo Ailerons Low rate 17 degrees 1 75 deflec...

Отзывы: