background image

I N S T R U C T I O N   M A N U A L

Champaign, Illinois

(217) 398-8970, Ext 5

[email protected]

Entire Contents © 2010 Hobbico,

®

 Inc. All rights reserved.

GPMA1201 Mnl

READ THROUGH THIS MANUAL BEFORE STARTING CONSTRUCTION. IT CONTAINS IMPORTANT

INSTRUCTIONS AND WARNINGS CONCERNING THE ASSEMBLY AND USE OF THIS MODEL.

WARRANTY

SPECIFICATIONS

Great Planes

®

 Model Manufacturing Co.

 guarantees this kit to 

be free from defects in both material and workmanship at the 
date of purchase. This warranty does not cover any component 
parts damaged by use or modification. 

In no case shall Great 

Planes’ liability exceed the original cost of the purchased kit.


Further, Great Planes reserves the right to change or modify this 
warranty without notice.

In that Great Planes has no control over the final assembly or 
material used for final assembly, no liability shall be assumed nor 
accepted for any damage resulting from the use by the user of 
the final user-assembled product. By the act of using the 
user-assembled product, the user accepts all resulting liability.

If the buyer is not prepared to accept the liability associated 
with the use of this product, the buyer is advised to return 

this kit immediately in new and unused condition to the 
place of purchase.

To make a warranty claim send the defective part or item to 
Hobby Services at the address below:

Hobby Services

3002 N. Apollo Dr.  Suite 1

Champaign IL  61822  USA

Include a letter stating your name, return shipping address, as 
much contact information as possible (daytime telephone 
number, fax number, e-mail address), a detailed description of 
the problem and a photocopy of the purchase receipt. Upon 
receipt of the package the problem will be evaluated as quickly 
as possible.

Wingspan:

68 in  [1725 mm]

Wing Area:

813 in

2  

[52.4 dm

2

]

Wing Loading:

23−26 oz /ft

[70−79 g /dm

2

]

Length:

58.5 in [1485mm]

Weight:

8.25 − 9 oz  [3740−4080 g]

Radio:

4-channel radio system with 5 servos

Engine:

.61− .95 in

3

 [10 –15.5cc] two-stroke, .91 – 1.20 in

3

 [15 – 20 cc] four-stroke

Electric Motor:

RimFire™ .80, 60A ESC

Battery:

Two 3S 5000mAh 11.1V LiPo

Содержание ESCAPADE .61

Страница 1: ...user of the final user assembled product By the act of using the user assembled product the user accepts all resulting liability If the buyer is not prepared to accept the liability associated with th...

Страница 2: ...ood condition a correctly sized engine and other components as specified in this instruction manual All components must be correctly installed so that the model operates correctly on the ground and in...

Страница 3: ...LiPo batteries FlightPower EONX 30 5000 mAh 3s 11 1V 30C LiPo FPWP6698 ElectriFly Series 2 Deans Male Ultra Plug 1 Deans Female Ultra Plug Adapter If experimenting with different batteries make certa...

Страница 4: ...is specified it is highly recommended that you use only 30 minute or 45 minute epoxy because you will need the working time and or the additional strength Photos and sketches are placed before the ste...

Страница 5: ...elephone at 217 398 8970 Order No Description REPLACEMENT PARTS LIST GPMA4135 GPMA4136 GPMA4137 GPMA4138 GPMA4139 GPMA4140 GPMA4141 GPMA4142 GPMA4143 GPMA4144 GPMA4145 Fuselage Escapade 61 ARF Wing Es...

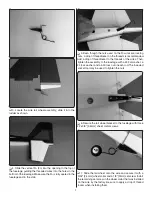
Страница 6: ...e string in the wing to pull the servo extension out the end and place the aileron servo in the wing 3 Temporarily mount the servo with the screws that came with it Drill 1 16 1 6mm holes for the serv...

Страница 7: ...over the clevis 7 Making sure the servo and the aileron are centered use a fine point felt tip pen to mark the pushrod wire where it crosses the outer hole in the servo arm 8 Make a 90 bend in the wi...

Страница 8: ...gs together and installing the screws Later during final radio and control throws set up the pushrods will be adjusted so the ailerons are centered when the radio is on or you could reconnect your ail...

Страница 9: ...commended Add a drop of threadlocker to the threads of the wires Then tighten the assembly to the fuselage with a 4 flat washer a 4 lock washer and a 4 40 lock nut on each rod The included socket tool...

Страница 10: ...same way you mounted the aileron servo s mount the rudder servo with the servo screws that came with them Don t forget to harden the screw holes with a few drops of thin CA after installing then remo...

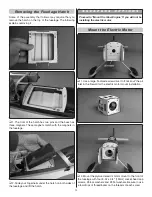
Страница 11: ...hrod wires together Mount the Main Landing Gear 1 Mount the landing gear to the fuselage with four 6 32 x 1 2 13mm Philips screws 6 flat washers and 6 lock washers 2 Mount an axle to each landing gear...

Страница 12: ...er the hatch on both sides of the fuselage and lift the hatch Proceed to Mount the Glow Engine if you will not be installing the electric motor Mount the Electric Motor 1 Use a large flat blade screwd...

Страница 13: ...screws and 2 flat washers Feed the connectors through the hole in the bottom of the motor mount and the firewall so that the connectors are inside the fuselage 5 Use a side cutter or moto tool to cut...

Страница 14: ...e without the cowl 1 Temporarily mount the two piece engine mount to the fuselage with four 8 32 x 1 1 4 32mm Phillips screws four 8 lock washers and 8 flat washers but don t tighten the screws all th...

Страница 15: ...e fuselage with four 8 32 x 1 1 4 32mm Phillips screws four 8 lock washers and 8 flat washers but don t tighten the screws all the way yet 3 Place your engine on the mount sliding the mount halves tog...

Страница 16: ...A into the holes to harden the threads MOUNT the FUEL TANK or BATTERY IMPORTANT If powering your Escapade with an electric motor before experimenting with different motor battery combinations and conn...

Страница 17: ...ray and tighten the Velcro straps around the battery Skip the following step if mounting a battery Mount the Fuel Tank 1 Inside the fuselage remove the two screws that hold the balsa block in place an...

Страница 18: ...on t worry about connecting the fuel lines at this time We will be installing them later in the assembly process HOOK UP THE THROTTLE 1 Install a servo arm onto the throttle servo Place the throttle s...

Страница 19: ...the carburetor arm 3 Connect the throttle pushrod to the throttle servo using a nylon Faslink in the same way as you did with the ailerons Proceed to Final Assembly on page 20 Four Stroke Hookup 1 Ins...

Страница 20: ...hown 2 If using a 2 4GHz receiver tape the antenna to the formers as shown If using a 72MHz receiver guide the antenna down through the fuselage 3 Of the four switch mounting locations pre cut into th...

Страница 21: ...o align with the screw holes in the back plate Depending on your choice of engine and propeller the holes will most likely not align correctly If this is the case cut the alignment pins from the spinn...

Страница 22: ...es with different voltages in series to achieve the new desired voltage This is a SERIES battery adapter GPMM3143 that connects two batteries in series 11 1V 3 Cell GPMP0613 OKAY 7 2V 2 Cell GPMP0613...

Страница 23: ...ifficult to control so remember more is not always better 1 Use a box or something similar to prop up the bottom of the fuselage so the horizontal stabilizer and wing will be level Measure the high ra...

Страница 24: ...the smoothness and stability but the model will then be less aerobatic which may be fine for less experienced pilots Moving the C G aft makes the model more maneuverable and aerobatic for experienced...

Страница 25: ...s Fingertip Prop Balancer GPMQ5000 in our flight box Ground Check and Range Check Run the engine for a few minutes making sure it idles reliably transitions smoothly and maintains full power indefinit...

Страница 26: ...ept in accordance with the frequency sharing agreement listed in the complete AMA Safety Code 9 Under no circumstances may a pilot or other person touch a powered model in flight nor should any part o...

Страница 27: ...ver powered model at excessive speeds Takeoff Before you get ready to takeoff see how the model handles on the ground by doing a few practice runs at low speeds on the runway Hold up elevator to keep...

Страница 28: ...d regaining tail wheel control One final note about flying your model Have a goal or flight plan in mind for every flight This can be learning a new maneuver s improving a maneuver s you already know...

Отзывы: