294 Programming examples - Timer confirmation with control or switch
SEL
0%
0%
0%
C1
C2
C3
–––
C4
Control switch
–85%
STO
–––
–––
–––
Cn1
SEL
Note:
Do not, however, set a switching point at a transmitter
control’s travel end-point, since this makes reliable
switching impossible.
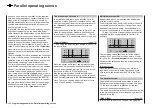
In order to assign the control switch you just created
to the desired timer, switch to the menu …
»Timers (general)«
… and select the line “Top” with the selection keys.
This is the standard line assigned to the stopwatch.
In this line, move the marker frame over the “Timer”
column to the right, to the column above the switch
symbol, using the appropriate selection key of the left
or right four-way button. Now tap twice on the center
SET
key of the right four-way button: The first tap will
activate the “Switch assignment”, the second tap will
call up the list of “expanded switches”:
Model time
Alarm
–––
0:34h
SEL
C o n t r o l / L o g i c / f i x s w
C2
C3
C4
FX
FXi L1
L2
L3
L4
C1
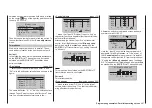
Now select the previously programmed control switch,
C1 in the example, and assign it to the timer with a
brief tap on the center
SET
key of the right four-way
button:
Model time
Batt. time
Top :
Centr:Flight
Alarm
–––
0:34h
1:23h
0s
0s
Stop
C1
–––
SEL
The timer in the base screen now starts with move-
ment of the C1 stick toward full throttle and stops if
you pull the C1 stick back over the switching point.
Example 1 of the preceding pages
If you have decided to continue with the model pro-
gramming described on the previous pages in Exam-
ple 1 on page 288, first switch to the menu …
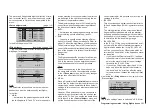
»Control switch«
… and select the line of a control switch which has
not been assigned yet with the selection keys. After
activation of the control assignment with a brief tap
on the center
SET
key of the right four-way button,
the following window will appear:
SEL
0%
C1
C2
C3
–––
C4
Control switch
STO
–––
–––
–––
SEL
Move desired
control adj.
Now simply move the respective proportional control,
e. g. the left side proportional rotary control from its
motor “OFF” position toward the motor “ON” direction.
Thereafter, change to the column above STO by us-
ing the appropriate selection key, move the selected
control near its motor “OFF” position then set the
switch-point at the selected position with a brief tap
on the center
SET
key of the right four-way button.
The switch status is shown to the right of the control
number:
Examples 4 and 5 of the preceding pages
If model programming is to be continued for Exam-
ple 4, page 291, or Example 5, page 293, as
described on previous pages or, completely inde-
pendent of this example programming, the C1 stick
(throttle/brake stick) is to be used for power regula-
tion, then a control switch can be used to automati-
cally start and stop the stopwatch. For this purpose,
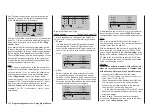
first switch to the menu …
»Control switch«
… and select the line of a control switch which has
not been assigned yet with the selection keys. After
activation of the control assignment with a brief tap
on the center
SET
key of the right four-way button,
the following window will appear:
SEL
0%
C1
C2
C3
–––
C4
Control switch
STO
–––
–––
–––
SEL
Move desired
control adj.
Now simply move the C1 stick (throttle/brake stick)
from the motor “OFF” position in the motor “ON” direc-
tion.
Thereafter, change to the column above STO by
using the appropriate selection key, move the C1
stick close to its motor “OFF” position then set the
switch-point at the selected position with a brief tap
on the center
SET
key of the right four-way button.
The switch’s state will be displayed at the right of the
control number, e. g.:
Timer confirmation with control or switch
Содержание HoTT MC-16 Series
Страница 1: ...Programming Manual mc 16 mc 20 HoTT 1 en mc 16 mc 20...
Страница 27: ...27 For your notes...
Страница 53: ...53 For your notes...
Страница 61: ...61 For your notes...
Страница 65: ...65 For your notes...
Страница 71: ...71 For your notes...
Страница 103: ...103 For your notes...
Страница 107: ...107 For your notes...
Страница 111: ...111 For your notes...
Страница 133: ...133 Program description Dual Rate Expo Winged models Set the Expo values as necessary in the same man ner...
Страница 137: ...137 Program description Dual Rate Expo Helicopter models Set the Expo values as necessary in the same man ner...
Страница 155: ...155 For your notes...
Страница 165: ...165 For your notes...
Страница 201: ...201 For your notes...
Страница 229: ...229 For your notes...
Страница 231: ...231 For your notes...
Страница 261: ...261 For your notes...
Страница 265: ...265 For your notes...
Страница 301: ...301 For your notes...
Страница 327: ...327 For your notes...
Страница 328: ...328 For your notes...


