42
XIP
-
3901 Installation and Operation
Installation of the Rear Connector Panel and Card
Installation of the Rear Connector Panel and Card
Grass Valley Densité series cards are each associated with a rear connector panel, which
must be installed in the Densité frame before the card can be inserted.
The XIP3901 card is designed to fit into Grass Valley’s Densité3+ frames. The following rear
connector panels are available:
•
XIP
3901
3+DRP:
Double rear connector panel for Densité 3+ (DIN connectors)
•
XIP39013+DRP-H:
Double rear connector panel for Densité 3+ (HD BNC connectors)
See
, on page 44 for details of the signal connections available
on a rear panel.
All cards and rear connector panels can be installed with the frame powered on. The card
has connectors that plug into a mid-frame motherboard to distribute power and connect to
the controller card, as well as a second connector that plugs directly into the rear connector
panel for input and output.
The rear connector panel must be installed with the card out of the frame.
• To remove an existing card from the slot, tilt up the swivel handle on the front of the
card to lever the connectors apart, then use the handle to pull the card straight out of
the slot.
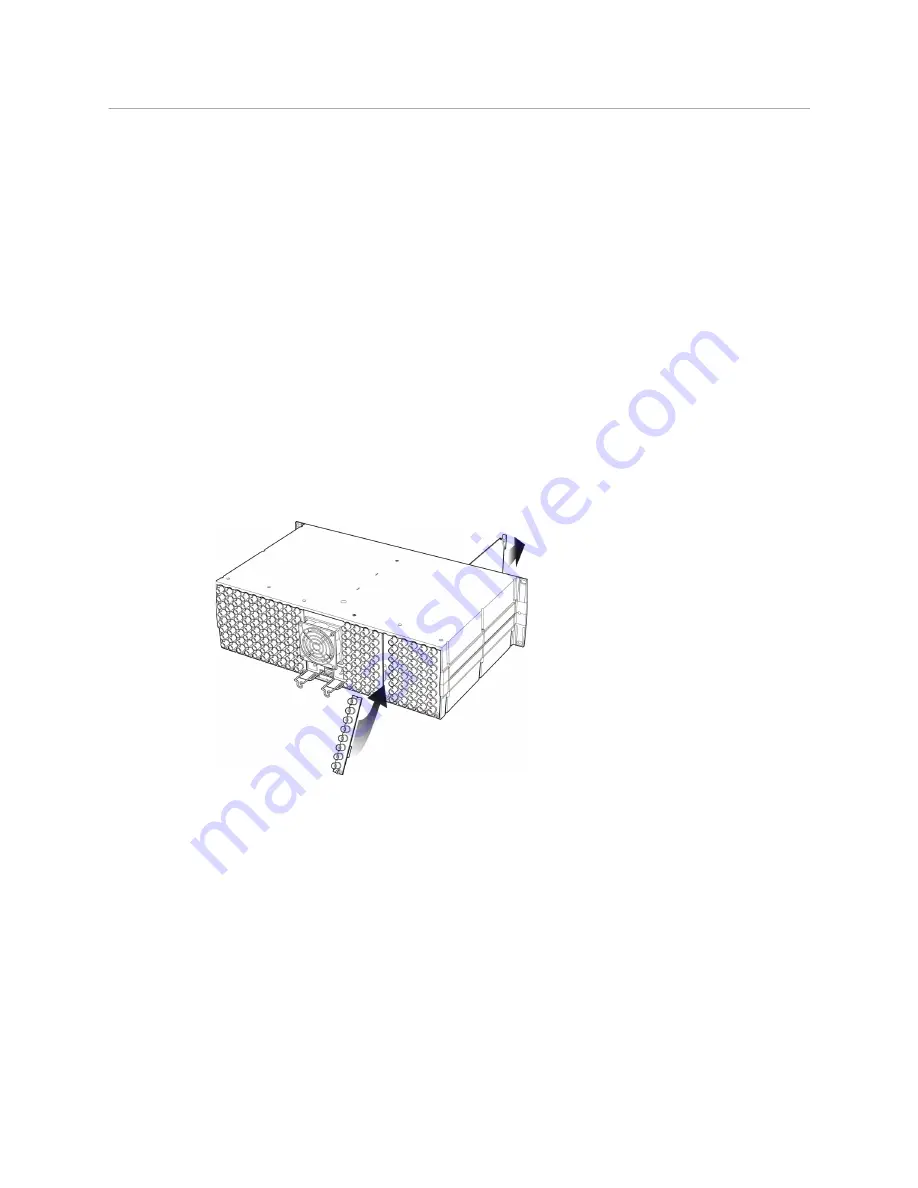
Densité-3 frame – rear panel installation
Step 1: To install the rear connector panel:
1 If a card is installed in the slot whose rear panel is being changed, remove it as
described above.
2 Remove the existing rear connector panel (either blank or belonging to an existing card
that is being changed) by releasing the captive screw(s) at the bottom (Densité3+ or
Densité3+FR4) or on the side (Densité3+FR1) of the panel.
3 Position the new rear connector panel and secure it in place with the captive screw(s) at
the bottom or on the side.
Step 2: To install the XIP
-
3901 Card:
Once a matching rear connector panel is in place, install the XIP3901 card as follows:
1 Open the front panel of the frame.
Содержание XIP-3901
Страница 1: ...XIP 3901 AGILE SDI IP PROCESSING PLATFORM User Manual 13 03065 010 AL M00 2021 08 04 ...
Страница 16: ...16 Table of Contents ...
Страница 18: ...18 Introduction to the XIP 3901 Agile SDI IP Processing Platform ...
Страница 60: ...60 Local Control Using the Densité Frame Control Panel Setting the Card s IP Addresses ...
Страница 65: ...65 XIP 3901 User Manual The iControl panel for the card then shown ...
Страница 113: ...113 XIP 3901 User Manual Figure 7 25 Options Panel Shown on XIP 3901 UC ...
Страница 114: ...114 Configuring the XIP 3901 UC DC FS Applications with iControl Options Panel ...
Страница 152: ...152 Configuring the XIP 3901 UDC IP v1 2 Application with iControl Metadata Panel Figure 8 21 Metadata panel ...
Страница 168: ...168 Configuring the XIP 3901 UDC IP v1 2 Application with iControl Options Panel ...
Страница 190: ...190 Configuring the XIP 3901 UDC IF v3 0 Application with iControl UDC1 UDC2 Tab Figure 9 14 HDR UDC1 UDC2 Tab ...
Страница 198: ...198 Configuring the XIP 3901 UDC IF v3 0 Application with iControl Metadata Panel Figure 9 16 Metadata panel ...
Страница 202: ...202 Configuring the XIP 3901 UDC IF v3 0 Application with iControl Inputs Tab Figure 9 18 Audio Inputs Tab ...
Страница 280: ...280 Configuring the XIP 3901 JPEG XS v1 0 Application with its Web Interface Technical Support Panel ...
Страница 290: ...290 Maintenance Troubleshooting Keep Fiber Connections Clean ...
Страница 298: ...298 Installing the SFP Ethernet Module Removing the SFP module ...
Страница 307: ...307 XIP 3901 User Manual ...


