background image

CUTTING PLOTTER 

SERVICE MANUAL 

FC9000-75/100/140/160

FC9000-UM-251-01-9370

Содержание FC9000-100

Страница 1: ...CUTTING PLOTTER SERVICE MANUAL FC9000 75 100 140 160 FC9000 UM 251 01 9370...

Страница 2: ......

Страница 3: ...FC9000 UM 251 9370 I HISTORY OF REVISIONS No Date issued Description of revision Page Edition 1 19 9 13 First Printing All 01...

Страница 4: ...FC9000 UM 251 9370 II...

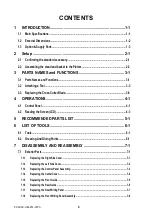
Страница 5: ...Blade 3 6 4 OPERATIONS 4 1 4 1 Control Panel 4 1 4 2 Reading the Screen LCD 4 3 5 RECOMMENDED PARTS LIST 5 1 6 LIST OF TOOLS 6 1 6 1 Tools 6 1 6 2 Greasing And Gluing Points 6 1 7 DISASSEMBLY AND REAS...

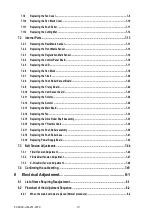
Страница 6: ...Replacing the Cam Sensor board 7 25 7 2 11 Replacing the Y motor 7 26 7 2 12 Replacing the X motor 7 29 7 2 13 Replacing the Main Board 7 31 7 2 14 Replacing the Fan 7 32 7 2 15 Replacing the Drive R...

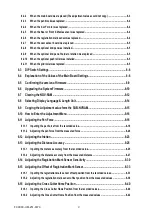
Страница 7: ...guage Length Unit 8 14 8 9 Copying the Adjustment value form the SUB NVRAM 8 15 8 10 How to Enter the Adjustment Menu 8 16 8 11 Adjusting the Pen Force 8 18 8 11 1 Inputting the pen force from the rec...

Страница 8: ...the Number of Push Rollers 8 62 8 21 Back up the adjustment value to the SUB NVRAM 8 64 9 TROUBLESHOOTING 9 1 9 1 The Plotter is Turned On But Doesn t Operate 9 1 9 2 Media Loading Operations 9 2 9 3...

Страница 9: ...ts 10 5 10 5 Y Drive Part 10 6 10 6 Y Slider Part 10 8 10 7 X Drive Part 10 9 10 8 Stand Basket 10 11 10 9 Details of Stocker Bracket 10 13 10 10 Details of Basket Base Bracket 10 14 10 11 Optional Ta...

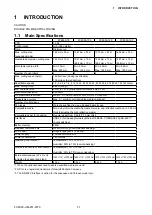
Страница 10: ...accuracy 1 Max 0 1 mm 2 m unit excluding media shrinkage Number of cutters pens 1 Pen types Water based fiber tip pen oil based ballpoint pen Compatible media Mono vinyl chloride media fluorescent med...

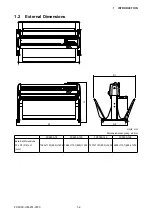
Страница 11: ...UCTION 1 2 External Dimensions H D1 D2 W Units mm Dimensional accuracy 5 mm FC9000 75 FC9000 100 FC9000 140 FC9000 160 External dimensions W x D1 D2 x H mm 1360 1151 803 1232 1665 1151 803 1232 1970 1...

Страница 12: ...e Supersteel CB09UB K60 5 5 blades pack 0 9 mm dia 60 angle for thin film CB15U 5 5 blades pack 1 5 mm dia 45 angle Supersteel CB15U K30 5 5 blades pack 1 5 mm dia 30 angle for sandblast rubber CB15UA...

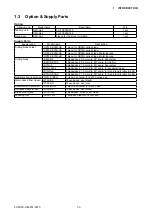
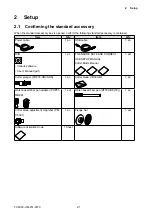
Страница 13: ...Power cable 1 pc USB cable 1 pc DVD Various software User s Manual pdf 1 pc TO ENSURE SAFE AND CORRECT USE SETUP MANUAL Cutter Blade Manual 1 set Cutter plunger PHP33 CB09 HS 1 pc Cutter blade CB09UB...

Страница 14: ...r roller L and R Allen wrench for M5 cap screw M5L16 Cap screw x 16 M5L10 Cap screw x 16 Basket Cloth Arm x 4 Basket tube short x 2 Basket tube long x 1 Basket tube hanger bracket x 2 Basket Cloth x 1...

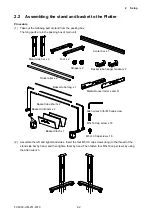
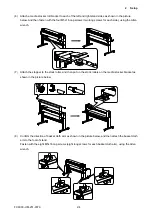
Страница 15: ...lotter on the stand by inserting the positioning pins on the stand into the positioning holes on the underside of the plotter Fasten with the four M5L10 cap screws two short screws for each side using...

Страница 16: ...r each side using the Allen wrench 7 Attach the stopper to the stock roller and then put on the stock rollers on the media stocker bracket as shown in the picture below 8 Confirm the direction of bask...

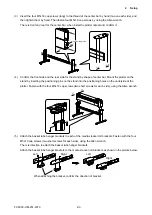
Страница 17: ...below Insert the long tube to the center of basket cloth and insert the short tubes to the front and rear Short tube Long tube 10 Put on the center basket tube onto the basket tube hanger brackets an...

Страница 18: ...the media Tool carriage Moves the cutter pen or plotting pen across the media during cutting or plotting Tool holder Holds the cutter pen or plotting pen and moves it up or down Pen station pen holder...

Страница 19: ...er Used to carry roll media and ensure its proper rotation Stock rollers A media roll is placed on these rollers USB interface connector Used to connect the plotter to the computer with a USB interfac...

Страница 20: ...touching the tool immediately after the cutting plotter is turned on or whenever the tool is moving It is explained here using cutter pen as an example 1 Loosen the pen holder screw 2 While pushing th...

Страница 21: ...retrofitted 1 Loosen the pen holder screw Top view Tool holder Tool holder Bracker to hold tool Bracker to hold tool 2 While pushing the pen holder in the upward direction push the pen all the way int...

Страница 22: ...n station and then attach a pen Holding part 2 Make sure that the bracket of the pen station is engaged in the upper groove of the pen Attach the pen with the upper groove of pen 3 Close the pen hold...

Страница 23: ...the screw holding the cross cutter blade in place and then remove the cross cutter blade Cross cutter blade 3 Remove the protective cushion from the replacement cross cutter blade Be sure to remove th...

Страница 24: ...g the ENTER key and the ORIGIN key simultaneously in the first screen of the MENU mode MENU screen COPY When this key was pressed the plotter copy the job of buffer memory ESC CROSS CUT When this key...

Страница 25: ...ON There are following functions depending on the operation Move the tool carriage and media It will move specified distance when it is pressed once and continuously move when it is pressed down It wi...

Страница 26: ...control panel Set condition of media READY status It will display READY when the media is loaded Display of setting condition Command HP GL HP GL command GP GL GP GL command None Command AUTO Stepsize...

Страница 27: ...reen Page number is displayed in the upper right corner of the screen if there are too many settings or selection that will need multiple pages to display Press the position pq key to move different p...

Страница 28: ...ngs of the condition for the interfacing with the control computer q ADV Make the settings of the conditions for the basic operation of the plotter such as display language unit of the measurements se...

Страница 29: ...9000 UM 251 9370 4 6 4 OPERATIONS Menu tree Default Screen Condition Setting Screen 1 3 COND TEST 1 2 3 4 1 2 3 4 1 2 3 4 3 ENTE COPY Condition Setting Screen 2 3 Condition Setting Screen 3 3 Continue...

Страница 30: ...251 9370 4 7 4 OPERATIONS Continued Default Screen Continued MENU Screen TOOLS SETTING Screen 1 4 TOOLS SETTING Screen 2 4 TOOLS SETTING Screen 3 4 TOOLS SETTING Screen 4 4 1 2 4 3 2 1 4 3 2 1 2 1 3 P...

Страница 31: ...fault Screen Continued Continued ARMS SETTING Screen 1 2 ARMS SETTING Screen 2 3 ARMS SETTING Screen 3 3 MENU Screen PAUSE MENU 2 1 2 3 1 2 3 1 2 3 1 2 1 2 3 4 MENU Screen AREA PARAMETERS Screen 1 2 A...

Страница 32: ...ued MENU Screen MEDIA SETTING Screen 1 2 MEDIA SETTING Screen 2 2 Default Screen Continued PAUSE MENU 4 1 2 3 1 2 3 4 4 When the Take UP option is installing this menu is displayed When the Take UP op...

Страница 33: ...ERFACE Screen 2 3 INTERFACE Screen 3 3 Default Screen Continued PAUSE MENU 1 2 3 1 2 1 2 3 4 4 When the RS 232C option is installing this menu is displayed When the RS 232C option is installing this m...

Страница 34: ...FC9000 UM 251 9370 4 11 4 OPERATIONS Continued MENU Screen ADVANCE Screen 2 4 ADVANCE Screen 3 4 ADVANCE Screen 4 4 ADVANCE Screen 1 4 Default Screen Continued PAUSE MENU 1 2 3 1 2 3 4 1 2 4 1 2 4...

Страница 35: ...MENU Screen TEST Screen 2 2 TEST Screen 1 2 Default Screen Continued PAUSE MENU 1 2 3 1 4 When the media is loading the diagnostics is not able to perform MENU Screen DATA LINK Screen 1 2 DATA LINK Sc...

Страница 36: ...692180302 Flexible Cable Cont FFC FFC512204 1 1 1 1 10 U682157130 LCD BTG240128SFBWBGG 1 1 1 1 11 U682132431 Motor UGJMEE A7JGR34 1 1 1 1 X motor 12 U682126201 Motor DMN37HE 003 1 1 1 1 Y motor 13 U79...

Страница 37: ...or Glue Point Grease or Glue name Application quantity 1 Cam Shinetu silicon grease G501 Suitable quantity 2 X drive motor pulley Shinetu silicon grease G501 Suitable quantity 3 Y drive motor pulley S...

Страница 38: ......

Страница 39: ...cing the Right Side Cover How to detach the right side cover 1 Remove the four M4L6 binding head screws from the right side cover 2 Detach the right side cover M4L6 binding head screw Right side cover...

Страница 40: ...ver How to detach the left side cover 1 Remove the four M4L6 binding head screws from the left side cover 2 Detach the left side cover M4L6 binding head screw Left side cover How to reinstall the left...

Страница 41: ...screws holding the control panel assembly M3L6 binding head screw Control panel assembly 3 Disconnect the control panel flexible cables from the control panel board Control panel board Control panel...

Страница 42: ...cover Refer to subsection 7 1 1 2 Detach the control panel assembly Refer to subsection 7 1 3 3 Remove the six M3L6 binding head screws holding the center cover M3L6 binding head screw Center cover 4...

Страница 43: ...the five M3L6 binding head screws from the front guide for the FC9000 100 Remove the six M3L6 binding head screws from the front guide for the FC9000 140 Remove the seven M3L6 binding head screws from...

Страница 44: ...e the five M3L6 binding head screws from the rear guide for the FC9000 100 Remove the six M3L6 binding head screws from the rear guide for the FC9000 140 Remove the seven M3L6 binding head screws from...

Страница 45: ...iting panel for the FC9000 75 Remove the five M3L6 binding head screws from the rear of the rear writing panel for the FC9000 100 Remove the six M3L6 binding head screws from the rear of the rear writ...

Страница 46: ...nel assembly for the FC9000 75 Remove the twelve M3L6 binding head screws holding the front writing panel assembly for the FC9000 100 Remove the fourteen M3L6 binding head screws holding the writing p...

Страница 47: ...ing the Fan Cover How to detach the fan cover 1 Remove the M3L6 binding head screw holding the fan cover 2 Detach the fan cover Fan cover M3L6 binding head screw How to reinstall the fan cover 1 Reatt...

Страница 48: ...ws holding the pen block cover Pen block cover M3L6 binding head screw 2 Detach the pen block cover There is a hook inside of this part While pressing the top of pen block cover a little bit pull out...

Страница 49: ...he push roller pin from the push roller shaft by using the needle nose pliers Push roller pin 2 Pull out the push roller shaft from the push roller arm Push roller shaft Push roller arm 3 Detach the p...

Страница 50: ...tting Mat How to detach the cutting mat 1 Peel off the cutting mat from the left side of cutting mat base Cutting Mat Peel off the cutting mat from here How to reinstall the cutting mat 1 Clean the cu...

Страница 51: ...r media sensor How to reinstall the rear media sensor 1 Reattach the rear media sensor in the reverse order in which it was detached 7 2 2 Replacing the Front Media Sensor How to detach the front medi...

Страница 52: ...on and then pull out it to the front side from the pen block Registration mark sensor unit Slide the registration mark sensor unit to upper direction and then pull out it to the front side from the pe...

Страница 53: ...rk sensor Registration mark sensor Registration mark sensor Registration mark sensor cable How to reinstall the registration mark sensor 1 Reattach the registration mark sensor in the reverse order in...

Страница 54: ...lexible cable Gently lift up the lock of connector and then unlock the connector LCD Control panel board 3 Disconnect the LCD flexible cable from the control board 4 Remove the seven M2L5 self tapping...

Страница 55: ...3 2 Detach the control panel board Refer to subsection 7 2 4 3 Slide the LCD to the left from the hooks and then detach the LCD from the control panel cover Hook LCD Control panel cover How to reinsta...

Страница 56: ...3 Detach the center cover Refer to subsection 7 1 4 4 Remove the two M3L6 binding head screws attaching the pen block cover M3L6 binding head screw Pen block cover 5 Detach the pen block cover 6 Disco...

Страница 57: ...sed pen block How to reinstall the pen block 1 Attach the pen block to the Y slider 2 Fasten the three M4L6 binding head screws to attach the pen block so that there is a gap of 10 mm between the bott...

Страница 58: ...efer to subsection 7 1 2 3 Detach the control panel assembly Refer to subsection 7 1 3 4 Detach the center cover Refer to subsection 7 1 4 5 Detach the pen block Refer to subsection 7 2 6 6 Mark the p...

Страница 59: ...Y belt from the unit How to reinstall the Y belt 1 Shave 2 to 3 mm off both ends of the Y belt until the wire comes out as shown below Y belt Shave 2 to 3 mm off both ends of the Y belt until the wire...

Страница 60: ...en attach the Y belt with the Y belt stopper plate to the Y slider This bulge must to inside Y belt stopper plate Y belt Y slider 5 Attach the pen block Refer to subsection 7 2 6 6 Reattach the other...

Страница 61: ...oller sensor bracket to the slider Y slider M3L6 binding head screw Push roller sensor bracket Push roller sensor board 5 Disconnect the push roller flexible cable from the push roller sensor board 6...

Страница 62: ...7 1 3 2 Detach the center cover Refer to subsection 7 1 4 3 Disconnect all the cables from the Y relay board M3L6 binding head screw Y relay board 4 Remove the three M3L6 binding head screws attachin...

Страница 63: ...he cam sensor board How to reinstall the cam sensor board 1 Reattach the cam sensor board in the reverse order in which it was detached 2 Confirm the dog of cam is not touching to the sensor of cam se...

Страница 64: ...board as shown in the picture below Y Motor Mark the position of temperature sensor board Cable tie Temperature sensor board 3 Detach the temperature sensor board which is attaching by cable tie on t...

Страница 65: ...he picture below Mark the position of screws which are holding the Y motor 7 Remove the three M3L6 binding head screws holding the Y motor 8 Detach the Y motor 2 3 2 3 4 Y motor M3L6 binding head scre...

Страница 66: ...pulley and the Y drive pulley 4 Tighten the two M3L4WP set screws that hold the Y motor pulley 5 Spread a suitable quantity of Loctite 222 on the two M3L4WP set screws that hold the Y motor pulley 6...

Страница 67: ...tor power cable from connecter J1010 on the main board X Motor J1004 X motor encoder cable J1010 X motor power cable 3 Mark the position of screws which are holding the X motor as shown in the picture...

Страница 68: ...ulley to the X motor at the following position Tighten the two M3L4WP set screws that hold the X motor pulley X motor X motor pulley 5 mm 2 Spread a suitable quantity of Loctite 222 on the two M3L4WP...

Страница 69: ...from their connectors on the main board 3 Remove the five M3L6 binding head screws holding the main board to the chassis M3L6 binding head screw Main board 4 Detach the main board from the chassis Ho...

Страница 70: ...ay cable connector Fan relay cable connector 3 Remove the M3L6 binding head screw holding the fan cover on the bottom of plotter and then detach it M3L6 binding head screw Fan cover 4 Remove the two M...

Страница 71: ...rear writing panel Refer to subsection 7 1 7 6 Detach the front writing panel assembly Refer to subsection 7 1 8 7 Mark the position of screws which are holding the X motor as shown in the picture be...

Страница 72: ...M3L6 binding head screws holding the pillow blocks FC9000 160 FC9000 140 FC9000 100 FC9000 75 Drive roller shaft assembly M3L6 binding head screw Pillow block Bearing cover 11 Slide out the X drive r...

Страница 73: ...mbly Bush Bearing Grid roller Bush Bearing 3 When the X drive pulley is installing to the drive roller shaft assembly tighten the four M3L4 set screws while pushing the drive pulley and the drive roll...

Страница 74: ...center cover Refer to subsection 7 1 4 4 Release the cable ties holding the Y flexible cable Main board Y flexible cable Cable tie 5 Disconnect the Y flexible cable from the main board 6 Remove M3L4 b...

Страница 75: ...he Y rail as shown below The Y flexible cable shouldn t touch the left side plate Allow a 25 mm space between the left end of the Y flexible cable and the left side Pen block Left side plate Y flexibl...

Страница 76: ...head screw holding the cam sensor board Cam sensor board M3L6 binding head screw 3 Detach the cam sensor board 4 Remove the two M4L8 binding head screws holding the cam sensor dog and then detach it f...

Страница 77: ...100 140 160 Mark the position of stopper here Stopper screw 8 Slide the push roller stopper to the left side of notch of Y rail FC9000 75 FC9000 100 140 160 Slide the stopper to here Notch of Y rail...

Страница 78: ...the Push Roller Assembly 1 Reattach the push roller assembly in the reverse order in which it was detached 2 When the cam shaft is inserting to the cam confirm the direction of cam that push roller i...

Страница 79: ...Roller base Don t loosen any screws on the push roller assembly 1 Detach the push roller assembly Refer to subsection 7 2 17 2 Release the spring from the push roller arm Push roller arm Spring 3 Deta...

Страница 80: ...then detach the push roller base as shown in the picture bellow Push roller base Push roller base shaft Presser adjusting part Push roller lever Push roller arm Front spring Cam E ring How to reinstal...

Страница 81: ...side cover Refer to subsection 7 1 2 2 Disconnect all cables from the power supply board 3 Remove the four M3L6 binding head screws holding the power supply board and then detach it Power supply board...

Страница 82: ...Tension Adjustments 7 3 1 Y Belt Tension Adjustment How to adjust the Y belt tension 1 Tighten the two adjustment screws to the marking position which was marked when detaching the Y belt Adjustment s...

Страница 83: ...ew a little When the Y belt is moving down tighten the upper screw a little When the adjustment position was not marked adjust the Y belt tension by the following procedure 1 Move the Y slider to the...

Страница 84: ...lider is moved from left to right several times The Y slider belt should not move up and down more than 1 5 mm The Y belt should not move up and down more than 1 5 mm Y belt Y belt tension adjustment...

Страница 85: ...otor Marking position When the adjustment position was not marked adjust the Y drive belt tension by the following procedure 1 Push the belt 2 mm using a force gauge as shown in the picture below 2 m...

Страница 86: ...motor Marking position When the adjustment position was not marked adjust the X drive belt tension by the following procedure 1 Push the belt 2 mm using a force gauge as shown in the picture below 2...

Страница 87: ...ard to the main board Confirming the cables wiring from the X motor to the main board The cables for X and Y motor has same connectors therefore do not connect those cables incorrectly The X motor has...

Страница 88: ...m sensor board Confirm the printed side which is facing to the right Confirm the printed side which is facing to the up Main board Confirming the flexible cable wiring Y flexible cable from the Y rela...

Страница 89: ...ide connect the flexible cable correctly as shown in the picture below Main board side Control panel flexible cable Control panel flexible cable Confirm the printed side which is facing to the up Main...

Страница 90: ...has a right side and a wrong side connect the flexible cable correctly as shown in the picture below Y relay board side Y relay board Push roller sensor flexible cable Confirm the printed side which...

Страница 91: ...Y drive belt Y belt NOV RAM clear M DIP switch setting M Firmware update M Copy the adjustment value to main board M Pen force adjustment N M Distance adjustment N N N N Registration mark sensor sensi...

Страница 92: ...stment values to the main board from the NV RAM memory of cam sensor board by the following procedure Update the System Firmware Refer to subsection 8 6 Set the dip switch for corresponding model Refe...

Страница 93: ...3 Input the pen force adjustment values Refer to subsection 8 11 1 Adjust the friction Refer to subsection 8 12 Input the Offset of Registration Mark Sensor adjustment value Refer to subsection 8 15...

Страница 94: ...n Refer to subsection 8 17 2 8 2 4 When the X or Y motor was replaced When the X motor or Y motor was exchanged perform the following adjustment Adjust the friction Refer to subsection 8 12 End of adj...

Страница 95: ...ection 8 19 2 End of adjustment 8 2 9 When the optional 2nd pen of holder or station was replaced When the optional 2nd pen of holder or station was replaced perform the following adjustment Adjust th...

Страница 96: ...model 1 2 3 4 5 6 7 8 ON OFF ON OFF OFF OFF OFF OFF OFF OFF FC9000 100 1 2 3 4 5 6 7 8 ON OFF ON OFF OFF OFF OFF OFF ON OFF FC9000 100 2nd pen option model 1 2 3 4 5 6 7 8 ON OFF OFF ON OFF OFF OFF O...

Страница 97: ...ch model when the NV RAM CLEAR was performed Dip Switch SW1 1 2 3 4 5 6 7 8 Model 1 2 3 4 5 6 7 8 ON OFF OFF OFF OFF ON OFF OFF OFF FC9000 75 1 2 3 4 5 6 7 8 ON OFF ON OFF OFF ON OFF OFF OFF FC9000 10...

Страница 98: ...1 2TOOL MEDIA SENS X Y Y Y H X Y F R xx xx xx xx xx xx xx xx xx xx xx xx xx xx xx xx xx xx Explanation of the values PEN FORCE Pen force adjustment values for each target force DISTANCE X and Y for t...

Страница 99: ...firm the version of firmware by the following procedure How to confirm the version of firmware 1 Turn off the power for the FC9000 if power was turned on 2 Turn on the power for the FC9000 3 The firmw...

Страница 100: ...ows driver was installed How to upgrade the system firmware 1 Turn off the power for the FC9000 if power was turned on 2 Turn on the power while pressing the LEFT and RIGHT position keys Or after turn...

Страница 101: ...he firmware the following menus will be displayed 7 When the updating is completed the plotter will start the initialization routine The firmware version is displayed during the initialization routine...

Страница 102: ...OFF FC9000 75 1 2 3 4 5 6 7 8 ON OFF ON OFF OFF ON OFF OFF OFF FC9000 100 1 2 3 4 5 6 7 8 ON OFF OFF ON OFF ON OFF OFF OFF FC9000 140 1 2 3 4 5 6 7 8 ON OFF ON ON OFF ON OFF OFF OFF FC9000 160 3 Turn...

Страница 103: ...5 2nd pen option model 1 2 3 4 5 6 7 8 ON OFF ON OFF OFF OFF OFF OFF OFF OFF FC9000 100 1 2 3 4 5 6 7 8 ON OFF ON OFF OFF OFF OFF OFF ON OFF FC9000 100 2nd pen option model 1 2 3 4 5 6 7 8 ON OFF OFF...

Страница 104: ...when you are going to enter the adjustment mode select the language to English and then select the Length unit to METRIC How to select the Language and Length Unit at the first power on 1 Select Engl...

Страница 105: ...Turn on the power while pressing the DOWN position key and the ENTER key 3 The following menu will be displayed The adjustment values are possible to copy to the new main board if the status of SERIA...

Страница 106: ...ltaneously within 2 seconds Or At the ready mode while the ENTER key is pressing press the ORIGIN key And then the plotter is reset While the plotter is resetting press the SLOW key and ENTER key simu...

Страница 107: ...ration mark sensor hood condition Do not change Running test for registration mark sensor hood Do not use Pen force setting for the maintenance mode X media sensor position adjustment Priority of Soft...

Страница 108: ...ial Tension gauge and adjust pen force to the target force with following procedure Required jigs and tools when the pen block assembly was replaced Correx Dial Tension gauges 1000 g 500 g 300 g 50 g...

Страница 109: ...pen force appears 11 Input the recorded value for 130 g and then press the ENTER key to store the setting The next specified pen force appears 12 Input the recorded value for 210 g and then press the...

Страница 110: ...ade length should be 0 Don t turn the blade out from the blade holder 2 Turn on the power while pressing the SLOW and the ENTER keys 3 Load a media to the plotter 4 The plotter displays the following...

Страница 111: ...sured value is within the specification range 48 4g 16 The 130g pen force specified pen force adjustment menu appears The pen is lowered Use the Correx Dial Tension gauges to measure the actual force...

Страница 112: ...within the specification range 618 18g Note When adjusting the pen force it is important to do it quickly Delaying the pen force adjustment changes the temperature of the actuator and causes artificia...

Страница 113: ...x Width 762 mm 30 inch FC9000 140 and 160 Length 1200 mm x Width 1372 mm 54 inch If you don t have above width of cutting film prepare at least 30 inch wider cutting film And the loadable widest cutt...

Страница 114: ...e down position key to display the following menu 7 Press the 3 key to display the following menu 8 Press the SLOW key to display the following menu 9 Move the tool position to the center of film and...

Страница 115: ...measuring distance 8 13 1 Inputting the distance accuracy from the recorded value How to input the distance accuracy from the recorded value 1 Turn on the power while pressing the SLOW and the ENTER k...

Страница 116: ...alue then the following menu is displayed 12 Press the F4 key to display the following menu UP and down allow keys changes value Slow key changes unit 13 Input the XY distance diagonal distance adjust...

Страница 117: ...the measured distance 1 Mount a fiber tip pen to the rear tool holder 2 Turn on the power while pressing the SLOW and the ENTER keys 3 The plotter displays the following menu 4 Load an A3 in the plot...

Страница 118: ...not use the distance of this pattern when inputting the adjustment values 10 Press the F1 key DRAW PATTERN to start to draw the adjustment pattern The plotter immediately plots the adjustment pattern...

Страница 119: ...w keys changes value Slow key changes unit 19 Input the XY distance adjustment value by the actual measuring value of diagonal distance If you measured the 352 0 mm for the diagonal distance input the...

Страница 120: ...itivity adjustment sheet which is on the last page of this chapter to A4 size white copy paper LOAD MEDIA TO FC9000 SHEET MOVE TOOL POSITION TO CENTER OF WHITE SQUARE REGISTRATION MARK SENSOR LEVEL AD...

Страница 121: ...following menu 9 Press the F2 key to display the following menu 10 Move the tip of tool to the center of the white square by using the position keys as shown below LOAD MEDIA TO FC9000 SHEET MOVE TOOL...

Страница 122: ...32 8 Electrical Adjustment 12 Press the ENTER key to store the setting 13 Turn off the power to exit from the adjustment menu When other adjustment is going to perform continuously it does not need t...

Страница 123: ...performed before this adjustment When the registration mark sensor was replaced or detached this adjustment must be performed Preparation When the registration mark sensor was replaced or removed prin...

Страница 124: ...ess the F2 key to display the following menu UP and down allow keys changes value 8 Input the X offset adjustment value from the recorded value of registration mark of X offset 9 Press the ENTER key t...

Страница 125: ...TER key to set the Y offset the following menu is displayed 13 Press the ENTER key the following menu is displayed 14 Turn off the power to exit from the adjustment menu When other adjustment is going...

Страница 126: ...is not cut through the target sheet Confirm the assign of tool is set to 1 for the condition 1 How to adjust the registration mark sensor offset position from the measured offset 1 Install the cutter...

Страница 127: ...o display the following menu 9 Press the F2 key to display the following menu 10 Press the F1 key MANUAL to display the following menu 11 Press the F2 key SCAN to display the following menu 12 Move th...

Страница 128: ...for the X offset adjustment Measure this distance for the X offset adjustment Media Feeding direction Y X Y X 14 When the offset is not correct measure the distance between the cross target line and t...

Страница 129: ...ut 20 Perform the steps from 10 to 13 to confirm the offset was adjusted correctly 21 Press the ENTER key the following menu is displayed 22 Turn off the power to exit from the adjustment menu When ot...

Страница 130: ...s replaced this adjustment must be performed 8 16 1 Inputting the Cross Cutter Home Position from the recorded values How to input Cross Cutter Home Position from the recorded values 1 Turn on the pow...

Страница 131: ...e position 8 Input the cross cutter home adjustment value from the recorded value of cross cutter home 9 Press the ENTER key to display the following menu 10 Press the ENTER key to display the followi...

Страница 132: ...e power while pressing the SLOW and the ENTER keys 2 The plotter displays the following menu 3 Load the sheet media to the plotter and then the plotter displays the following menu Media must to load t...

Страница 133: ...og and the cross cutter release plate 11 Adjust the gap to a value in the range of 0 6 mm to 1 0 mm Press the UP or DOWN position key to adjust the gap Cross cutter dog Cross cutter release plate 0 6...

Страница 134: ...djustment 14 Press the ENTER key to store the setting and the following menu is displayed 15 Turn off the power to exit from the adjustment menu When other adjustment is going to perform continuously...

Страница 135: ...ched this adjustment must be performed When the registration mark sensor was replaced or detached this adjustment must be performed 8 17 1 Inputting the X Media Sensor Position from the recorded value...

Страница 136: ...play the following menu UP and down allow keys changes value 10 Input the front X media sensor adjustment value from the recorded 11 Press the ENTER key to display the following menu 12 Press the F3 k...

Страница 137: ...70 8 47 8 Electrical Adjustment 15 Press the ENTER key to display the following menu 16 Turn off the power for the plotter When other adjustment is going to perform continuously it does not need to tu...

Страница 138: ...m 150 mm 130 mm 30 mm Make a 100 mm X 20 mm rectangle hole to the A4 size of copy paper at the showing position How to adjust the X media sensor position 1 Turn on the power while pressing the SLOW an...

Страница 139: ...following menu 9 Press the F1 key and then the plotter scan the adjustment target sheet and then it automatically adjust the front and the rear media sensor position with the registration mark sensor...

Страница 140: ...as replaced or the 2nd Pen option was installed perform this adjustment 8 18 1 Inputting the 2nd Pen Exchange position from the recorded value How to input the 2nd Pen Exchange position 1 Turn on the...

Страница 141: ...display the following menu 10 Press F4 key to display the following menu Input height exchange position using the up or the down position key 11 Input the height exchange position value from the reco...

Страница 142: ...n model 1 2 3 4 5 6 7 8 ON OFF OFF ON OFF OFF OFF OFF ON OFF FC9000 140 2nd pen option model 1 2 3 4 5 6 7 8 ON OFF ON ON OFF OFF OFF OFF ON OFF FC9000 160 2nd pen option model How to adjust the 2nd P...

Страница 143: ...then confirm the gap between the 2nd pen holder and the 2nd pen station The gap must be 1 2 mm When this gap is too far or too close the 2nd pen will not exchange correctly And confirm the height betw...

Страница 144: ...ion 16 Turn the pen by hand manually and then confirm the pen turns smoothly without play 17 Press the right key to confirm that the pen exchanging is performed correctly This test performs by the 0 3...

Страница 145: ...ment 8 19 1 Inputting the Spacing Between Tool 1 and Tool 2 from the recorded value How to input the Spacing Between Tool 1 and Tool 1 Turn on the power while pressing the SLOW and the ENTER keys 2 Th...

Страница 146: ...u Set the Y offset value by using the UP or DOWN position key 10 Input the Y offset value from the recorded 11 Press the ENTER key after offset value is input the following menu is displayed 12 Press...

Страница 147: ...3 4 5 6 7 8 Model 1 2 3 4 5 6 7 8 ON OFF OFF OFF OFF OFF OFF OFF ON OFF FC9000 75 2nd pen option model 1 2 3 4 5 6 7 8 ON OFF ON OFF OFF OFF OFF OFF ON OFF FC9000 100 2nd pen option model 1 2 3 4 5 6...

Страница 148: ...older rear and 2nd pen station Right side plate of holder 8 Press the down position key until the following menu is displayed 9 Press the F2 key to display the following menu 10 Set adjustment pen for...

Страница 149: ...1 2 16 The following menu is displayed The adjustment tool is shown 1 2 17 Press the F2 key to display the following menu is displayed Use the Position keys to move the pen to an open area to plot the...

Страница 150: ...Press the ENTER key after offset value is input the following menu is displayed 23 When it needs to adjust for Y direction pen block moving direction press the F4 key to display the following menu Se...

Страница 151: ...the adjustment 27 Press the ENTER key the following menu is displayed 28 Press the ENTER key the following menu is displayed 29 Turn off the power for the plotter When other adjustment is going to per...

Страница 152: ...r was installed perform this adjustment How to set the number of push rollers 1 Turn on the power while pressing the SLOW and the ENTER keys 2 The plotter displays the following menu 3 Press the PAUSE...

Страница 153: ...8 Electrical Adjustment 8 Press the ENTER key after it is set the following menu is displayed 9 Turn off the power for the plotter When other adjustment is going to perform continuously it does not ne...

Страница 154: ...to backup the adjustment values SerialNumberConfig exe and GITKPRNP ddl OPS662 USB Driver software for the FC9000 version must later than V3 70 Preparation 1 Copy the SerialNumberConfig folder onto t...

Страница 155: ...after the READY was displayed on the LCD of FC9000 9 Turn on the power while pressing the DOWN ARROW key and the ENTER key 10 The following menu will be displayed The adjustment values are possible to...

Страница 156: ...FC9000 UM 251 9370 8 66 8 Electrical Adjustment LOAD MEDIA TO FC9000 SHEET MOVE TOOL POSITION TO CENTER OF WHITE SQUARE REGISTRATION MARK SENSOR LEVEL ADJUST...

Страница 157: ...FC9000 UM 251 9370 8 67 8 Electrical Adjustment AUTO REGISTRATION MARK TARGET The specification of the cross mark is 30 mm line length and 0 3 to 0 5mm line width...

Страница 158: ...firm the serge capacitor is not burning and the fuse F101 has conduction It is caused by the thunderbolt if the serge capacitor is burning and the fuse F101 does not have conduction Replace the power...

Страница 159: ...s the front media sensor dirty Clean the front media sensor Is the front media sensor cable securely connected to the main board and the sensor Reconnect the cable securely Is the front media sensor r...

Страница 160: ...played Confirm all push rollers are on the grid rollers Set the right push roller to the right side media edge where on the grid roller Set the left push roller to the left side media edge where on th...

Страница 161: ...rs pressures or lower than the right and left edges of push rollers Confirm the right and left edges of push rollers are onto the media when the media is feeding Set the media straightly Adjust the pu...

Страница 162: ...g Is not the pen force too low Adjust the pen force Confirm the pen block height The pen block height must be 10 mm from the cutting mat Adjust the pen block height When it is cutting with the same co...

Страница 163: ...djustment value For example The 5 mm is short when it cuts the 5 m Adjustment value is 5 mm 5000 mm x 100 0 1 Set the 0 1 for the X distance adjustment When it is cutting the LED of PAUSE MENU is blin...

Страница 164: ...white area of media The vertical line of 1st registration mark could not detect Was the right side push roller set to at least 6 mm outside from the vertical line of 1st registration mark Print the ve...

Страница 165: ...n mark at least 6 mm inside from the cutting area if it is not possible Was it printing the small size of registration mark to the long media Print the big size of registration mark and load the media...

Страница 166: ...nting in the 6 mm inside from the cutting area Load the media by the SHEET and then confirm the tool position is possible to move to at least 6 mm outside from the horizontal line of 4th registration...

Страница 167: ...outside from the horizontal line of 2nd and 3rd registration mark Print the 2nd and 3rd registration mark at least 6 mm inside from the cutting area if it is not possible Is there any black printing...

Страница 168: ...lotter 3 Open the device manager from the control panel of WINDOWS 4 Open the Universal Serial Bus controllers 5 Uninstall the USB Printing Support 6 Turn off the power for the plotter 7 Install the U...

Страница 169: ...HOOTING 9 6 Error Messages 9 6 1 Hardware Error Messages Error code Error Display Verification item Cause Solution E01001 to E01005 Main board is defective Replace the main board E01006 E01007 E01008...

Страница 170: ...being obstructed Turn off the plotter remove the obstacle then turn the plotter back on Use the basket Confirm the X motor cables securely connected Confirm the X motor cables are connecting to the co...

Страница 171: ...cables are securely connected The Y motor cables are not securely connected Or it is connecting to the wrong connector Connect the Y motor cables securely Connect the Y motor cables to correct connec...

Страница 172: ...ve Main Board Replace the Y motor if it is defective Replace the main board when the problem remained even if Y motor was replaced E01021 Confirm the motor cables are securely connected The power cabl...

Страница 173: ...t is connecting to the connector of rewind motor shaft The power cable of optional rewind motor shaft is not connecting to the connector of rewind motor shaft Connect it securely Confirm the power cab...

Страница 174: ...t the HP GL E02002 Confirm the application software is supporting this plotter When wrong terminator received or there is no terminator in the command this error is shown Set the correct model name Co...

Страница 175: ...hen the RS 232C cable is using confirm the correct wiring of cable is using The wrong wiring of RS 232C cable is using Use the correct wiring of RS 232C cable E02004 Confirm the application software i...

Страница 176: ...evice When the RS 232C interface is using confirm transport setting The plotter s interface conditions have been changed Re specify the software application s interface conditions E02006 Confirm the o...

Страница 177: ...n item Cause Solution E03001 Confirm setting on the application software The plotter received an unrecognizable command The plotter is receiving the GP GL command mostly Set the command setting to the...

Страница 178: ...l Re specify the software application s interface conditions Set the correct model name if it was incorrect E03012 Invalid byte was received within device control command E03013 A parameter outside of...

Страница 179: ...layed while scanning the horizontal line of 1st registration mark The base color for scanning area and the registration mark detected with same color by the wrong scanning starting position Move the t...

Страница 180: ...ning the horizontal line of 2nd registration mark The media is skewing while feeding the media Use the media of strong adhesive strength When this error was displayed while scanning the horizontal lin...

Страница 181: ...s to the 6 mm inside from the scanning area Cutting area There is not enough margin from the horizontal line of 2nd and 3rd registration marks to the rear of media edge Load the media with the SHEET a...

Страница 182: ...1st and the 4th registration mark from the front edge of media Confirm the media is not tilting when the media is loading to the plotter If it is tilting the margin from 1st and the 4th to front edge...

Страница 183: ...rtical line of 1st and 2nd registration marks And confirm the media is not tilting when the media is loading to the plotter If it is tilting the margin from the right push roller position to the 1st a...

Страница 184: ...nsor level adjustment Change the color of the registration mark Check the media Check the print position of the registration mark E04024 Registration mark was not detected Redo the sensor level adjust...

Страница 185: ...t on the grit roller Check the push roller position Set the push roller on the grit roller E05005 It has failed to cross cut The media was not cut off Check the blade for the cross cut Check the media...

Страница 186: ...he printing of barcode Confirm the printing of barcode Move the tool position to the barcode start mark position correctly E05010 The rotation can not set to the barcode operation Set the rotation set...

Страница 187: ...FC9000 UM 251 9370 30 9 TROUBLESHOOTING Error code Error Display Cause Verification item Solution E05018 E05019 E05020 E05021 E05022 E05023...

Страница 188: ...sensor and the push roller sensor W06004 Cross cut function cannot operate when the push roller sensor is disabled Enable the detection of the push roller sensor W06005 Cross cut function cannot opera...

Страница 189: ...pying the registration mark data the rotation function cannot operate The rotation function cannot operate with the registration mark function W06011 When copying the registration mark data the mirror...

Страница 190: ...r The plotter displays LOAD MEDIA even if a media is loaded Push roller sensor When the media was loaded the pen block hits to the left side and then the Y position alarm is displayed X X media sensor...

Страница 191: ...py key 3 3 key Up Up arrow key Dn Down arrow key Esc ESC Cross Cut key 4 4 key Slo Slow key Cod Condition key Ent Enter key 7 Cover the front media sensor with a piece of paper The status of XFRONT ch...

Страница 192: ...e the pen tool is set 3 Press the PAUSE MENU key to display the menu below 4 Press the Left position t key TEST to display the menu below 5 Press the F1 key CONDITION LIST to display the menu below 6...

Страница 193: ...t the pen tool to the tool carriage and select the condition where the pen tool is set 3 Press the PAUSE MENU key to display the menu below 4 Press the Left position t key TEST to display the menu bel...

Страница 194: ...ect the condition where the pen tool is set 3 Press the PAUSE MENU key to display the menu below 4 Press the Left position t key TEST to display the menu below 5 Press the F3 key DATA DUMP to display...

Страница 195: ...e power on without loading the media 3 Press the PAUSE MENU key to display the menu below 4 Press the Left position t key TEST to display the menu below 5 Press the down position q key TEST to display...

Страница 196: ...Y motor signal 8 Tool height signal 9 1 key 10 2 key 11 3 key 12 4 key 13 POSITION u key 14 POSITION t key 15 POSITION q key 16 POSITION p key 17 ENTER key 18 CONDITION key 19 ORIGIN key 20 SLOW key 2...

Страница 197: ...ivity adjustment sheet which is on the last page of chapter 8 to A4 size white copy paper LOAD MEDIA TO FC9000 SHEET MOVE TOOL POSITION TO CENTER OF WHITE SQUARE REGISTRATION MARK SENSOR LEVEL ADJUST...

Страница 198: ...k movement 10 Manually move the pen block to the white area of registration mark sensor sensitivity adjustment sheet The sensor output level bar goes up when the sensor is detecting the white area 11...

Страница 199: ...own below 2 Press the F1 key DEFAULT SETTING The following menu is displayed 3 Press the F1 key SET DEFAULT The following menu is displayed 4 Press the F1 key CONTINUE The following menu is displayed...

Страница 200: ...0 1 FC9000 100 C U621824210 Rear Guide FC90 140 1 FC9000 140 C U621834210 Rear Guide FC90 160 1 FC9000 160 C 6 U621800162 Front Writing Panel FC90 75 1 FC9000 75 C U621810162 Front Writing Panel FC90...

Страница 201: ...FC9000 UM 251 9370 10 2 10 PARTS LIST Outer Casing 1 2 3 4 10 7 11 5 16 15 6 12 12 9 13 14 8...

Страница 202: ...900780 Cover Control Panel FC90 1 621804051 621584250x4 C 3 U621804270 Key Top Left FC90 70 2 C 4 U621804250 Key Top Cursor FC90 70 1 C 5 U621804260 Key Top Right FC90 70 1 C 6 U682157130 LCD BTG24012...

Страница 203: ...CA512216A 1 Registration Mark Sensor C 11 U621263460 Latch TL 294 1 A 12 U621803813 Cross Cutter Key Bracket 1 C 13 U380205351 Spring E 535 2 C 14 U621803803 Cross Cutter Base 1 This part is includin...

Страница 204: ...512203C 1 FC9000 140 160 A 10 U361102011 Flexible Cable Clamper RFC 45V0 2 D 11 U361001016 Cord Clip 1 CC 1003NH D 12 U561500100 AC Inlet R 301 02 1 C 13 U561630088 Switch Power AJ7W202BF 1 C 14 U6218...

Страница 205: ...D 13 Bush D6L11 1 D 14 U621800741 Cam Shaft Holder C 15 U621803204 Bracket Y Drive 1 D 16 U621803211 Adjustment Plate Y Drive Shaft Tilting 1 D 17 U621803400 Belt Y 300S2M1183LW C 1 FC9000 75 A U6218...

Страница 206: ...FC9000 UM 251 9370 10 7 10 PARTS LIST Y Drive Part 2 3 4 2 3 2 3 4 5 6 2 3 1 20 21 21 2 3 6 4 5 6 7 12 14 24 22 22 23 25 16 17 18 15 13 11 19 10 9 8...

Страница 207: ...r Sensor Board 1 C 5 U621833513 Bracket Y Slider PCB 1 C 6 Core GFC 31 12 1 D 7 U621403322 Holder Core 1 D 8 U621803520 Tension Plate Y Slider Roller 1 A 9 U621583390 Roller B R1240KK1MTRP5 8 C 10 U39...

Страница 208: ...FC9000 100 C U621822003 Grid Roller Shaft FC9 140 1 FC9000 140 C U621832003 Grid Roller Shaft FC9 160 1 FC9000 160 C U621802010 Grid Roller X GRIT 2658 W160 1 C U621802020 Grid Roller X GRIT 2658 W12...

Страница 209: ...STD 4 FC9000 160 STD 26 U621803033 Bracket Spring HooK 2 FC9000 75 STD C 3 FC9000 100 STD 4 FC9000 140 160 STD 4 FC9000 160 STD 27 U621800903 Cam Shaft FC9 75 1 FC9000 75 STD C U621810903 Cam Shaft F...

Страница 210: ...0 140 C U621831900 Stocker Shaft Assembly FC9 160 FC9000 160 C 8 U621801910 Stocker Shaft FC9 75 2 FC9000 75 D U621811910 Stocker Shaft FC9 100 FC9000 100 D U621821910 Stocker Shaft FC9 140 FC9000 140...

Страница 211: ...FC9000 UM 251 9370 10 12 10 PARTS LIST Stand Basket 3 4 6 9 8 7 10 13 11 9 14 12 6 5 1 1 2 2 15...

Страница 212: ...C3 2 D 5 U621801730 Plate Stocker Stopper 1 C 6 Spacer ARU 305S 1 D 7 Wave Washer C5 1 D 8 Bush C3L2 5 1 D 9 Bush C4L2 5 1 D 10 Binding Head Screw M3L6 2 D 11 TP Screw M4L6 1 D 12 U621801380 Roller B...

Страница 213: ...No Part No Description Q ty Remarks Rank 1 U621801771 Side Pipe Basket 4 2 U334506301 Plastic Washer CC 0610 25 8 3 U621801930 Shaft Side Pipe Basket 12 4 E ring C4 24 5 U621801211 Bracket Side Pipe...

Страница 214: ...8330 C 6 U792900845 Take Up Guide 140 1 621828370x2 621828510x2 C U792900850 Take Up Guide 160 621828370x2 621838510x2 C 7 U792900855 Right Media Guide Bracket 1 621828351 621828421 C 8 U792900860 Lef...

Страница 215: ...1 U500052533 USB Cable CBL1112 3 0M 1 C 2 U621809700 FC9000 DVDM01M 1 DVD C 3 U621809710 Setup Manual FC9000 UM 8M1 1 C 4 U621809720 Blade Manual CUTTERMANU FC90 1 C Regarding the rank of spare parts...

Страница 216: ...FC9000 UM 251 9370 10 17 10 PARTS LIST...

Страница 217: ...ler for the FC9000 140 160 CA512213x 69218013x FLEXIBLE CABLE FCC512204x 69218030x J902 9610S 24Y923 J1002 10FLT SM2 J3001 9610S 24Y926 1 GND 2 TMBMC 3 TMBMC 4 GMD 5 MCM 6 MCM 7 MCP 8 MCP 9 GND 10 5V...

Страница 218: ...series on the WEEE instruction Printed circuit boards of mobile phones and of other devices if the surface of the printed circuit board is larger than 10 square centimeters No Parts code Parts name Re...

Страница 219: ...Electrolytic capacitors C127 C512 and C513 on the Switching Power Supply Unit C127 C512 C513 Liquid crystal display for surface area to exceed 100cm2 Include it in the casing if necessary and all thi...

Страница 220: ...d toner cartridge and the color toner Plastic including bromine system flame retardant for RoHs Parts including asbestos waste and asbestos CRT Chlorofluorocarbon CFC and hydro chlorofluorocarbon HCFC...

Страница 221: ...ng A Main Board 1 Remove the four M4L6 binding head screws from the right side cover 2 Detach the right side cover M4L6 binding head screw Right side cover 3 Disconnect all the cables and flexible cab...

Страница 222: ...ntrol Panel Board E LCD 1 Remove the four M4L6 binding head screws from the right side cover 2 Detach the right side cover M4L6 binding head screw Right side cover 3 Remove the four M3L6 binding head...

Страница 223: ...l panel flexible cable 5 Disconnect the LCD flexible cable from the control board Control panel cover Control panel board LCD LCD flexible cable 6 Remove the seven M2L5 self tapping screws holding the...

Страница 224: ...FC9000 UM 251 9370 12 7 12 Target electrical component for WEEE instruction 7 Slide the LCD to the left from the hooks and then detach the LCD from the control panel cover Hook LCD Control panel cover...

Страница 225: ...inding head screws from the right side cover 2 Detach the right side cover M4L6 binding head screw Right side cover 3 Disconnect the control panel flexible cable from the main board 4 Remove the four...

Страница 226: ...head screws holding the center cover M3L6 binding head screw Center cover 6 Detach the center cover 7 Disconnect all the cables from the Y relay board M3L6 binding head screw Y relay board 8 Remove th...

Страница 227: ...move the four M4L6 binding head screws from the left side cover 2 Detach the left side cover M4L6 binding head screw Left side cover 3 Disconnect all cables from the power supply board 4 Remove the fo...

Отзывы:

Похожие инструкции для FC9000-100