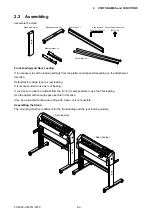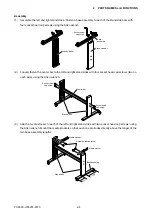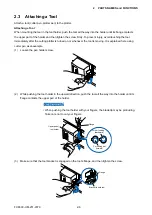
FC8600-UM-251-9370 2-1
2 PARTS NAMES and FUNCTIONS
2 PARTS NAMES and FUNCTIONS
2.1 Parts Names and Functions
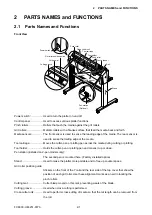
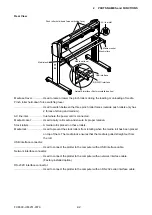
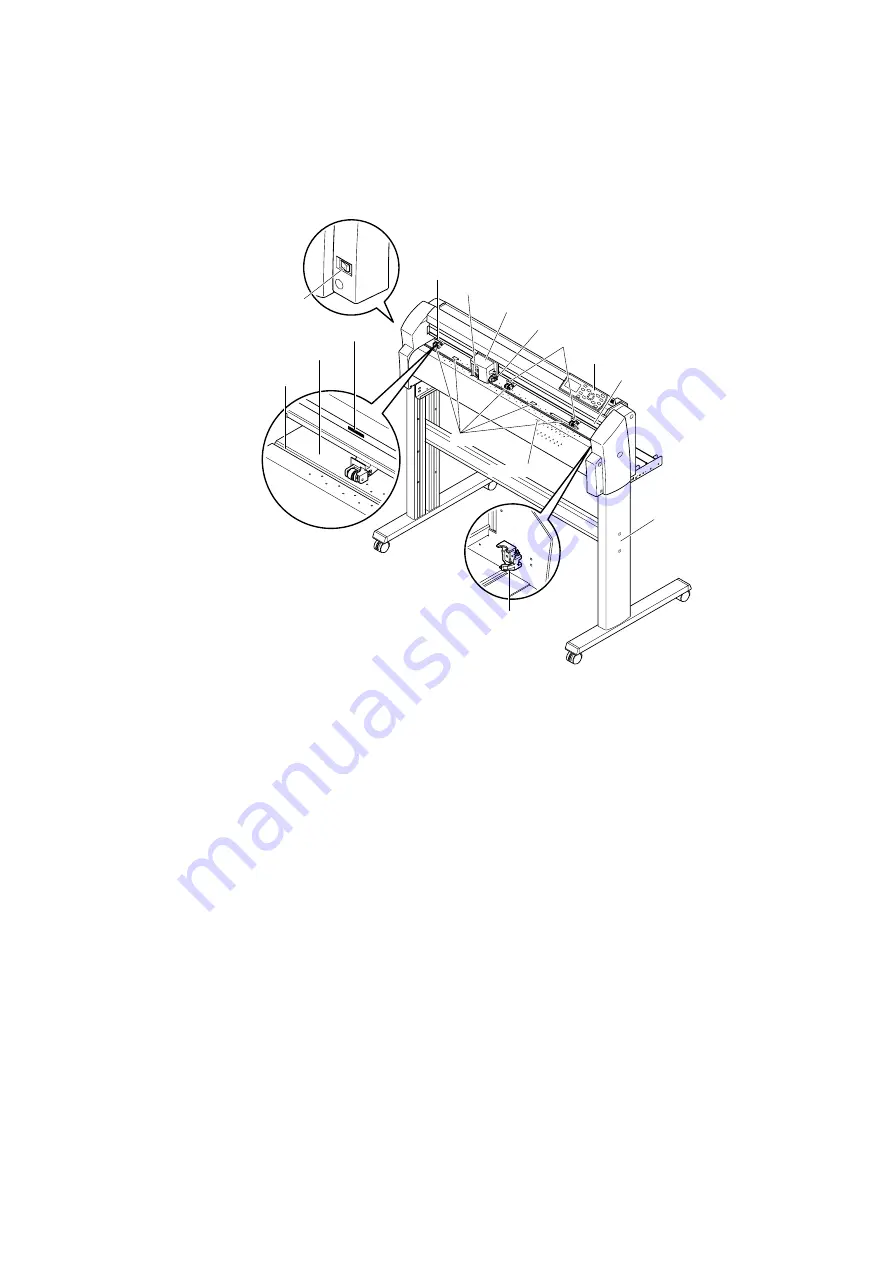
Front View
Power switch
Cutting groove
Cutting mat
Grit roller position guide
Push roller
Grit roller
Media sensor
Cross cutter unit
Tool carriage
Tool holder
Push roller
Control panel
Stand
Pen station
(Optional)
Rail
Power switch: ����������������� Used to turn the plotter on and off�
Control panel: ����������������� Used to access various plotter functions�
Pinch rollers: ������������������� Rollers that push the media against the grit rollers�
Grit rollers: ���������������������� Metallic rollers with a file-like surface that feed the media back and forth�
Media sensors: ��������������� The front sensor is used to sense the leading edge of the media� The rear sensor is
used to sense the trailing edge of the media�
Tool carriage: ������������������ Moves the cutter-pen or plotting pen across the media during cutting or plotting�
Tool holder: ��������������������� Holds the cutter-pen or plotting pen and moves it up or down�
Pen station (installed on 2-pen models only):
The second pen is mounted here� (Factory-installed option)
Stand: ����������������������������� Used to make the plotter more portable and to free up counter space�
Grit roller position guide:
Stickers on the front of the Y rail and the rear side of the top cover that show the
position of each grit roller� Use these alignment marks as an aid in locating the
pinch rollers�
Cutting mat: �������������������� Cutter blade moved on this mat, preventing wears of the blade�
Cutting groove: ��������������� Used when cross-cutting is performed�
Cross-cutter unit: ������������ Used to perform cross-cutting of media so that the cut length can be removed from
the roll�
Содержание FC8600-100
Страница 1: ...CUTTING PLOTTER SERVICE MANUAL FC8600 60 75 100 130 160 FC8600 UM 251 07 9370 ...
Страница 2: ......
Страница 4: ...FC8600 UM 251 9370 II ...
Страница 32: ......
Страница 103: ...FC8600 UM 251 9370 7 43 7 ADJUSTMENT ...
Страница 118: ...FC8600 UM 251 9370 8 15 8 TROUBLESHOOTING 11 When testing is completed turn off the power to the plotter ...
Страница 124: ...FC8600 UM 251 9370 9 2 9 PARTS LIST Outer Casing 4 6 2 3 9 13 11 12 14 15 10 1 16 8 7 5 ...
Страница 131: ...FC8600 UM 251 9370 9 9 9 PARTS LIST Main Frame 1 3 4 5 7 8 9 10 11 12 6 2 15 16 13 14 20 21 22 17 18 19 ...
Страница 141: ...FC8600 UM 251 9370 10 3 10 BLOCK DIAGRAMS AND CIRCUIT DIAGRAMS 10 2 2 Main Board CONNECTOR ...
Страница 142: ...FC8600 UM 251 9370 10 4 10 BLOCK DIAGRAMS AND CIRCUIT DIAGRAMS 10 2 3 Main Board MOTOR DRIVER ...
Страница 143: ...FC8600 UM 251 9370 10 5 10 BLOCK DIAGRAMS AND CIRCUIT DIAGRAMS 10 2 4 Main Board FPGA ...
Страница 144: ...FC8600 UM 251 9370 10 6 10 BLOCK DIAGRAMS AND CIRCUIT DIAGRAMS 10 2 5 Main Board I F ...
Страница 145: ...FC8600 UM 251 9370 10 7 10 BLOCK DIAGRAMS AND CIRCUIT DIAGRAMS 10 2 6 Main Board MEMORY ...
Страница 146: ...FC8600 UM 251 9370 10 8 10 BLOCK DIAGRAMS AND CIRCUIT DIAGRAMS 10 2 7 Main Board Power When the LAN is connected ...
Страница 147: ...FC8600 UM 251 9370 10 9 10 BLOCK DIAGRAMS AND CIRCUIT DIAGRAMS 10 2 8 LAN Board ...
Страница 148: ...FC8600 UM 251 9370 10 10 10 BLOCK DIAGRAMS AND CIRCUIT DIAGRAMS 10 2 9 Light Pointer ...
Страница 149: ...FC8600 UM 251 9370 10 11 10 BLOCK DIAGRAMS AND CIRCUIT DIAGRAMS 10 2 10Pen Relay Board ...
Страница 151: ...FC8600 UM 251 9370 10 13 10 BLOCK DIAGRAMS AND CIRCUIT DIAGRAMS 10 2 13Control Panel Board ...
Страница 152: ...FC8600 UM 251 9370 10 14 10 BLOCK DIAGRAMS AND CIRCUIT DIAGRAMS 10 2 14Cam Sensor Board ...

