


3.8
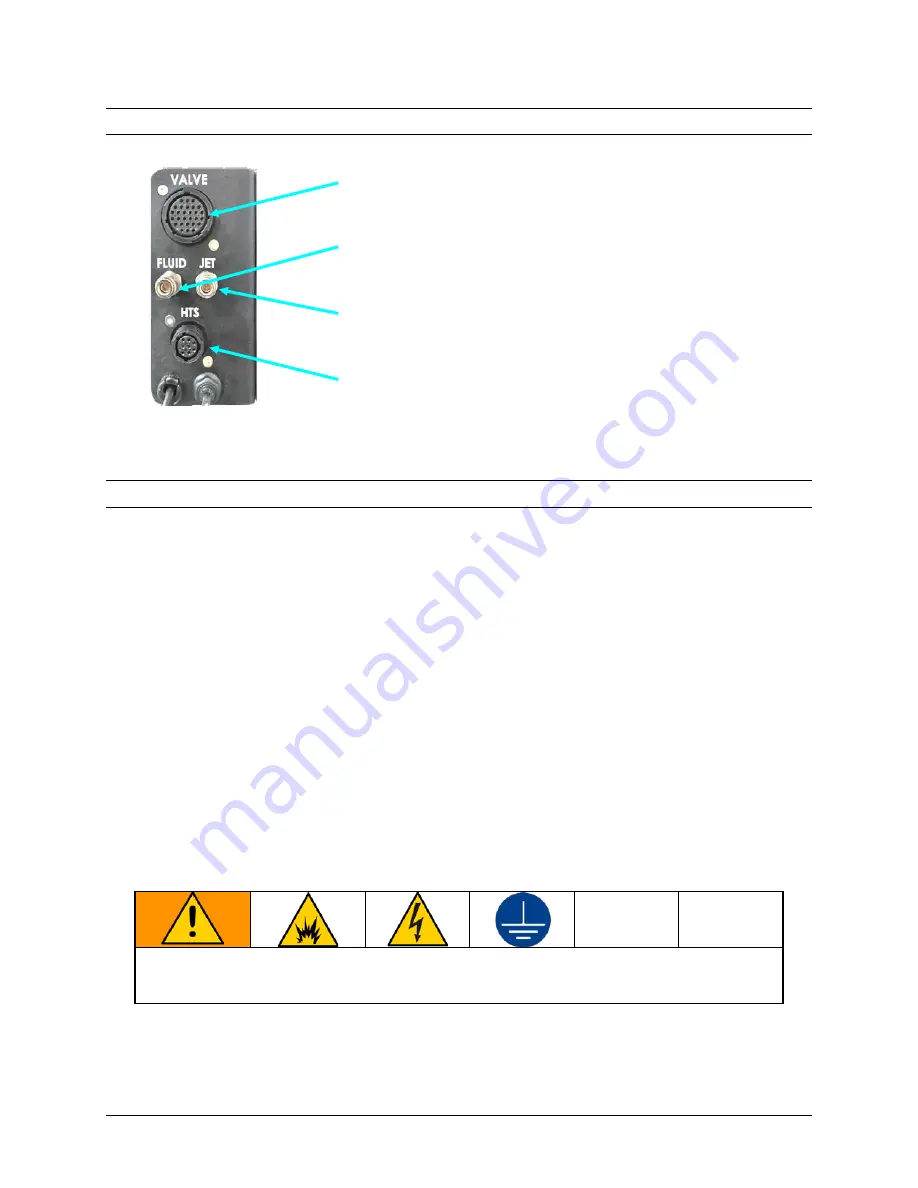
Connect Jet Cables to Robot Z Head
Note: Connect the cables in the order listed to avoid unintended dispensing (and the resultant mess).
Attach the Jet
Valve
Cable. Align the connector and
1.
twist the locking ring to tighten.
Attach the CLEAR
Fluid
Air Pressure tubing and push
2.
it straight into the FLUID connector until it clicks.
Attach the BLACK
Jet
Air Pressure tubing and push it
3.
straight into the JET connector until it clicks.
Attach the Height Sensor (
HTS
) cable. Align the
4.
connector and twist the locking ring to tighten.
3.9
Connect Components to Power
There are four power connections for the UniXact Automated Jet Dispense System:
UniXact Tabletop Robot
Advanjet HV-2100C or HM-2600C Controller
Monitor
PC (via power adapter)
A power cord/adapter set (P/N 25E557) with connectors for each of the regions listed is
provided for the robot, the controller, and the monitor:
Standard 115 V, 10A cord for USA, Mexico, Canada, Taiwan, and similar
250V cord for continental Europe
Adapter for UK, Australia, and similar
For the PC, a set of regional 320-C5 adapters is provided (P/N 25E758).
The camera is powered through the robot via USB. The keyboard and mouse use
batteries.
The controller and robot are grounded through their power cords. Connect the power
cords to a properly grounded power source before operating.
The equipment must be grounded to reduce the risk of static sparking and electric shock. Electric
or static sparking can cause fumes to ignite or explode. Improper grounding can cause electric
shock. Grounding provides an escape wire for the electric current.
Figure 12:
Jet Connections on the
Robot Z Head
Page 12 of 18
UniXact Automated Jet Dispense System Installation
3A5913B


