


53
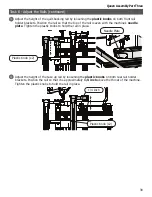
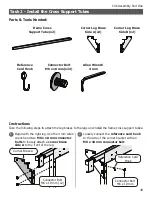
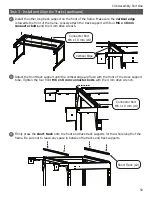
1. Install the other long track support on the front of the frame. Make sure the
vertical edge
is towards the front of the frame. Loosely attach the track support with four
M6 x 10 mm
connector bolts
and the 4 mm Allen wrench.
2
Connector Bolt
M6 x 10 mm (x4)
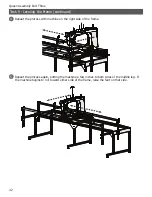
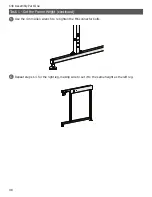
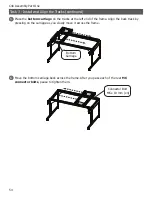
1. Firmly press the
short track
onto the front and back track supports for the whole length of the
frame. Be sure not to leave any space in between the tracks and track supports.
Short Track (x2)
Connector Bolt
M6 x 10 mm (x4)
4
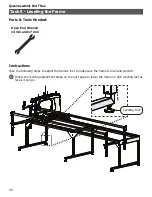
Task 3 - Install and Align the Tracks (continued)
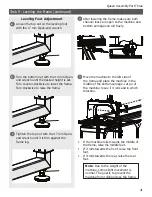
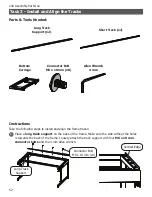
Vertical Edge
1.
Adjust the front track support until the vertical edge are flush with the front of the cross support
tube. Tighten the four front
M6 x 10 mm connector bolts
with the 4 mm Allen wrench.
3
Crib Assembly Part One
Содержание Q-Zone Queen
Страница 1: ...Assembly Instructions Copyright December 3 2021 V2 0 Grace Company ...
Страница 2: ......
Страница 13: ...13 Queen Assembly ...
Страница 44: ...44 Crib Assembly ...
Страница 72: ...72 Repeat the process with machine on the right side of the frame 4 Crib Assembly Part Three ...
Страница 84: ...The Grace Company Phone 1 800 264 0644 www graceframe com ...