


0020313973_01 Compact Installation and maintenance instructions
21
7.2
Flushing the heating installation for the first
time ("cold")
Note
The complete heating system must be flushed
at least twice: Once with cold water and once
with hot water in accordance with the following
instructions.
1.
Check whether all thermostatic radiator valves and
both service valves on the product are open.
2.
Connect a hose to the drain valve that is located at the
lowest position in the heating system.
3.
Open the radiator valves and the drain valves so that
the water can drain quickly. Start at the next point in
the installation and open the purging valves on the ra-
diators so that the contaminated water can completely
drain.
4.
Close the draining cocks.
5.
Refill the heating system with water.
6.
Check that the expansion relief valve of the heating
system is functioning correctly by turning the handle on
the valve.
7.
Check the pressure in the heating system and top up
with water if necessary.
8.
Close the filling valve and the cold water tap.
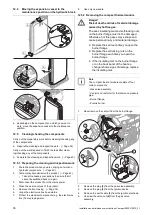
7.3
Connecting gas and water
Danger!
Risk of burns and/or risk of material dam-
age due to incorrect installation leading to
escaping gas.
Using oakum, Teflon or any other products
of this sort for the gas connection thread can
cause leaks.
▶
Only use the flat seals that are supplied
with the product or those supplied by the
manufacturer.
1.
Install the gas pipe on the gas connection such that it is
free from mechanical stress.
2.
Purge the gas pipe before start-up.
3.
Check the entire gas pipe properly for leak-tightness.
4.
Install the water flows and returns in accordance with
the relevant standards.
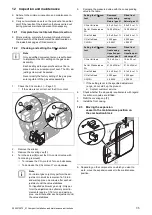
7.4
Connecting the condensate discharge hose
Danger!
Risk of death from escaping flue gases!
The siphon's condensate discharge hose
must not be tightly connected to waste-water
pipework because, otherwise, the internal
condensate siphon may be drained fully and
flue gas may escape.
▶
Have the condensate discharge hose end
outside of the waste-water pipework.
A
B
1.
Follow the instructions listed here and observe the
legal and local regulations on condensate discharge.
2.
Use only pipes made of acid-resistant material (e.g.
plastic) for the condensate discharge pipe (e.g. plastic).
3.
If you cannot guarantee that the materials from which
the condensate discharge pipe is made are suitable,
install a system to neutralise the condensate.
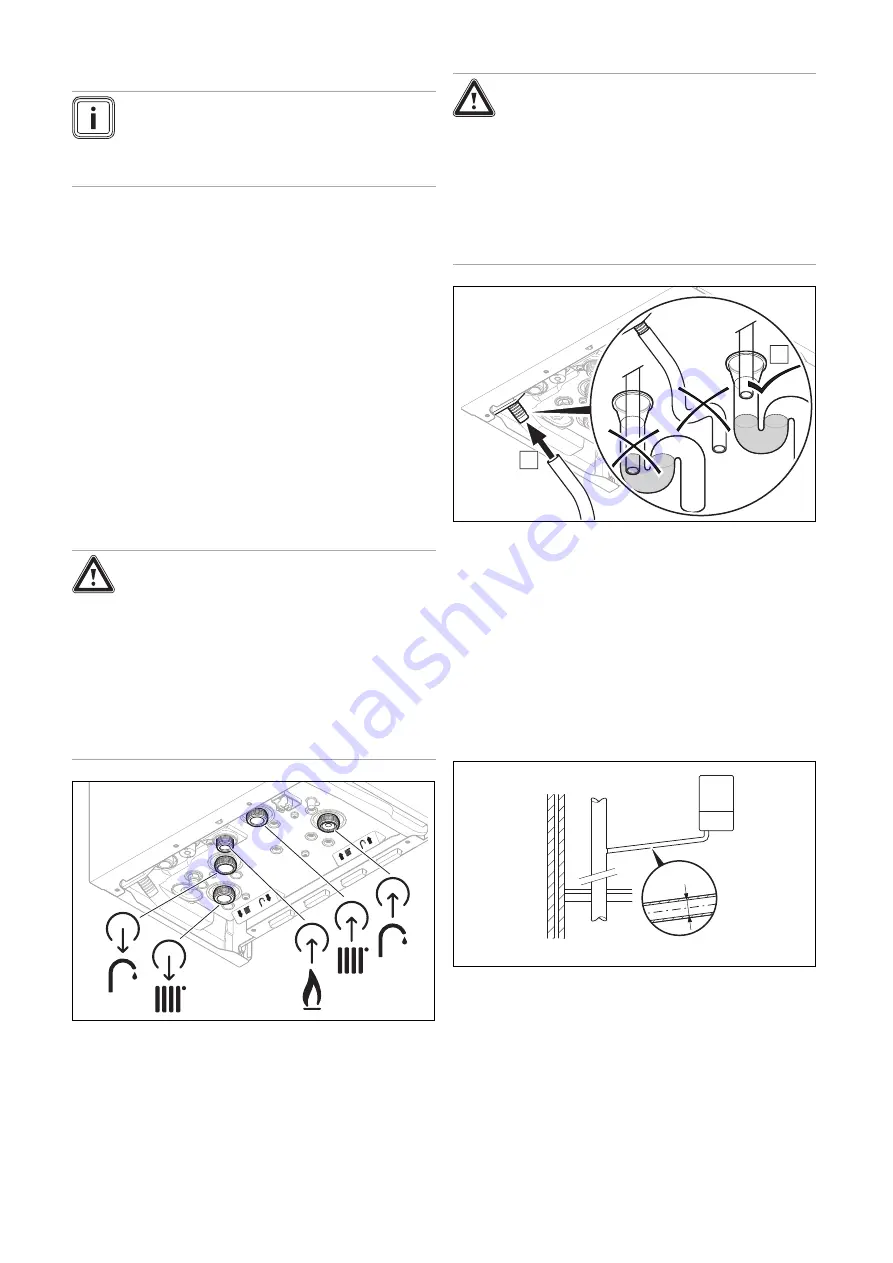
7.5
Overview of the condensate discharge
systems
7.5.1
Direct Connection to internal soil and vent
stack
Ø22mm
Preferred option