background image

22

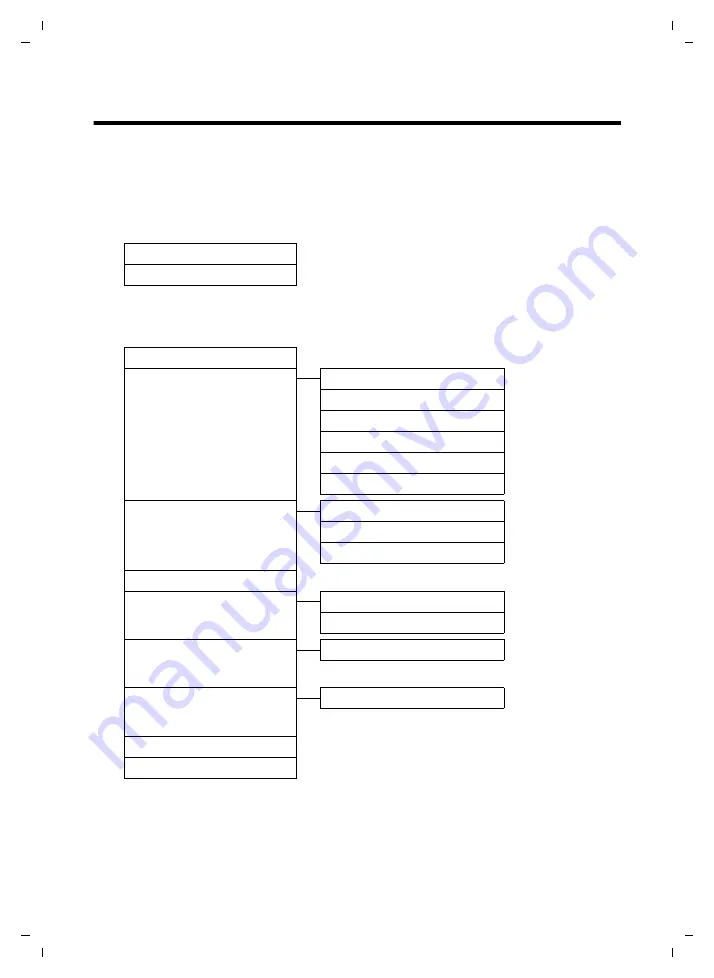
Menu tree

Gigaset A510H / Australia / A31008-M2252-C401-1-7619 / menuetree.fm / 18.04.2012

V

e

rsion 4.1, 21

.11.2007

Menu tree

The menu entries are divided into sections. The page numbers refer to the relevant description 
in the user guide

.

To open the main menu: 

press the


§Menu§

 display key when the phone is in idle mode.

ì

Alarm Clock

Activation

¢

page 31

Wake up time

¢

page 31

Ì

Voice Mail

(Menu dependent on base)

Ï

Settings

Date/Time

¢

page 14

Audio Settings

Call Volume

¢

page 32

Ringer Volume

¢

page 33

Advisory Tones

¢

page 34

Battery Low

¢

page 34

Ringtones (Handset)

¢

page 33

Ringtones (Base)

(dependent on base)

Display

Screensaver

¢

page 32

Colour Schemes

¢

page 32

Contrast

¢

page 32

Language

¢

page 32

Registration

Register Handset

¢

page 13

De-register Handset

(dependent on base)

Telephony

Auto Answer

¢

page 32

(further submenus dependent on base)


System

Reset Handset

¢

page 34

(further submenus dependent on base)


Eco Mode

¢

page 31

Eco Mode+

¢

page 31

Содержание A510H

Страница 1: ...08 M2252 C401 1 7619 Cover_front fm 18 04 2012 Congratulations By purchasing a Gigaset you have chosen a brand that is fully committed to sustainability This product s packaging is eco friendly To learn more visit www gigaset com ...

Страница 2: ...Gigaset A510H Australia A31008 M2252 C401 1 7619 Cover_front fm 18 04 2012 ...

Страница 3: ...ave fun using your new phone Directory for 150 entries Save phone numbers and names to the directory page 26 You can designate important entries as VIPs Very Important Persons VIP calls are then recognised by their ringtone and their background colour page 27 If you don t always want it to ring Use time control for calls page 33 or ensure that all calls from a withheld number are not signalled pag...

Страница 4: ... Activate deactivate ringtones press and hold 6 Message key page 28 Access to calls and message lists Flashing new message or new call 7 Microphone 8 Recall key Consultation call flash Insert a dialling pause press and hold 9 Hash key Keypad lock on off press and hold in idle sta tus Toggles between upper lower case and digits 10 End call key On Off key End call cancel function go back one menu le...

Страница 5: ...ge status of the batteries page 15 Name of the handset Current day current time page 14 Alarm clock switched on and wake up time set page 31 Number of new messages u à On the answering machine dependent on base net work mailbox page 28 u In the missed calls list page 28 Display keys page 4 Signal strength page 15 or Eco Mode icon page 31 Keypad locked page 19 Ringtone switched off page 34 Connecti...

Страница 6: ...er at a time from right to left Go back one menu level or can cel operation Main menu icons Information on using the menus page 18 Menu overview page 22 Û À μ Ð Ø Ü Ú Ø ì Ú z Ø å Ú Information Query Please wait Action failed Action complete Establishing a connection External call page 23 Alarm call page 31 Connection established Connection cannot be established or connection interrupted Internal c...

Страница 7: ...e 14 What would you like to do next 16 Using the phone 17 Control key 17 Keys on the keypad 17 Correcting incorrect entries 17 Using the menu 18 Activating deactivating the handset 19 Activating deactivating the keypad lock 19 Understanding the operating steps 20 Menu tree 22 Making calls 23 Making an external call 23 Ending a call 23 Accepting a call 23 Handsfree mode 23 Switching to mute 23 Maki...

Страница 8: ...reensaver 32 Automatically activating deactivating auto answer 32 Changing the handsfree earpiece volume 32 Changing ringtones 33 Restoring the handset default settings 34 Customer service product warranty Australia and New Zealand 35 Customer Service 35 Product Warranty 35 Questions and answers 37 Environment 37 Our environmental mission statement 37 Environmental management system 38 Disposal 38...

Страница 9: ... the Appendix chapter for the specifications of this Gigaset product Do not hold the rear of the handset to your ear when it is ringing or when handsfree mode is activated Otherwise you risk serious and permanent damage to your hear ing Your Gigaset is compatible with the majority of digital hearing aids on the market However perfect function with all hearing aids cannot be guaranteed The handset ...

Страница 10: ...31008 M2252 C401 1 7619 starting fm 18 04 2012 Version 4 1 21 11 2007 First steps Checking the package contents 1 One Gigaset A510H handset 2 Two batteries 3 One battery cover 4 One charger 5 One power adapter 6 One user guide 3 1 2 3 5 6 4 ...

Страница 11: ... of marks on the surfaces cannot be completely ruled out Please note u Never expose the telephone to the effects of heat sources direct sunlight or other electrical devices u Protect your Gigaset from moisture dust corrosive liquids and fumes Connecting the charger Please note Pay attention to the range of the base This is up to 300 m in unobstructed outdoor areas and up to 50 m inside build ings ...

Страница 12: ...erting the battery and closing the battery cover Insert the batteries with the polarity in the correct direction The polarity is indicated in the battery compart ment First insert the battery cover at the top a Then press the cover b until it clicks into place To open the battery cover for instance to replace the batteries insert a coin into the cavity on the casing then pull the battery cover in ...

Страница 13: ...charged If you have any questions about using your phone please read the tips on troubleshooting page 37 or contact our Customer Care team page 35 Please note The handset may only be placed in the designated base charger 5 5 h Please note u After the first battery charge and discharge you may place your handset in the charger after every call u Always repeat the charging and discharging procedure ...

Страница 14: ...d the end call key a to return to idle status Francais Back U OK L 4 English English x Francais Press right on the control key Press the keys L and 4 slowly one after the other The display for setting languages appears and the current language e g English is selected Press down on the control key s until the language you wish to use is displayed e g French Press the key below OK to select this lan...

Страница 15: ...andset with the display facing up in the base The handset registers automatically Registration can take up to 5 minutes Do not remove the handset from the base during this time ì Handset is registering U Place handset into base Redial Time Please note u Each key press interrupts automatic registration u If the handset is already registered to a base or if automatic registration does not work the h...

Страница 16: ...andsets please consult the base user guide Please note Depending on your network provider the date and time may be displayed auto matically Enter Date 04 04 2011 Redial Time Back OK Press the key below Time on the display screen to open the input field If you have already set the date time open the input field via the menu page 22 The Date Time submenu is shown on the display The active input posi...

Страница 17: ...ry almost empty less than 10 minutes talktime e V V Illuminated batteries charging u INT 1 Internal name of the handset If Eco Mode page 31 is activated the icon is displayed in the top left corner of the display Your phone is now ready for use μ Saved The display shows Saved You will hear a confirmation tone and the handset auto matically reverts to idle status or returns to the Settings menu if ...

Страница 18: ...an immediately start call ing or you can adapt it to your personal requirements Use the following guide to quickly locate the most important functions Information on is located here Using the phone page 17 Setting ringtones page 33 Transferring directory entries from existing Gigaset handsets to new handset s page 27 Setting Eco Mode Eco Mode page 31 Setting the earpiece volume page 32 g g g g g ...

Страница 19: ...In menus and lists t s Scroll up down line by line In input fields You can use the control key to move the cursor up t down s right v or left u During an external call v Mute the microphone s Open the directory u Initiate an internal consultation call t Adjust the loudspeaker volume for earpiece and handsfree mode Keys on the keypad c Q P etc Press the corresponding key on the handset Enter digits...

Страница 20: ...entry is displayed If you press the display key Back left on the control key u or briefly press the end call key a the display returns to idle status Submenus The functions in the submenu are displayed with the corresponding names Selecting a function You can scroll between functions using the control key q The relevant function is shown in the display Press the display key OK to select the displa...

Страница 21: ...any inadvertent use of the phone In idle status press and hold the hash key confirmation tone The key pad lock is activated or deactivated When the keypad lock is activated the Ø icon appears in the display If the keypad lock is activated a corresponding message is displayed when you press a key The keypad lock deactivates automatically when you receive a call It is reactivated when the call is fi...

Страница 22: ...wn in abbreviated form for example Menu Settings Eco Mode on This means you should proceed as follows Ï Settings Back W OK Redial Menu Press the key below Menu on the dis play screen to open the main menu Press down on the control key s Press the key below OK on the display screen to confirm your selection until the Settings menu item appears Press down on the control key s ...

Страница 23: ... 1 21 11 2007 Press the key below Back on the display screen to jump back to the previous menu level Or Press and hold the end call key a to return to idle status Ï Eco Mode Back U OK until the Eco Mode menu item appears Press the key below OK on the display screen to switch the function on or off on ...

Страница 24: ...e page 31 Ì Voice Mail Menu dependent on base Ï Settings Date Time page 14 Audio Settings Call Volume page 32 Ringer Volume page 33 Advisory Tones page 34 Battery Low page 34 Ringtones Handset page 33 Ringtones Base dependent on base Display Screensaver page 32 Colour Schemes page 32 Contrast page 32 Language page 32 Registration Register Handset page 13 De register Handset dependent on base Telep...

Страница 25: ...de In handsfree mode you activate the loud speaker so that you can hear the caller with out having to hold the handset to your ear You therefore have both hands free and other people can listen in on the conversa tion Activating deactivating handsfree mode During a call activate or deactivate hands free mode d Press the handsfree key Each key press switches between earpiece and hands free mode If ...

Страница 26: ...e talk key All handsets are called Ending a call a Press the end call key Internal consultation call connecting a call You are in conversation with an external par ticipant Press the control key u and call one or all handsets The external participant hears the music on hold u Before the internal participant has answered press the end call key a the call is diverted to the participant who answers t...

Страница 27: ...l key Q on your phone and listen for the dial tone then press Q again For more information please contact Telstra Optus You are on the phone and hear the beeps To put the first caller on hold and talk to the new caller the caller on hold will hear noth ing Press the Recall key Q on your phone To return to the first caller Press the Recall key Q and put the new caller on hold You can alternate betw...

Страница 28: ...ess OK Enter the name and press OK Storing a number in the directory s Menu New Entry Enter the number and press OK Enter the name and press OK Order of directory entries Directory entries are generally sorted alpha betically by surname Spaces and digits take first priority The sort order is as follows 1 Space 2 Digits 0 9 3 Letters alphabetical 4 Other characters To work round the alphabetical or...

Страница 29: ...ete all directory entries Send List Send the entire directory to a handset Transferring the directory to another handset page 27 Shortcut Assign the current entry to a shortcut key next section Using shortcut keys Using shortcut keys You can assign directory entries to the keys Q and 2 O s q select entry Menu Shortcut press the key you want to assign the number to In idle status press and hold the...

Страница 30: ...c Press the talk key briefly Or Redial Press the display key s Select entry c Press the talk key The number is dialled Managing entries in the redial list c Press the talk key briefly Or Redial Press the display key s Select entry Menu Open menu The following functions can be selected with q Use Number As in the directory page 27 Copy to Directory Storing a number in the directory page 26 Delete E...

Страница 31: ...isplayed e g 1 Press the display key OK Answering machine list dependent on base You can use the answering machine list to listen to the messages that are on the answering machine Calls list dependent on base Prerequisite Calling Line Identification Presentation CLIP Depending on the base the calls list con tains u All calls Accepted calls Unanswered calls Calls recorded by the answering machine u...

Страница 32: ... need to enter the number of the network mailbox Menu Voice Mail Network Mailbox selected Enter the network mailbox number and press OK The setting for fast access applies to all handsets Calling the network mailbox 1 Press and hold You are con nected straight to the network mailbox Viewing the network mailbox message When a message is recorded you receive a call from the network mailbox If you ha...

Страница 33: ...g the alarm clock Menu Alarm Clock Activation on After you activate the alarm clock the menu for setting the wake up time opens automat ically The ë icon and wake up time are shown on the display A wake up call is signalled on the display page 3 with the selected ringer volume and melody page 33 The wake up call sounds for 60 seconds If no key is pressed the wake up call is repeated twice at five ...

Страница 34: ...ations e g during a call or if the handset is de registered To show the display in idle status briefly press the end call key a Colour Schemes You can view the display backlight in dif ferent colours Four colour schemes are available Contrast Nine contrast settings are available Automatically activating deactivating auto answer If this function is activated you can simply lift the handset out of t...

Страница 35: ...OK q Select melody and press OK selected For external calls In idle status t Ringtones Handset External Calls Select and press OK q can be used to select the following Melodies You can set the ringtone as described above Time Control You can specify a time period when you do not want the telephone to signal external calls e g during the night Activation is switched on or off by press ing OK activa...

Страница 36: ...uses advisory tones to tell you about different activities and statuses These can be activated and deactivated independ ently of each other u Advisory Tones Confirmation tone at the end of an entry setting and when a new entry arrives in the calls list Error tone when you make an incor rect entry Key click every key press is confirmed u Battery Low The battery requires charging t Advisory Tones Ba...

Страница 37: ...failure Subject to the conditions stated in this Product Warranty Section this product excluding bat teryand accessory devices is guaranteedagainst any defectin materials or workmanship under conditions of normal use for a period of 12 months from date of purchase Product Warranty The benefits conferred by this warranty are in addition to other warranties and remedies that are implied under the Au...

Страница 38: ...rviced within ten business days after the defective product is received by the authorised agent Any and all warranty services referred to under this Product Warranty will be provided In Australia by CommsPlus Distribution Unit 3a 100 Station Street Nunawading Victoria 3131 Phone 1300 780 878 and in New Zealand by Atlas Gentech NZ Limited 76 Carbine Road Mt Wellington Auckland 1741 Phone 0800 780 8...

Страница 39: ...flashes on the display 1 The handset is outside the range of the base Move the handset closer to the base 2 The base s range is reduced because Eco Mode is activated Deactivate Eco Mode page 31 or reduce the distance between the handset and the base 3 The base is not activated Check the base power adapter 4 Handset has not been registered with the base or has been de registered Register the handse...

Страница 40: ...erve to prevent potential harm to the environment and to health They are a precon dition for the re use and recycling of used electrical and electronic equipment For further information on disposing of your used equipment please contact your local authority or your refuse collection service Appendix Care Wipe the base station charging cradle and handset with a damp cloth do not use sol vent or an ...

Страница 41: ... teries in the FAQ section of the Gigaset Cus tomer Care pages is updated regularly www gigaset com service General specifications Capacity mAh approx 550 700 800 1000 Standby time hours 220 255 290 360 Talktime hours 20 23 27 33 Operating time for 1 5 h of calls per day hours Without Eco Mode With Eco Mode 135 95 155 110 180 130 255 155 Chargingtimeinbase hours 6 7 8 10 Charging time in charger h...

Страница 42: ...ess the hash key to change the text input mode When themodeischanged theactivemode is indicated at the bottom left of the screen Writing names Enter the individual letters characters by pressing the corresponding key The characters assigned to the key are shown in a selection line at the bottom left of the screen The selected character is high lighted Briefly press the key several times in suc ces...

Страница 43: ...formation about the handset functions in connection with the individual Gigaset bases at www gigaset com compatibility Ordering Gigaset products All accessories and batteries are available from your phone retailer Use only original accessories This will avoid possible health risks and personal injury and also ensure that all the relevant regulations are complied with 21 6 mm approx 3 3 mm ...

Страница 44: ...or 2 3 Colour scheme 32 Confirmation tone 34 Connecting 24 Consultation call internal 24 Contrast 32 Control key 2 17 Correcting incorrect entries 17 Customer service product warranty Australia and New Zealand 35 D Deactivating auto answer 32 flashing message key 29 handset 19 keypad lock 19 Delete key 4 Deleting characters 17 Dialling using shortcut 27 with directory 26 Digital clock 32 Directory...

Страница 45: ...9 ringtone 34 Idle status display 15 18 returning to 18 Incorrect entries correction 17 Internal consultation 24 Internal call call waiting 25 K Key 1 quick dial 2 Keypad lock 19 Keys assigning directory entry 27 control key 2 17 delete key 4 display keys 2 4 end call key 2 23 hash key 2 19 message key 2 on off key 2 quick dial 2 recall key 2 shortcut 27 star key 2 talk key 2 23 L Language display...

Страница 46: ...2 Redial 28 Registering handset 13 Ringer setting melody 33 Ringtone changing 33 setting volume 33 S Screen protection see Screensaver Screensaver 32 Searching in directory 26 Sending directory entry to handset 27 Setting date 14 melody ringtone 33 time 14 wake up time 31 Setting up base 9 handset 10 Shortcut 27 SMS dependent on base writing 40 Snooze mode 31 Sound see Ringtone Specifications 39 S...

Страница 47: ......

Страница 48: ...Gigaset A510H Australia A31008 M2252 C401 1 7619 Cover_back fm 16 08 2013 Version 21 08 2013 ...

Отзывы: