background image

BIOS Setup

- 59 -

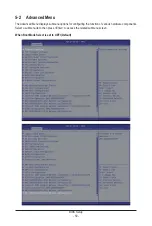
5-2  Advanced Menu

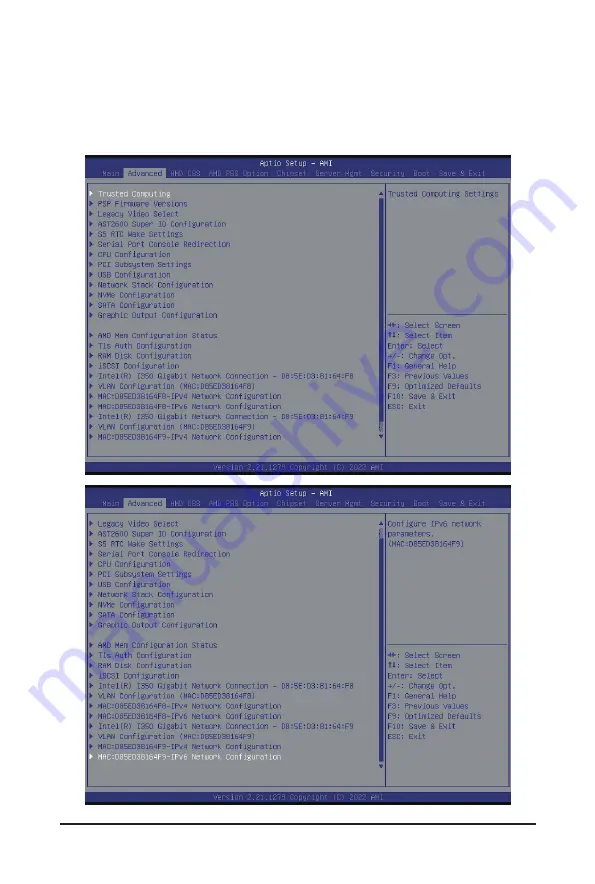
The Advanced Menu displays submenu options for configuring the function of various hardware components. 

Select a submenu item, then press <Enter> to access the related submenu screen.  

When Boot Mode Select is set to UEFI (Default)

Содержание H273-Z82-AAN1

Страница 1: ...H273 Z82 AAN1 H273 Z82 AAW1 HCI Server AMD EPYC 9004 DP 2U 4 Node Server 8 x Gen4 NVMe SATA 2600W AAN1 HCI Server AMD EPYC 9004 DP 2U 4 Node Server 8 x Gen4 NVMe SATA 3000W AAW1 User Manual Rev 1 0 ...

Страница 2: ... and BIOS User Guide detailed information about the installation use of an add on hardware or software component e g BMC firmware rail kit compatible with this product Quick Installation Guide a short guide with visual diagrams that you can reference easily for installation purposes of this product e g motherboard server barebones Please see the support section of the online product page to check ...

Страница 3: ...guide NOTE Gives bits and pieces of additional information related to the current topic CAUTION Gives precautionary measures to avoid possible hardware or software problems WARNING Alerts you to any damage that might result from doing or not doing specific actions ...

Страница 4: ... This server is equipped with high speed fans Keep away from hazardous moving fan blades during servicing WARNING This equipment is not suitable for use in locations where children are likely to be present WARNING This equipment is intended to be used in Restrict Access Location The access can only be gained by Skilled person Only authorized by well trained professional person can access the restr...

Страница 5: ...scharge ESD and ESD protection ESD can damage drives boards and other parts We recommend that you perform all procedures in this chapter only at an ESD workstation If one is not available provide some ESD protection by wearing an antistatic wrist strap attached to chassis ground any unpainted metal surface on the server when handling parts ESD and handling boards Always handle boards carefully The...

Страница 6: ...on if battery is replaced incorrectly or with an incorrect type Replace the battery only with the same or equivalent type recommended by the manufacturer Dispose of used bat teries according to the manufacturer s instructions ...

Страница 7: ...Cover 29 3 4 Removing and Installing the Fan Duct 30 3 5 Removing and Installing the Heatsink 31 3 6 Removing and Installing the CPU 34 3 7 Installing Memory 36 3 7 1 Twelves Channel Memory Configuration 36 3 7 2 Installing the Memory 37 3 7 3 Processor and Memory Module Matrix Table 37 3 7 4 Memory Population Table 38 3 8 Installing the PCI Expansion Card 40 3 9 Removing and Installing the Rear I...

Страница 8: ...phic Output Configuration 79 5 2 14 AMD Mem Configuration Status 80 5 2 15 Tls Auth Configuration 81 5 2 16 RAM Disk Configuration 82 5 2 17 iSCSI Configuration 83 5 2 18 Intel R I350 Gigabit Network Connection 84 5 2 19 VLAN Configuration 86 5 2 20 MAC IPv4 Network Configuration 87 5 2 21 MAC IPv6 Network Configuration 88 5 3 AMD CBS Menu 89 5 3 1 CPU Common Options 90 5 3 2 DF Common Options 96 ...

Страница 9: ...ion 156 5 6 3 BMC Network Configuration 157 5 6 4 IPv6 BMC Network Configuration 158 5 7 Security Menu 159 5 7 1 Secure Boot 160 5 8 Boot Menu 162 5 9 Save Exit Menu 164 5 10 BIOS Recovery 165 5 11 BIOS POST Beep code AMI standard 166 5 11 1 PEI Beep Codes 166 5 11 2 DXE Beep Codes 166 ...

Страница 10: ... 10 This page intentionally left blank ...

Страница 11: ... dry and first touch a metal object to eliminate static electricity Prior to installing the motherboard please have it on top of an antistatic pad or within an electrostatic shielding container Before unplugging the power supply cable from the motherboard make sure the power supply has been turned off Before turning on the power make sure the power supply voltage has been set according to the loca...

Страница 12: ...ting Properties Power Supply System fan Memory Per Node 24 x DIMM slots Total 96 x DIMM slots DDR5 memory supported only 12 Channel memory architecture RDIMM modules up to 128GB supported 3DS RDIMM modules up to 256GB supported Memory speed Up to 4800 MHz cket t Security Security Server Operating Properties Power Supply System fan LAN Per Node 2 x 1GbE LAN ports 1 x Intel I350 AM2 Supported NCSI f...

Страница 13: ...s NGFF 2280 22110 cards Optional kit for M 2 extension riser card PN 9CMTP192NR 00 Socket Socket Security Security Server Operating Properties Power Supply System fan SAS Supported via add on SAS Card Socket Socket Security Security Server Operating Properties Power Supply System fan Expansion Slots Per node 1 x Low profile half length slots with PCIe x16 Gen5 x16 bus from CPU_0 1 x OCP 3 0 mezzan...

Страница 14: ...s LED 1 x CMC reset button Only one CMC status LED and reset button per system Socket Socket Security Security Server Operating Properties Power Supply System fan Rear I O Per node 2 x USB 3 2 Gen1 1 x Mini DP 2 x RJ45 1 x RJ45 MLAN 1 x Node Status LED Total 8 x USB 3 2 Gen1 4 x Mini DP 8 x RJ45 4 x RJ45 MLAN 4 x Node Status LED Socket Socket Security Security Server Operating Properties Power Sup...

Страница 15: ...utput Max 1000W 100 127V 12 2V 81A 12 2Vsb 4 5A Max 2600W 200 220V 12 2V 213A 12Vsb 4 5A System power supply requires C19 type power cord AAW1 Dual 3000W 240V 80 PLUS Titanium redundant power supply AC Input 100 127V 16A 50 60Hz 200 240V 16A 50 60Hz DC Input 240Vdc 16A DC Output Max 1200W 100 127V 12 2V 98 36A 12 2Vsb 3A Max 2600W 200 207V 12 2V 213A 12 2Vsb 3A Max 3000W 208 240V 12 2V 245 9A 12 2...

Страница 16: ... Storage Circular Storage Policy Hardware Inventory Fan Profile System Firewall Power Consumption Power Control LDAP AD RADIUS Support Backup Restore Configuration Remote BIOS BMC CPLD Update Event Log Filter User Management Media Redirection Settings PAM Order Settings SSL Settings SMTP Settings cket t Security Security Server Operating Properties Power Supply System fan Operating Properties Oper...

Страница 17: ...AN Hub NCSI NCSI Switch BMC ASPEED AST2600 Intel I350 AM2 SPI PCIe2 0 x1 USB2 0 x1 TPM USB Hub 12 Channel DDR5 12 x DIMMs Speed up to 4800 MHz 12 Channel DDR5 12 x DIMMs Speed up to 4800 MHz xGMI3 32GT s 4 x16 GOP PCIe5 0 x16 LP slot Riser CRSH01R PCIe4 0 x4 PCIe4 0 x8 PCIe5 0 x16 SATAIII x6 SATAIII x2 OCP 3 0 CPU0 AMD EPYC 9004 Socket SP5 CPU1 AMD EPYC 9004 Socket SP5 USB3 2 Gen1 2 bay 2 5 NVMe S...

Страница 18: ... Please Go to Chapter 2 3 Front Panel LED and Buttons for detail description of function LEDs NODE1 NODE2 NODE3 NODE4 1 1 HDD 0 HDD 1 HDD 6 HDD 7 HDD 12 HDD 13 HDD 18 HDD 19 1 1 No Decription 1 Front Panel LEDs and buttons NOTE Drives with green latches support NVMe ...

Страница 19: ...ce 19 2 2 Rear View No Decription 1 PCIe Slot 2 Node System Status LED 3 Mini DP Port 4 2 x USB 3 2 Gen1 5 GbE LAN Port x 2 6 BMC Server Management LAN Port 7 OCP 3 0 Slot SFF Type 7 2 3 4 5 6 1 PSU1 PSU2 SLOT2 SLOT1 ...

Страница 20: ...e hibernate mode 4 ID Button with LED Note This LED represents the RoT function LED behavior Please see the following section for detail LED behavior 5 Enclosure Green On System is operating normally Amber On Critical condition may indicates Power module failure System fan failure Power supply voltage issue System temperature Blink Non critical condition may indicates Redundant power module failur...

Страница 21: ... times per second Blinks Green 4 times per second Recovering BIOS Active Flash Blinks Blue 4 times per second Blinks Amber 4 times per second Authentication AUTH Pass Recovering BIOS Active Flash OFF OFF BMC AUTH pass after doing recovery BIOS AUTH pass after doing recovery OFF OFF BMC AUTH pass after doing recovery BIOS AUTH pass OFF OFF BMC AUTH pass BIOS AUTH pass after doing recovery OFF OFF A...

Страница 22: ...oken or not exited result in Microchip CEC1702 cannot load EC FW for authentication 2 1 Authentication fail include below scenarios Configuration table is missing or modified Public key is missing or modified Protected area or signature is modified Flash empty 3 if active flash is still authentication failed after recovery sequence Microchip CEC1702 stop the process and showing LED behavior 4 If b...

Страница 23: ... Speed LED Yellow On 1Gbps data rate Green On 100 Mbps data rate N A Off 10 Mbps data rate 2 1GbE Link Activity LED Green On Link between system and network or no access Blink Data transmission or receiving is occurring N A Off No data transmission or receiving is occurring 1 2 1 1 2 2 ...

Страница 24: ...Hz Green Blinking Power supply firmware updateing mode Amber AC cord unplugged or AC power lost with a second power supply in parallel still with AC input power Power supply critical event causing shut down failure OCP OVP fan failure and UVP 1Hz Amber Blinking Power supply warning events where the power supply continues to operate high temp high power high current and slow fan ...

Страница 25: ...Back Panel Removed HDD Slot LED on Back Panel Disk LED Removed HDD Slot RAID SKU No RAID configuration via HBA RAID configuration via HW RAID Card or SW RAID Card HDD Access HDD Present No Access BLINK 2 BLINK 2 OFF OFF OFF OFF OFF OFF Low Speed 2 Hz 3 3 Rebuilding HDD Fault OFF OFF ON OFF ON OFF OFF OFF Locate Amber Green ON 1 ON OFF ON 1 OFF Green Amber Green ON 1 Green OFF Amber Amber OFF LED1 ...

Страница 26: ...u are working inside the computer case If possible wear a grounded wrist strap when you are working inside the computer case Alternatively discharge any static electricity by touching the bare metal system of the computer case or the bare metal body of any other grounded appliance Hold electronic circuit boards by the edges only Do not touch the components on the board unless it is necessary to do...

Страница 27: ...erted incorrectly Make sure that the HDD is connected to the HDD connector on the backplane Follow these instructions to install the Hard disk drive 1 Press the release button 2 Extend the locking lever 3 Pull the locking lever to remove the HDD tray 4 Align the hard disk drive with the positioning stud on the HDD tray 5 Slide hard disk drive into the blank HDD tray 6 Reinsert the HDD tray into th...

Страница 28: ... simultaneously pushing down the tray handle for the node 2 Pull the node out of the system 3 To install the node push the node back into the system 1 2 3 Read the following guidelines before you begin to replace a node To make sure the system operates normally please power off only the node that will be replaced or reconfigured ...

Страница 29: ...ystem cover Make sure the system is not turned on or connected to AC power Follow these instructions to remove the system cover 1 Loosen and remove the six screws securing the back cover 2 Slide the cover to the rear of the system and remove the cover in the direction of the arrow 1 1 1 1 1 1 2 ...

Страница 30: ... remove install the fan duct 1 Remove the two screws securing the fan ducts 2 Lift up to remove the fan ducts 3 To install the fan duct align the fan duct with the guiding groove Push down the fan duct into chassis until its firmly seats then install the four screws to secure the fan ducts in place 1 1 ...

Страница 31: ...ause seri ous damage Do not attempt the procedures described in the following sections unless you are a qualified service technician Follow these instructions to remove the heatsink 1 Loosen the four captive screws securing the heatsink to the system 2 Lift and remove the heatsink WARNING CPU0 and CPU1 use different CPU heatsinks See the following images for using the correct heatsink Failure to o...

Страница 32: ... 32 System Hardware Installation CPU1 Heatsink CPU0 Heatsink 1 2 1 1 1 1 5 5 3 3 2 2 4 4 6 6 1 1 5 5 3 3 2 2 4 4 6 6 1 2 ...

Страница 33: ...low CPU0 Heatsink CPU1 Heatsink Lock the CPU by using a Torx T20 screwdriver to tighten screw When installing the heatsink to CPU use a Torx T20 screwdriver to tighten 6 captive nuts in sequence as 1 6 The screw tightening torque 13 5 0 5 kgf cm To ensure the system operates properly make sure the heatsink is seated on the processor firmly 6 6 2 2 4 4 5 5 3 3 1 1 6 6 2 2 4 4 5 5 3 3 1 1 ...

Страница 34: ...s described in the following sections unless you are a qualified service technician Follow these instructions to install the CPU 1 Loosen the three captive screws securing the CPU cover 2 Flip open the CPU cover 3 Remove the CPU carrier from the CPU frame using the handle on the CPU carrier 4 Using the handle on the CPU carrier insert the new CPU carrier with CPU installed into the CPU frame NOTE ...

Страница 35: ... to tighten screw When installing the heatsink to CPU use a Torx T20 screwdriver to tighten 6 captive nuts in sequence as 1 6 The screw tightening torque 13 5 0 5 kgf cm To ensure the system operates properly make sure the heatsink is seated on the processor firmly CPU 4 5 6 7 ...

Страница 36: ...motherboard supports the memory It is recommended that memory of the same capacity brand speed and chips be used Always turn off the computer and unplug the power cord from the power outlet before installing the memory to prevent hardware damage Memory modules have a foolproof design A memory module can be installed in only one direction If you are unable to insert the memory switch the direction ...

Страница 37: ... V V V V V V V V V V V V V V V V V V V V V V V V V V V V V V V V V V V V Before installing a memory module make sure to turn off the computer and unplug the power cord from the power outlet to prevent damage to the memory module Be sure to install DDR4 DIMMs on this motherboard Follow these instructions to install the Memory 1 Insert the DIMM memory module vertically into the DIMM slot and push it...

Страница 38: ... 2S8Rx4 16 ranks 4800 EPYC Memory Speed based on DIMM Population Two DIMM per Channel 14 layer 93mil high Dk PCB stackup DIMM Type DIMM Population Max EPYC 9004 DDR5 Frequency MT s DIMM 0 DIMM 1 RDIMM 1R 4800 1R 1R 4000 2R 4400 1R 2R 3600 2R 2R 3600 3DS 2S2R 4 Ranks 4400 2S4R 8 Ranks 4400 2S8R 16 Ranks 4400 2S2R 4 Ranks 2S2R 4 Ranks 3600 2S4R 8 Ranks 2S4R 8 Ranks 3600 2S8Rx4 16 Ranks 2S8Rx4 16 Ran...

Страница 39: ...M 0 DIMM 1 RDIMM 1R 4800 1R 1R 4400 2R 4800 1R 2R 4000 2R 2R 4000 3DS 2S2R 4 Ranks 4800 2S4R 8 Ranks 4800 2S8R 16 Ranks 4800 2S2R 4 Ranks 2S2R 4 Ranks 4000 2S4R 8 Ranks 2S4R 8 Ranks 4000 2S8Rx4 16 Ranks 2S8Rx4 16 Ranks 4000 Note When only one DIMM is used it must be populated in memory slot DIMM1 ...

Страница 40: ...cket to the system 2 Lift up the riser bracket out of system 3 Remove the screw securing the side bracket to the riser bracket 4 Remove the side bracket 5 Align the PCIe card to the riser guide slot and push in the direction of the arrow until the PCI E card sits in the PCI card connector 6 Secure the PCIecard with a screw 7 Install the side bracket to the riser bracket 8 Secure the side bracket t...

Страница 41: ... 41 System Hardware Installation 8 7 5 6 ...

Страница 42: ...lling the Rear IO Card 1 2 Follow these instructions to install the Rear IO card 1 Remove the three screws securing the Rear IO card to the system 2 Lift up the Rear IO card out of system 3 Reverse steps 1 2 to install the Rear IO card back into the system ...

Страница 43: ...or latch Follow these instructions to install an OCP 3 0 Mezzanine card 1 Remove the one screw securing the OCP 3 0 card slot cover 2 Remove the slot cover from the system 3 Insert the OCP 3 0 card into the card slot ensuring that the card is firmly connected to the connector on the motherboard 4 Tighten the thumbnail screw to secure the OCP 3 0 card in place 5 Reverse steps 3 4 to replace the OCP...

Страница 44: ... replacement fan assembly Voltages can be present within the server whenever an AC power source is connected This voltage is present even when the main power switch is in the off position Ensure that the system is powered down and all power sources have been disconnected from the server prior to replacing a system fan Failure to observe these warnings could result in personal injury or damage to e...

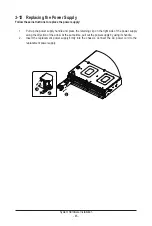
Страница 45: ... Pull up the power supply handle and press the retaining clip on the right side of the power supply along the direction of the arrow At the same time pull out the power supply by using its handle 2 Insert the replacement power supply firmly into the chassis Connect the AC power cord to the replacement power supply 1 3 2 ...

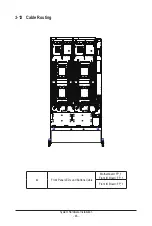
Страница 46: ...System Hardware Installation 46 3 13 Cable Routing A Front Panel LEDs and Buttons Cable Motherboard FP_1 Front IO Board FP_1 Front IO Board FP_1 A A A A ...

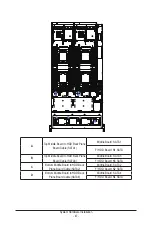
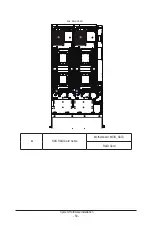
Страница 47: ...d SATA1 F HDD Board N1 SATA B Top Middle Board to HDD Back Plane Board Cable SATA3 Middle Board SATA3 F HDD Board N3 SATA C Bottom Middle Board to HDD Back Plane Board Cable SATA2 Middle Board SATA2 F HDD Board N2 SATA D Bottom Middle Board to HDD Back Plane Board Cable SATA4 Middle Board SATA4 F HDD Board N4 SATA ...

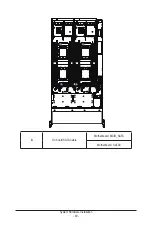
Страница 48: ... HDD Board N1 U 2 A B Top Middle Board to HDD Back Plane Board Cable NVMe Node3 Middle Board N3_U2_A F HDD Board N3 U 2 A C Bottom Middle Board to HDD Back Plane Board Cable NVMe Node2 Middle Board N2 U 2 A F HDD Board N2 U 2 A D Bottom Middle Board to HDD Back Plane Board Cable NVMe Node4 Middle Board N4_U2_A F HDD Board N4 U 2 A ...

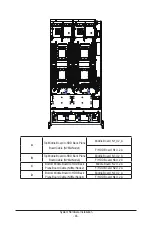
Страница 49: ...System Hardware Installation 49 A On board SATA Cable Motherboard MCIO_SATA Motherboard SATA0 A A A A ...

Страница 50: ... 50 System Hardware Installation A SAS RAID Card Cable Motherboard MCIO_SATA RAID Card SAS RAID CARD A A A A ...

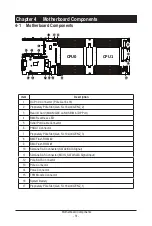
Страница 51: ... Rear IO Card MLAN GbE LAN USB Mini DP Port 4 BMC Readiness LED 5 Serial Port Cable Connector 6 PSOUT Connector 7 Proprietary PCIe Slot Gen 5 x10 slot GENZ_3 8 BMC Flash ROM 2 9 BMC Flash ROM 1 10 SlimLine SAS Connector SATA0 SATA Signal 11 SlimLine SAS Connector MCIO_SATA SATA Signal Input 12 PCIe SATA Connector 13 PCIe Connector 14 Powe Connector 15 TPM Module Connector 16 System Battery 17 Prop...

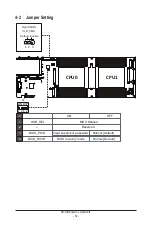
Страница 52: ...ts 52 4 2 Jumper Setting CPU0 CPU1 1 2 3 Clear CMOS CLR_CMS Default Enable ON BIOS Defined Reserved OFF HSB_SEL BIOS_PWD J1 1 2 3 BIOS_RCVR 4 Clear supervisor password BIOS recovery mode Normal Default Normal Default 21 3 ...

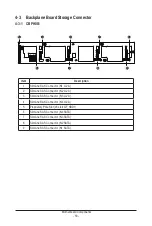
Страница 53: ...ion 1 SlimLine SAS Connector N1 U 2 A 2 SlimLine SAS Connector N2 U 2 A 3 SlimLine SAS Connector N3 U 2 A 4 SlimLine SAS Connector N4 U 2 A 5 Proprietary PCIe Slot x8 slot GF_HDD1 6 SlimLine SAS Connector N4 SATA 7 SlimLine SAS Connector N3 SATA 8 SlimLine SAS Connector N2 SATA 9 SlimLine SAS Connector N1 SATA ...

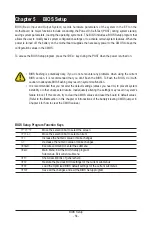
Страница 54: ... with caution Inadequate BIOS flashing may result in system malfunction It is recommended that you not alter the default settings unless you need to to prevent system instability or other unexpected results Inadequately altering the settings may result in system s failure to boot If this occurs try to clear the CMOS values and reset the board to default values Refer to the Exit section in this cha...

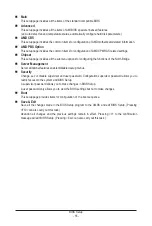
Страница 55: ...f the North Bridge Server Management Server additional features enabled disabled setup menus Security Change set or disable supervisor and user password Configuration supervisor password allows you to restrict access to the system and BIOS Setup A supervisor password allows you to make changes in BIOS Setup A user password only allows you to view the BIOS settings but not to make changes Boot This...

Страница 56: ... displayed on the bottom line of the Main Menu Submenu Help While in a submenu press F1 to display a help screen General Help of function keys available for the menu Press Esc to exit the help screen Help for each item is in the Item Help block on the right side of the submenu When the system is not stable as usual select the Restore Defaults item to set your system to its defaults The BIOS Setup ...

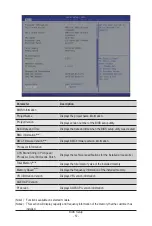
Страница 57: ...rmation CPU Brand String CPU Speed Processor Core Microcode Patch Displays the technical specifications for the installed processor s Total Memory Note2 Displays the total memory size of the installed memory Memory SpeedNote2 Displays the frequency information of the installed memory VR Information Version Displays VR version information AGESA PI Version PI Version Displays AGESA PI version inform...

Страница 58: ...eter Description Onboard LAN Information LAN1 MAC Address Note Displays LAN MAC address information LAN2 MAC Address Note Displays LAN MAC address information System Date Sets the date following the weekday month day year format System Time Sets the system time following the hour minute second format ...

Страница 59: ...Menu The Advanced Menu displays submenu options for configuring the function of various hardware components Select a submenu item then press Enter to access the related submenu screen When Boot Mode Select is set to UEFI Default ...

Страница 60: ...BIOS Setup 60 When Boot Mode Select is set to Legacy in the Boot Boot Mode Select section ...

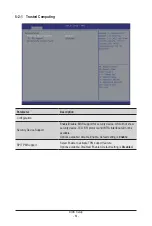
Страница 61: ...le BIOS support for security device OS will not show security device TCG EFI protocol and INT1A interface will not be available Options available Disable Enable Default setting is Enable SPI TPM Support Select Enable to activate TPM support feature Options available Disabled Enabled Default setting is Disabled ...

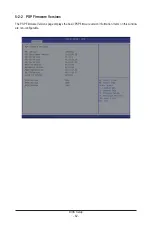
Страница 62: ...BIOS Setup 62 5 2 2 PSP Firmware Versions The PSP Firmware Versions page displays the basic PSP firmware version information Items on this window are non configurable ...

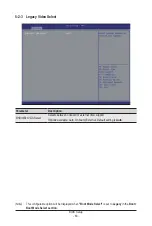
Страница 63: ...ion OnBrd Ext VGA Select Selects between onboard or external VGA support Options available Auto Onboard External Default setting is Auto Note This configurable option will be displayed when Boot Mode Select is set to Legacy in the Boot Boot Mode Select section ...

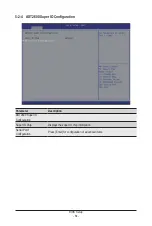
Страница 64: ... 2 4 AST2600 Super IO Configuration Parameter Description AST2600 Super IO Configuration Super IO Chip Displays the super IO chip information Serial Port 1 Configuration Press Enter for configuration of advanced items ...

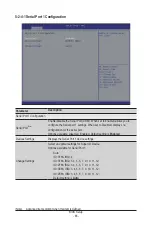
Страница 65: ...n for the serial port Options available Disabled Enabled Default setting is Enabled Devices Settings Displays the Serial Port 1 device settings Change Settings Select an optimal settings for Super IO Device Options available for Serial Port 1 Auto IO 3F8h IRQ 4 IO 3F8h IRQ 3 4 5 6 7 9 10 11 12 IO 2F8h IRQ 3 4 5 6 7 9 10 11 12 IO 3E8h IRQ 3 4 5 6 7 9 10 11 12 IO 2E8h IRQ 3 4 5 6 7 9 10 11 12 Defaul...

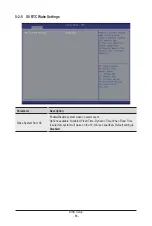
Страница 66: ...ngs Parameter Description Wake System from S5 Enable Disable system wake on alarm event Options available Disabled Fixed Time Dynamic Time When Fixed Time is selected system will wake on the hr min sec specified Default setting is Disabled ...

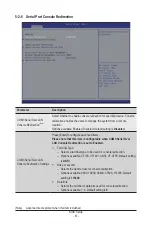
Страница 67: ...M1 Serial Over LAN Console Redirection Settings Press Enter to configure advanced items Please note that this item is configurable when COM1 Serial Over LAN Console Redirection is set to Enabled Terminal Type Selects a terminal type to be used for console redirection Options available VT100 VT100 ANSI VT UTF8 Default setting is ANSI Bits per second Selects the transfer rate for console redirection...

Страница 68: ...s 1 Flow Control Flow control can prevent data loss from buffer overflow When sending data if the receiving buffers are full a stop signal can be sent to stop the data flow Once the buffers are empty a start signal can be sent to re start the flow Hardware flow control uses two wires to send start stop signals Options available None Hardware RTS CTS Default setting is None VT UTF8 Combo Key Suppor...

Страница 69: ...s EMS Console Redirection Note EMS console redirection allows the user to configure Console Redirection Settings to support Out of Band Serial Port management Options available Disabled Enabled Default setting is Disabled Serial Port for Out of Band EMS Console Redirection Settings Press Enter to configure advanced items Please note that this item is configurable when Serial Port for Out of Band M...

Страница 70: ...ta loss from buffer overflow When sending data if the receiving buffers are full a stop signal can be sent to stop the data flow Once the buffers are empty a start signal can be sent to re start the flow Hardware flow control uses two wires to send start stop signals Options available None Hardware RTS CTS Software Xon Xoff Default setting is None ...

Страница 71: ...Configuration Parameter Description SVM Mode Enable Disable the CPU Virtualization Options available Disabled Enabled Default setting is Enabled CPU 0 1 Information Press Enter to view the memory information related to CPU 0 1 ...

Страница 72: ...BIOS Setup 72 5 2 8 PCI Subsystem Settings ...

Страница 73: ...ezzanine OCP max link speed Options available Auto Gen5 Gen4 Gen3 Gen2 Gen1 Default setting is Auto Onboard LAN Controller Note3 Enable Disable the onboard LAN devices Options available Disabled Enabled Default setting is Enabled Onboard LAN I O ROM Note3 Enable Disable the onboard LAN devices and initializes device expansion ROM Options available Disabled Enabled Default setting is Enabled PCI De...

Страница 74: ...SB devices are connected DISABLE option will keep USB devices available only for EFI applications Options available Enabled Disabled Auto Default setting is Enabled XHCI Hand off Enable Disable the XHCI Hand off support Options available Enabled Disabled Default setting is Enabled USB Mass Storage Driver Support Note Enable Disable the USB Mass Storage Driver Support Options available Disabled Ena...

Страница 75: ...ault setting is 20 sec Device power up delay Maximum time the device will take before it properly reports itself to the Host Controller Auto uses default value for a Root port it is 100 ms for a Hub port the delay is taken from Hub descriptor Options available Auto Manual Default setting is Auto Mass Storage Devices Displays the mass storage devices available on the system ...

Страница 76: ...the Ipv4 HTTP feature Options available Enabled Disabled Default setting is Disabled Ipv6 PXE Support Note Enable Disable the Ipv6 PXE feature Options available Enabled Disabled Default setting is Enabled Ipv6 HTTP Support Note Enable Disable the Ipv6 HTTP feature Options available Enabled Disabled Default setting is Disabled PXE boot wait time Note Wait time in seconds to press ESC key to abort t...

Страница 77: ...onfiguration Parameter Description NVMe Configuration Displays the NVMe devices connected to the system NVMe LED Control Enable Disable NVMe LED Control Options available System Default Disabled Enabled Default setting is Enabled ...

Страница 78: ...BIOS Setup 78 5 2 12 SATA Configuration Parameter Description SATA Configuration Displays the installed HDD devices information System will automatically detect HDD type ...

Страница 79: ... 13 Graphic Output Configuration Parameter Description Output Device Type Selects output device type Options available First loaded Device Onboard Device External Device Specific Device Default setting is Onboard Device ...

Страница 80: ...BIOS Setup 80 5 2 14 AMD Mem Configuration Status Parameter Description CPU 0 1 Press Enter to view the memory configuration status related to CPU 0 1 ...

Страница 81: ...iguration of advanced items Enroll Cert Press Enter to enroll a certificate Enroll Cert Using File Cert GUID Input digit character in 1111111 2222 3333 4444 1234567890ab format Commit Changes and Exit Discard Changes and Exit Delete Cert Client Cert Configuration Press Enter for configuration of advanced items ...

Страница 82: ...disk Options available Boot Service Data Reserved Default setting is Boot Service Data Create Raw Creates a raw RAM disk Size Hex Input a valid RAM disk size that should be multiple of the RAM disk block size Create Exit Discard Exit Create from file Creates a RAM disk from a given file Created RAM disk list Remove selected RAM disk s Selects the RAM disk s to remove ...

Страница 83: ...Initiator Name Press Enter and name iSCSI Initiator Only IQN format is accepted Range from 4 to 223 Add an Attempt Press Enter to configure advanced items Delete Attempts Press Enter to configure advanced items Change Attempt Order Press Enter to configure advanced items ...

Страница 84: ...BIOS Setup 84 5 2 18 Intel R I350 Gigabit Network Connection ...

Страница 85: ... Press the numeric keys to adjust desired values UEFI Driver Displays the technical specifications for the Network Interface Controller Adapter PBA Displays the technical specifications for the Network Interface Controller Device Name Displays the technical specifications for the Network Interface Controller Chip Type Displays the technical specifications for the Network Interface Controller PCI D...

Страница 86: ...g VLAN Press the keys to increase or decrease the desired values The valid range is from 0 to 4094 Priority Sets 802 1Q Priority for a new VLAN or an existing VLAN Press the keys to increase or decrease the desired values The valid range is from 0 to 7 Add VLAN Press Enter to create a new VLAN or update an existing VLAN Configured VLAN List Remove VLAN Press Enter to remove an existing VLAN ...

Страница 87: ...ote Options available Enabled Disabled Default setting is Disabled Local IP Address Note Press Enter to configure local IP address Local NetMask Note Press Enter to configure local NetMask Local Gateway Note Press Enter to configure local Gateway Local DNS Servers Note Press Enter to configure local DNS servers Save Changes and Exit Press Enter to save all configurations Note This item appears whe...

Страница 88: ...for the device The string is colon separated e g ff dd 88 66 cc 1 2 3 DAD Transmit Count The number of consecutive Neighbor solicitation messages sent while performing Duplicate Address Detection on a tentative address A value of zero indicates that Duplicate Address Detection is not performed Policy Options available automatic manual Default setting is automatic Save Changes and Exit Press Enter ...

Страница 89: ... 89 5 3 AMD CBS Menu AMD CBS menu displays submenu options for configuring the CPU related information that the BIOS automatically sets Select a submenu item then press Enter to access the related submenu screen ...

Страница 90: ...BIOS Setup 90 5 3 1 CPU Common Options ...

Страница 91: ...e Control Options available Low Current Idle Typical Current Idle Auto Default setting is Auto SEV ES ASID Space Limit Configures the Space limit for SEV ES ASIDs Default setting is 1 SEV Control Enable Disable SEV control Options available Enable Disable Default setting is Enable Streaming Stores Control Enable Disable the Streaming Stores functionality Options available Disabled Enabled Auto Def...

Страница 92: ...e Disable AVX512 Options available Disabled Enabled Auto Default setting is Auto MONITOR and MWAIT disable The MONITOR MWAIT MONITORX and MWAITX opcodes become invalid when enabled Options available Enabled Disabled Auto Default setting is Auto Small Hammer Configuration Options available Disabled Enabled Auto Default setting is Auto Corrector Branch Predictor Options available Disable Enable Defa...

Страница 93: ... you can control the number of CCDs to be used and the number of cores to be used CCD Control Options available Auto 2 CCDs 4 CCDs 6 CCDs 8 CCDs 10 CCDs Default setting is Auto Core Control Options available Auto ONE 1 0 TWO 2 0 THREE 3 0 FOUR 4 0 FIVE 5 0 SIX 6 0 SEVEN 7 0 Default setting is Auto SMT Control Can be used to disable symmetric multithreading To re enable SMT a POWER CYCLE is needed ...

Страница 94: ...cess history to fetch additional lines when the data access for a given instruction tends to be followed by other data accesses Enable Disable L1 Region Prefetcher Options available Disable Enable Auto Default setting is Auto L2 Stream HW Prefetcher Enable Disable L2 Stream HW Prefetcher Options available Disable Enable Auto Default setting is Auto L2 Up Down Prefetcher Use memory access history t...

Страница 95: ...e Disabled Enabled Auto Default setting is Auto Core Watchdog Timer Interval Select the CPU Watchdog Timer interval Options available 2 681s 1 340s 669 41ms 334 05ms 166 37ms 82 53ms 40 61ms 20 970ms 10 484ms 5 241ms 2 620ms 1 309ms 654 08us 326 4us 162 56us 80 64us 39 68us Auto Default setting is Auto Note Advanced items prompt when this item is defined ...

Страница 96: ...ternal IP sync flood propagation Enable Disable SyncFlood to UMC downstream slaves Options available Sync flood disabled Sync flood enabled Auto Default setting is Auto Sync flood propagation to DF Components Enable Disable DF Sync Flood propagation Options available Sync flood disabled Sync flood enabled Auto Default setting is Auto Freeze DF module queues on error Options available Disabled Enab...

Страница 97: ...onfiguration NPS and interleaving selection and may not always be possible Options available Do not remap Attempt to remap Auto Default setting is Auto DRAM map inversion Enable Disable the DRAM map inversion function Options available Disabled Enabled Auto Default setting is Auto Location of private memory regions Controls whether or not the private memory regions PSP SMU and CC6 are at the top o...

Страница 98: ...Options available Disabled Enabled Auto Default setting is Auto ACPI SLIT Distance Control Determines how the SLIT distances are declared Options available Manual Auto Default setting is Auto ACPI SLIT remote relative distance Sets the remote socket distance for 2P systems as near 2 8 or far 3 2 Options available Near Far Auto Default setting is Auto ...

Страница 99: ...Gbps 27Gbps 30Gbps 32Gbps Auto Default setting is Auto 3 link xGMI max speed Specifies the max speed of 3 link xGMI Options available 12Gbps 16Gbps 17Gbps 18Gbps 20Gbps 22Gbps 23Gbps 24Gbps 25Gbps 26Gbps 27Gbps 30Gbps 32Gbps Auto Default setting is Auto xGMI 18GACOFC Configures xGMI 18GACOFC Options available Auto Enable Disable Default setting is Auto xGMI CRC Scale Configures leaky bucket scale ...

Страница 100: ... to configure the xGMI TXEQ Search Mask CPU0 1 link xGMI AC DC Coupled Link Press Enter to configure the xGMI AC DC Coupled link xGMI AC DC Coupled Link Control Note Options available Manual Auto Default setting is Auto xGMI Channel Type Press Enter to configure the xGMI Channel Type xGMI Channel Type Control Note Options available Manual Auto Default setting is Auto Note Advanced items prompt whe...

Страница 101: ...CI Parameter Description SDCI Note Options available Disabled Enabled Auto Default setting is Auto DisRmSteer Options available Disabled Enabled Auto Default setting is Auto Note Advanced items prompt when this item is defined ...

Страница 102: ... advanced items DDR RAS Press Enter for configuration of advanced items DDR Bus Configuration Press Enter for configuration of advanced items DDR Timing Configuration Press Enter for configuration of advanced items DDR Training Options Press Enter for configuration of advanced items DDR Security Press Enter for configuration of advanced items DDR PMIC Configuration Press Enter for configuration of...

Страница 103: ...ailable Enabled Disabled Auto Default setting is Auto Address Hash CS Enable or disable CS addressing hashing Options available Enabled Disabled Auto Default setting is Auto Address Hash Rm Enable or disable RM addressing hashing Options available Enabled Disabled Auto Default setting is Auto Address Hash Subchannel Enable or disable sub channel addressing hashing Options available Enabled Disable...

Страница 104: ...arameter Description DDR Cotroller Configuration DDR Power Options Press Enter for configuration of advanced items Memory Channel Diable Press Enter for configuration of advanced items Refresh Management RFM Press Enter for configuration of advanced items ...

Страница 105: ... Auto Sub Urgent Refresh Lower Bound Specifies the stored refresh limit required to enter sub urgent refresh mode Urgent Refresh Limit Specifies the stored refresh limit required to enter urgent refresh mode DRAM Refresh Rate DRAM refresh rate 1 95us or 3 9us Options available 1 95usec 3 9 usec Default setting is 3 9 usec Self Refresh Exit Staggering Options available n 1 9 Default setting is n 9 ...

Страница 106: ...BIOS Setup 106 5 3 3 2 2 Memory Channel Disable Parameter Description Memory Channel Disable Memory Channel Disable Bitmask CPU0 CPU1 Channel_ Press Enter to enable disable specific memory channel ...

Страница 107: ...ld Override Rolling Accumulated ACT Initial Management Threshold Options available 32 40 48 56 64 72 80 Auto Default setting is Auto RAA Maximum Management Threshold Override Rolling Accumulated ACT Maximum Management Threshold Options available 3X 4X 5X 6X Auto Default setting is Auto RAA Refresh Decrement Multiplier Override RAA Refresh Decrement Multiplier Options available 0 5 1 Auto Default s...

Страница 108: ... MBIST Aggressors Note1 Enable Disable MBIST Aggressor test Options available Auto Enabled Disabled Default setting is Auto MBIST Per Bit Slave Die Reporting Note1 Enable Disable to report 2D data eye results in ABL log for each DQ Chipselect and Channel Options available Auto Enabled Disabled Default setting is Auto Data Eye Press Enter to configure advanced items Memory Healing BIST Enable Disab...

Страница 109: ...er Description PMU Mem BIST Algprithm DDR Healing BIST Note2 For DRAM errors found in the BIOS memory BIST select tje repair type Options available Soft Repair Hard Repair No Rrepairs Test only Default setting is Soft Repair ...

Страница 110: ...ol function Options available Enabled Disabled Default setting is Disabled Aggressor Static Lane Select Upper 32 bits This item is configurable when Aggressor Static Lane Control is set to Enabled Aggressor Static Lane Select Lower 32 bits This item is configurable when Aggressor Static Lane Control is set to Enabled Aggressor Static Lane Select ECC This item is configurable when Aggressor Static ...

Страница 111: ...Granularity Options available Per Chip Select Per Nibble Default setting is Worst Case Margin Only Read Voltage Sweep Step Size Configures the step size for read Data Eye voltage sweep Options available 1 2 4 Default setting is 2 Read Timing Sweep Step Size Configures the step size for read Data Eye timing sweep Options available 1 2 4 Default setting is 1 Write Voltage Sweep Step Configures the s...

Страница 112: ... Disable Default setting is Disable RCD Parity Enable Disable the RCD Parity function Options available Auto Enabled Disabled Default setting is Enabled Max RCD Parity Error Replay Default setting is 8 Write CRC Enable Disable the Write CRC function Options available Auto Enabled Disabled Default setting is Enabled Max Write CRC Error Replay Default setting is 8 Read CRC Enable Disable the Read CR...

Страница 113: ...AM ECC When set to Auto it will set ECC to enable Options available Auto Enabled Disabled Default setting is Auto DRAM UECC Retry Enable Disable DRAM UECC Retry Options available Auto Enabled Disabled Default setting is Disabled Max DRAM UECC Error Replay Default setting is 8 Memory Clear Options available Auto Enabled Disabled Default setting is Auto Address XDR after ECC Options available Auto E...

Страница 114: ... Auto DRAM AutoEcs during Self Refresh Options available Auto AutoEcs Disabled AutoEcs Enabled Default setting is Auto DRAM ECS WriteBack Suppression Options available Auto Enable Disable Default setting is Auto DRAM X4 WriteBack Suppression Options available Auto Enable Disable Default setting is Auto DRAM Corrected Error Counter Enabled Configure DRAM Corrected Error Counter function Options ava...

Страница 115: ...setting is Auto Dram ODT impedance RTT_ WR Select the DRAMs On die Termination impedance for RTT_WR Options available Auto RTT_OFF RZQ 240 RZQ 2 120 RZQ 3 80 RZQ 4 60 RZQ5 40 RZQ6 20 RZQ7 34 Default setting is Auto Dram OD Timpedance RTT_ PARK Select the DRAMs On die Termination impedance for RTT_PARK Options available Auto RTT_OFF RZQ 240 RZQ 2 120 RZQ 3 80 RZQ 4 60 RZQ5 40 RZQ6 20 RZQ7 34 Defaul...

Страница 116: ...hm 240 ohm 160 ohm 120 ohm 96 ohm 80 ohm 68 6 ohm 60 ohm 53 3 ohm 48 ohm 43 6 ohm 40 ohm 36 9 ohm 34 3 ohm 32 ohm 30 ohm 28 2 ohm 26 7 ohm 25 3 ohm Default setting is Auto Dram DQ drive strengths Select the Dram Pull up and Pull Down Output Driver Impedance for all DQ and DMI IOs Options available Auto 48 ohm 40 ohm 34 ohm Default setting is Auto ...

Страница 117: ...BIOS Setup 117 5 3 3 6 DDR Timing Configuration ...

Страница 118: ... Training Options Parameter Description DDR Training Options DRAM PDA Enumerate ID Programming Specify PDA enumeration mode Options available Auto Toggling PDA enumeration mode Legacy PDA enumeration mode Default setting is Auto ...

Страница 119: ...o Enabled Disabled Default setting is Auto AES Options available AES 128 AES 256 Default setting is AES 256 Data Scramble Enable Disable Data Scrambling Options available Enabled Disabled Default setting is Enabled SME MK Options available Enabled Disabled Default setting is Disabled 5 3 3 8 DDR Security ...

Страница 120: ...se True Default setting is Auto PMIC Operation Mode Options available Secure Mode Programming Mode Default setting is Programming Mode PMIC Fault Recovery Options available Always Never Once Default setting is Always PMIC SWC VDDIO Default setting is 1100 PMIC SWA SWB VDD Core Default setting is 1100 PMIC Stagger Delay Default setting is 5 Max PMIC Power On Default setting is FF ...

Страница 121: ...BIOS Setup 121 5 3 3 10 DDR Miscellaneous Parameter Description DDR Miscellaneous DRAM Survives Warm Reset Options available Enabled Disabled Default setting is Enabled ...

Страница 122: ...BIOS Setup 122 5 3 4 NBIO Common Options ...

Страница 123: ...le for each downstream port Options available Disable Enable Auto Default setting is Auto PCIe Ten Bit Tag Support Enable Disable PCIe ten bit tags for supported devices Auto Disabled Options available Disable Enable Auto Default setting is Auto SMU Common Options Press Enter for configuration of advanced items NBIO RAS Common Options Press Enter for configuration of advanced items Enable AER Cap ...

Страница 124: ...isable Enable Default setting is Auto SRIS Options available Auto Disable Enable Default setting is Auto Multi Upstream Auto Speed Change Defines the setting of this feature for all PCIe devices Options available Disabled Enabled Auto Default setting is Auto Multi Auto Speed Change On Last Rate Options available Disable Enable Auto Default setting is Auto PCIE Link Speed Capability Options availab...

Страница 125: ...BDIS Options available 0 1 Auto Default setting is Auto Power Profile Selection Options available High Performace Mode Efficiency Mode Maximum IO Performance Mode Default setting is High Performace Mode BoostFmaxEn Options available Manual Auto Default setting is Auto DF PState Frequency Optimizer Options available Auto Enabled Disabled Default setting is Auto DF PState Latency Optimizer Options a...

Страница 126: ...uto Manual Default setting is Auto 3D V Cache Options available Auto Disable 1 stack 2 stack 4 stack Default setting is Auto Diagnostic Mode Options available Disabled Enabled Auto Default setting is Auto PCIE Speed PMM Control Options available Dynamic link speed determined by Power Management functionality Static Target Link Speed GEN4 Static Target Link Speed GEN5 Auto Default setting is Auto G...

Страница 127: ...of 0 indicates LOW severity NBIO SyncFlood Generation The value may be used to mask SyncFlood caused by NBIO RAS options Options available Enabled Disabled Auto Default setting is Auto NBIO SyncFlood Reporting The value may be used to enable SyncFlood reporting to APML Options available Enabled Disabled Auto Default setting is Auto Egress Poison Mask High Enables mask for masking of errors logged ...

Страница 128: ...Aer Reporting Mechanism Selects the method of reporting AER errors from PCI Express Options available Firmware First Firmware Frist but allow OS First OS First Auto Default setting is Auto Edpc Control Options available Disabled Enabled Auto Default setting is Auto ACS RAS Request Value Options available Direct Request Access Enabled Request Blocking Enabled Request Redirect Enabled Auto Default s...

Страница 129: ...is Auto ACS Options available Auto Disable Enable Default setting is Auto ATS Options available Auto Disable Enable Default setting is Auto PASID Options available Auto Disable Enable Default setting is Auto RTR Options available Auto Disable Enable Default setting is Auto PAGE_REQ Options available Auto Disable Enable Default setting is Auto PWR Options available Auto Disable Enable Default setti...

Страница 130: ...e Enable Default setting is Auto P2PEgressStrap5 Options available Auto Disable Enable Default setting is Auto DirectTranslatedStrap5 Options available Auto Disable Enable Default setting is Auto SsidEnStrap5 Options available Auto Disable Enable Default setting is Auto PriEnPageReq Options available Auto Disable Enable Default setting is Auto PriResetPageReq Options available Auto Disable Enable ...

Страница 131: ...BIOS Setup 131 Parameter Description RCC_DEV0 continued EXTENDED_FMT Options available Auto Disable Enable Default setting is Auto ...

Страница 132: ...ems USB Configuration Options Press Enter for configuration of advanced items AC Power Loss Options Press Enter for configuration of advanced items Uart Configuration Options Press Enter for configuration of advanced items ESPI Configuration Options Press Enter for configuration of advanced items FCH RAS Options Press Enter for configuration of advanced items Miscellaneous Options Press Enter for ...

Страница 133: ...ons available Disabled Enabled Auto Default setting is Auto Release SPD Host Control Options available Disabled Enabled Auto Default setting is Auto I2C SDA Hold Override Options available Disabled Enabled Auto Default setting is Auto APML SB TSI Mode Options available I3C I2C Default setting is I3C I3C Mode Speed Options available SDR2 6MHz SDR0 12 5MHz Auto Default setting is Auto I3C SDA Hold V...

Страница 134: ...Default setting is Auto SATA Staggered Spin up Options available Disabled Enabled Auto Default setting is Auto SATA Disabled AHCI Prefetch Function Options available Disabled Enabled Auto Default setting is Auto Aggrestive SATA Device Sleep P0 P1 Options available Disabled Enabled Auto Default setting is Auto SATA Controller options Press Enter for configuration of advanced items SATA Controller E...

Страница 135: ...Enable Disable USB controller Options available Enabled Disabled Auto Default setting is Auto USB ecc SMI Enable Options available Enable Off Auto Default setting is Auto MCM USB enable Press Enter for configuration of advanced items XHCI2 XHCI3 enable Socket1 Options available Enabled Disabled Auto Default setting is Auto ...

Страница 136: ...up 136 5 3 5 4 AC Power Loss Options Parameter Description AC Power Loss Options AC Loss Control Selects the AC Loss Control Method Options available Power Off Power On Last State Default setting is Last State ...

Страница 137: ...BIOS Setup 137 5 3 5 5 Uart Configuration Options Parameter Description Uart Configuration Options Uart 0 1 2 3 Enable Options available Disabled Enabled Auto Default setting is Auto ...

Страница 138: ...BIOS Setup 138 5 3 5 6 ESPI Configuration Options Parameter Description ESPI Configuration Options ESPI Enable Options available Disabled Enabled Auto Default setting is Auto ...

Страница 139: ... ALink RAS Support Enable Disable the ALink RAS Support Options available Disabled Enabled Auto Default setting is Auto Reset after sync flood Enables AB to forward downstream sync flood message to system controller Options available Enable Disable Auto Default setting is Auto ...

Страница 140: ...BIOS Setup 140 5 3 5 8 Miscellaneous Options Parameter Description Miscellaneous Options Boot Timer Enable Enable Disable Boot Timer Options available Disabled Enabled Auto Default setting is Auto ...

Страница 141: ...mon Options Socket 0 P0 P2 NTB Enable Enable Disable NTB on Socket 0 P0 P2 Link Options available Auto Enable Disable Default setting is Auto Socket 0 G0 G2 NTB Enable Enable Disable NTB on Socket 0 G0 G2 Link Options available Auto Enable Disable Default setting is Auto ...

Страница 142: ...ABL Basic Console Out Control Enable Disable the Basic ConsoleOut function for ABL Options available Disable Enable Auto Default setting is Auto ABL PMU message Control To Control the total number of PMU debug messages Options available Auto Detailed debug message Coarse debug message Stage completion Assertion messages Firmware completion message only Default setting is Auto ABL Memory Population...

Страница 143: ...lback FAR Press Enter for configuration of advanced items FAR enforcement state Default setting is Enabled SPL value in the CPU Fuse SPL value in the SPL table FAR Switch Options available Disabled Enabled Auto Default setting is Auto ...

Страница 144: ...ensive Storgae IO Intensive NIC Throughput Intensive NIC Latency Sensitive Accelerator Throughput VMware vSphere Optimized Linux KVM Optimized Container Optimized RDBMS Optimized Big Data Analytics Optimized IOT Gateway HPC Optimized OpenStack NFV OpenStack for ReakTime Kernel Auto Default setting is Auto Performance Tracing Enable to allow capturing performance traces Options available Disabled E...

Страница 145: ...vailable Auto Enabled Disabled Default setting is Auto CXL vLSM Power Management Press Enter for configuration of advanced items CXL io L1 L2 Options available Auto Enabled Disabled Default setting is Auto CXL camem L1 L2 Options available Auto Enabled Disabled Default setting is Auto CXL Encryption Options available Enabled Disabled Default setting is Disabled Temp Gen5 Advertisement Options avai...

Страница 146: ...he function of AMD PBS Select a submenu item then press Enter to access the related submenu screen Parameter Description RAS Press Enter for configuration of advanced items SPI Locking Enable Disable SPI Locking for protect ROM part Options available Disabled Enabled Default setting is Disabled ...

Страница 147: ... Period GHES Notify Type Selects the Notification type for deferred corrected errors Options available Polled SCI Default setting is Polled GHES UnCorr Notify Type Selects the Notification type for uncorrected errors Options available Polled NMI Default setting is NMI PCIe GHES Notify Type Selects the Notification type for PCIe corrected errors Options available Polled SCI Default setting is Polle...

Страница 148: ...corrected Error Mask register of PCIe device PCIe Device UnCorr Err Sev Reg Initialize the PCIe AER Uncorrected Error Severity register of PCIe device DRAM Hard Post Package Repair This feature allows spare DRAM rows to replace malfunctioning rows via an in field repair mechanism Options available Disabled Enabled Default setting is Disabled HEST DMC Structure Support HEST DMC Deferred Machine Che...

Страница 149: ...arameter Description PCIe Link Training Type Options available 1 Step 2 Step Default setting is 1 Step PCIe Compliance Mode Options available Off On Default setting is Off Program All VR Enable Disable program all VR on MB Options available Disabled Enabled Default setting is Enabled North Bridge Press Enter for configuration of advanced items Fabric Resource Press Enter for configuration of advan...

Страница 150: ...150 5 5 1 North Bridge Parameter Description North Bridge Configuration Memory Information Total Memory Displays the total memory information CPU 0 1 Information Press Enter to view information related to CPU 0 1 ...

Страница 151: ...BIOS Setup 151 5 5 2 Fabric Resource ...

Страница 152: ... CPU 0 1 NBIO_ PCIe Bus Number Prefetchable Mmio Above 4G size Change CPU 0 1 NBIO_ Prefetchable MMIO Above 4G Size Options available System Default 0 1G 2G 4G 8G 16G 32G 64G 128G 256G 512G 1T 2T 4T 8T Default setting is System Default PCIe IO Resource Change CPU 0 1 NBIO_ PCIe IO Resource ...

Страница 153: ... OS Watchdog Timer Enable Disable OS Watchdog Timer function Options available Enabled Disabled Default setting is Disabled OS Wtd Timer Timeout Note Configures OS Watchdog Timer Options available 5 minutes 10 minutes 15 minutes 20 minutes Default setting is 10 minutes OS Wtd Timer Policy Note Configure OS Watchdog Timer Policy Options available Do Nothing Reset Power Down Power Cycle Default sett...

Страница 154: ...vent Log Press Enter to configure advanced items View FRU Information Press Enter to view the FRU information BMC network configuration Press Enter to configure advanced items IPv6 BMC Network Configuration Press Enter to configure advanced items ...

Страница 155: ...ase SEL Choose options for erasing SEL Options available No Yes On next reset Yes On every reset Default setting is No When SEL is Full Choose options for reactions to a full SEL Options available Do Nothing Erase Immediately Default setting is Do Nothing Custom EFI Logging Options Log EFI Status Codes Enable Disable the logging of EFI Status Codes if not already converted to legacy Options availa...

Страница 156: ...U Information The FRU page is a simple display page for basic system ID information as well as System product information Items on this window are non configurable Note The model name will vary depends on the product you purchased ...

Страница 157: ...IP address Displays IP Address information Subnet mask Displays Subnet Mask information Please note that the IP address must be in three digitals for example 192 168 000 001 Router IP address Displays the Router IP Address information Station MAC address Displays the MAC Address information VLAN Support Set BMC to enable disable VLAN support Options available Enabled Disabled Default setting is Di...

Страница 158: ... network during BIOS phase Options available Unspecified Disable Enable Default setting is Enable IPv6 BMC Lan IP Address Source Selects to configure LAN channel parameters statically or dynamically by BIOS or BMC Options available Unspecified Static Dynamic Obtained by BMC running DHCP Default setting is Dynamic Obtained by BMC running DHCP IPv6 BMC Lan IP Address Prefix Length Check if the IPv6 ...

Страница 159: ...ll settings in the Setup Utility User Password Entering this password will restrict a user s access to the Setup menus To enable or disable this field a Administrator Password must first be set A user can only access and modify the System Time System Date and Set User Password fields Parameter Description Administrator Password Press Enter to configure the administrator password User Password Pres...

Страница 160: ...e booting process to be pre signed with valid digital certificates This way the system knows all files being loaded before Windows loads to the login screen have not been tampered with When set to Standard it will automatically load the Secure Boot keys form the BIOS databases When set to Custom you can customize the Secure Boot settings and manually load its keys from the BIOS database Options av...

Страница 161: ...ays the current status of the Key Exchange Key Database KEK Press Enter to configure a new KEK or load additional KEK from storage devices Options available Update Append Authorized Signatures DB Displays the current status of the Authorized Signature Database Press Enter to configure a new DB or load additional DB from storage devices Options available Update Append Forbidden Signatures DBX Displ...

Страница 162: ...BIOS Setup 162 5 8 Boot Menu The Boot menu allows you to set the drive priority during system boot up BIOS setup will display an error message if the legacy drive s specified is not bootable ...

Страница 163: ...mp full Setup Data Press Enter to dump full setup data to file Dump non default Setup Data Press Enter to dump non default setup data to file Restore Setup Data Press Enter to restore setup data from file cJson format Boot mode select Selects the boot mode Options available LEGACY UEFI Default setting is UEFI FIXED BOOT ORDER Priorities Boot Option 1 2 3 4 5 Press Enter to configure the boot prior...

Страница 164: ...ne so far to any of the setup options Options available Yes No Default Options Restore Defaults Loads the default settings for all BIOS setup parameters Setup Defaults are quite demanding in terms of resources consumption If you are using low speed memory chips or other kinds of low performance components and you choose to load these settings the system might not function properly Options availabl...

Страница 165: ... corrupt the boot block can be used to restore the BIOS to a working state To restore your BIOS please follow the instructions listed below Recovery Instruction 1 Copy the XXX rom to USB diskette 2 Setting BIOS Recovery jump to enabled status 3 Boot into BIOS recovery 4 Run Proceed with flash update 5 BIOS updated ...

Страница 166: ...L was not found 3 DXE Core Firmware Volume was not found 4 Recovery failed 4 S3 Resume failed 7 Reset PPI is not available 5 11 2 DXE Beep Codes of Beeps Description 1 Invalid password 4 Some of the Architectural Protocols are not available 5 No Console Output Devices are found 5 No Console Input Devices are found 6 Flash update is failed 7 Reset protocol is not available 8 Platform PCI resource r...

Отзывы: