- 10 -
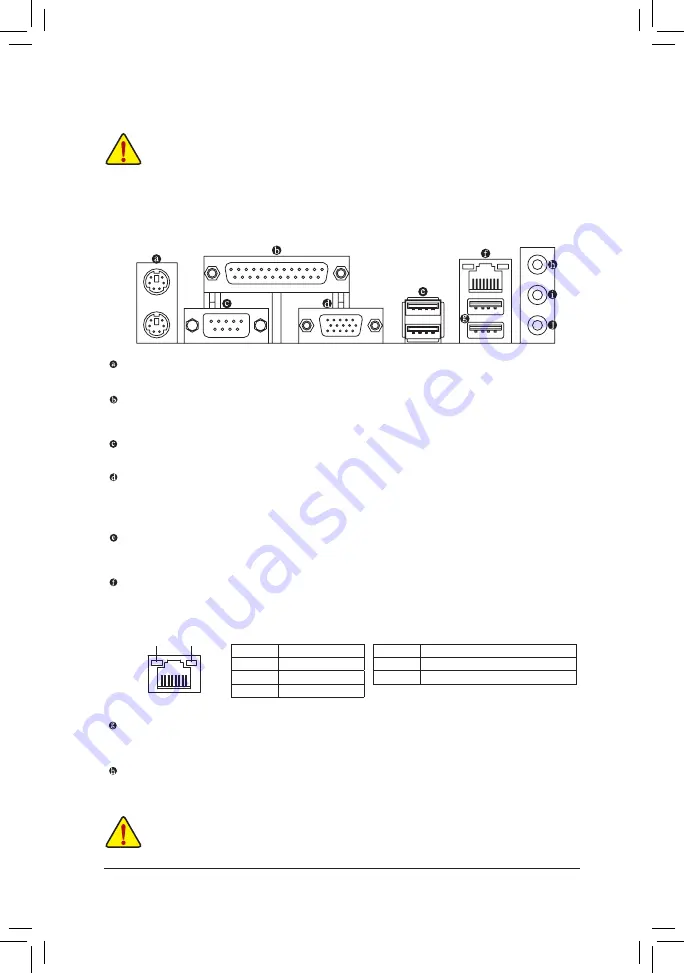
1-6 Back Panel Connectors
PS/2 Keyboard and PS/2 Mouse Port
Use the upper port (green) to connect a PS/2 mouse and the lower port (purple) to connect a PS/2 keyboard.
Parallel Port
Use the parallel port to connect devices such as a printer, scanner and etc. The parallel port is also called
a printer port.
Serial Port
Use the serial port to connect devices such as a mouse, modem or other peripherals.
D-Sub Port
The D-Sub port supports a 15-pin D-Sub connector and supports a maximum resolution of 1920x1200
(the actual resolutions supported depend on the monitor being used). Connect a monitor that supports
D-Sub connection to this port.
USB 3.0/2.0 Port
The USB 3.0 port supports the USB 3.0 specification and is compatible to the USB 2.0/1.1 specification.
Use this port for USB devices such as a USB keyboard/mouse, USB printer, USB flash drive and etc.
RJ-45 LAN Port
The Gigabit Ethernet LAN port provides Internet connection at up to 1 Gbps data rate. The following
describes the states of the LAN port LEDs.
USB 2.0/1.1 Port
The USB port supports the USB 2.0/1.1 specification. Use this port for USB devices such as a USB
keyboard/mouse, USB printer, USB flash drive and etc.
Line In Jack (Blue)
The line in jack. Use this audio jack for line in devices such as an optical drive, walkman, etc.
1-5 Installing an Expansion Card
Read the following guidelines before you begin to install an expansion card:
•
Make sure the motherboard supports the expansion card. Carefully read the manual that came
with your expansion card.
•
Always turn off the computer and unplug the power cord from the power outlet before installing an
expansion card to prevent hardware damage.
Activity LED
Connection/
Speed LED
LAN Port
Activity LED:
Connection/Speed LED:
State
Description
Orange
1 Gbps data rate
Green
100 Mbps data rate
Off
10 Mbps data rate
State
Description
Blinking
Data transmission or receiving is occurring
Off
No data transmission or receiving is occurring
•
When removing the cable connected to a back panel connector, first remove the cable from your
device and then remove it from the motherboard.
•
When removing the cable, pull it straight out from the connector. Do not rock it side to side to prevent
an electrical short inside the cable connector.


