


System Hardware Installation
- 28 -
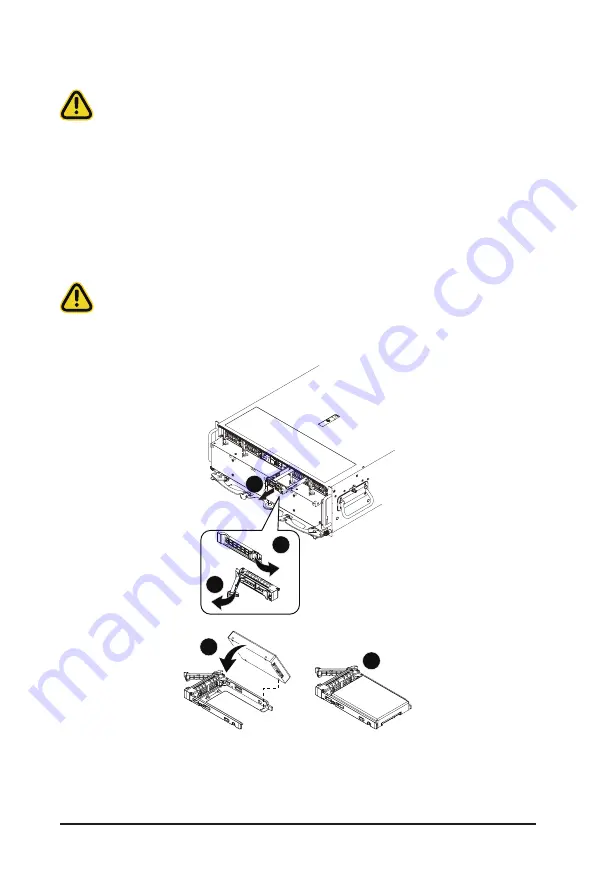
3-5 Removing and Installing the 2.5" Hard Disk Drive
Read the following guidelines before you begin to install the hard disk drive:
•
Take note of the drive tray orientation before sliding it out.
• The tray will not fit back into the bay if inserted incorrectly.
Follow these instructions to install a 2.5" hard disk drive:
1. Press the release button.
2. Extend the locking lever.
3. Pull the locking lever to remove the HDD tray.
4. Slide the hard disk drive into the blank HDD tray.
5. Secure the hard drive to the tray with the four screws as shown. Do not over tighten the screws.
Slide the hard drive tray into the bay until it locks in place.
CAUTION!
We strongly recommend using enterprise level hard disk drives in the Gigabyte server system. For
more information of recommended HDDs, please visit the Gigabyte website:
https://www.gigabyte.com
and search for the specific product QVL from
Support & Downloads.
1
2
3
4
5
Содержание G492-ZD0
Страница 1: ...G492 ZD0 HPC Server 4U DP SXM4 A100 8 GPU Server User Manual Rev 1 0 ...
Страница 10: ... 10 This page intentionally left blank ...
Страница 16: ...Hardware Installation 16 This page intentionally left blank ...
Страница 49: ... 39 BIOS Setup 5 2 4 1 Serial Port 1 2 Configuration ...
Страница 58: ...BIOS Setup 58 5 2 9 PCI Subsystem Settings ...
Страница 69: ... 39 BIOS Setup 5 2 18 Intel R Ethernet Controller X550 ...
Страница 71: ... 39 BIOS Setup 5 2 19 VLAN Configuration ...
Страница 152: ...BIOS Setup 152 This page intentionally left blank ...