33
3-3-2.
Designating IN and OUT point from the recording timecode
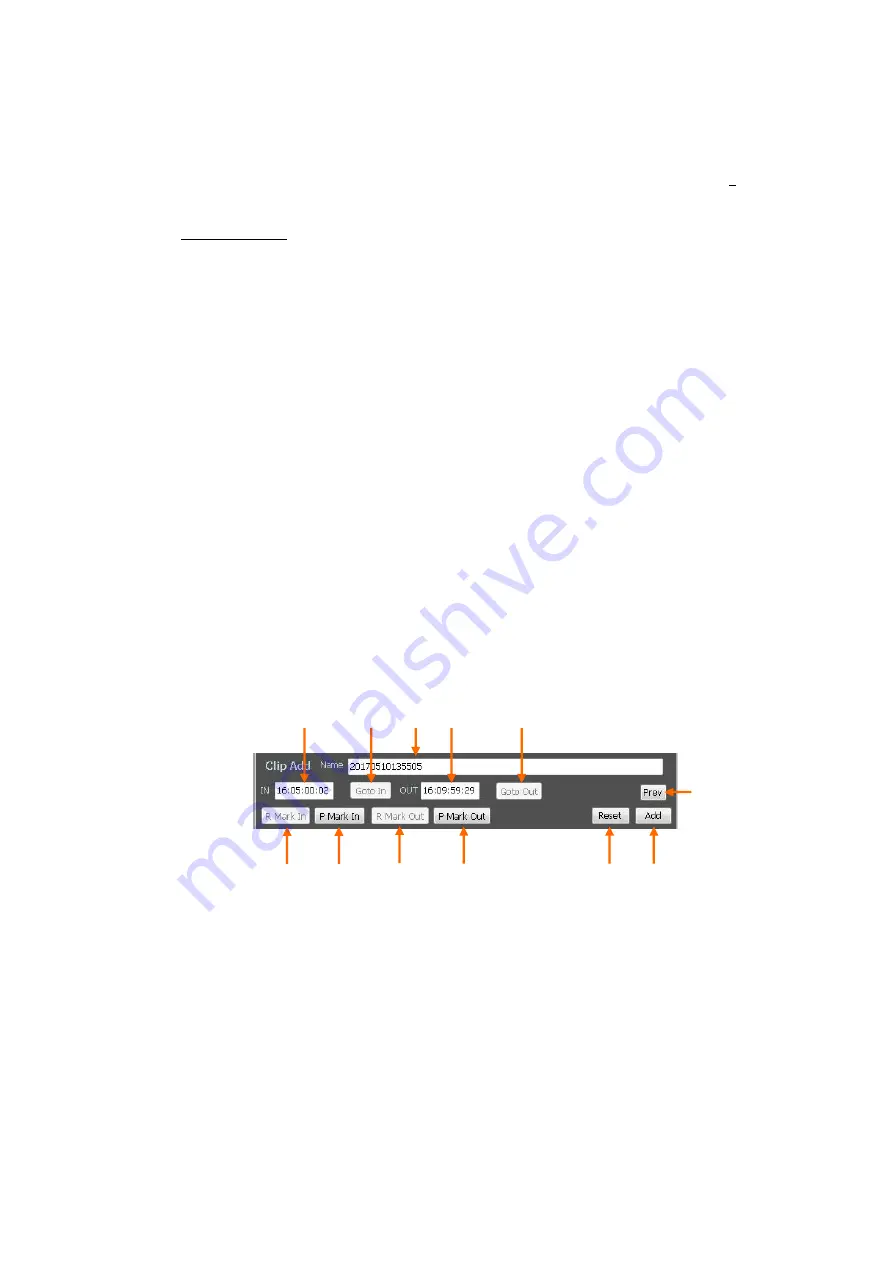
You can set the IN point and OUT point from the current time at the recording side.
How to set clips
(1) Select the [Single file mode] on the [Playback Settings] menu (or push the [F1] key).
(2) At the timing that you want to mark as IN point, click the [
R Mark In
] button
⑥
to
take the timecode value for the IN point. You can also directly type the timecode
value in the IN point timecode box
②
.
(3) Then at the timing that you want to mark as OUT point, Click the [
R Mark Out
]
button
⑧
to take the timecode value for the OUT point. You can also directly type
the timecode value in the OUT point timecode box
④
.
(4) By clicking the [
Goto In
] button
③
, or the [
Goto Out
] button
⑤
, you can cue-up to
the IN point or the OUT point respectively.
(5) By clicking the [
Prev
] button, you can preview the clip (playback from the IN point to
the OUT point). When the [
Repeat
] is set on the [Playback settings] menu, the
playback repeats from IN point and OUT point.
(6) When you want to change the IN or the OUT point, retry (2) to (5) above.
(7)
If the IN point and the OUT point is OK, put the clip name in the [
Name
] box then
click the [
Add
] button. The clip is registered on the Clip list.
①
⑧
⑥
⑨
⑦
②
③
④
⑤
⑩
⑪
⑫


