¥ ‡
78
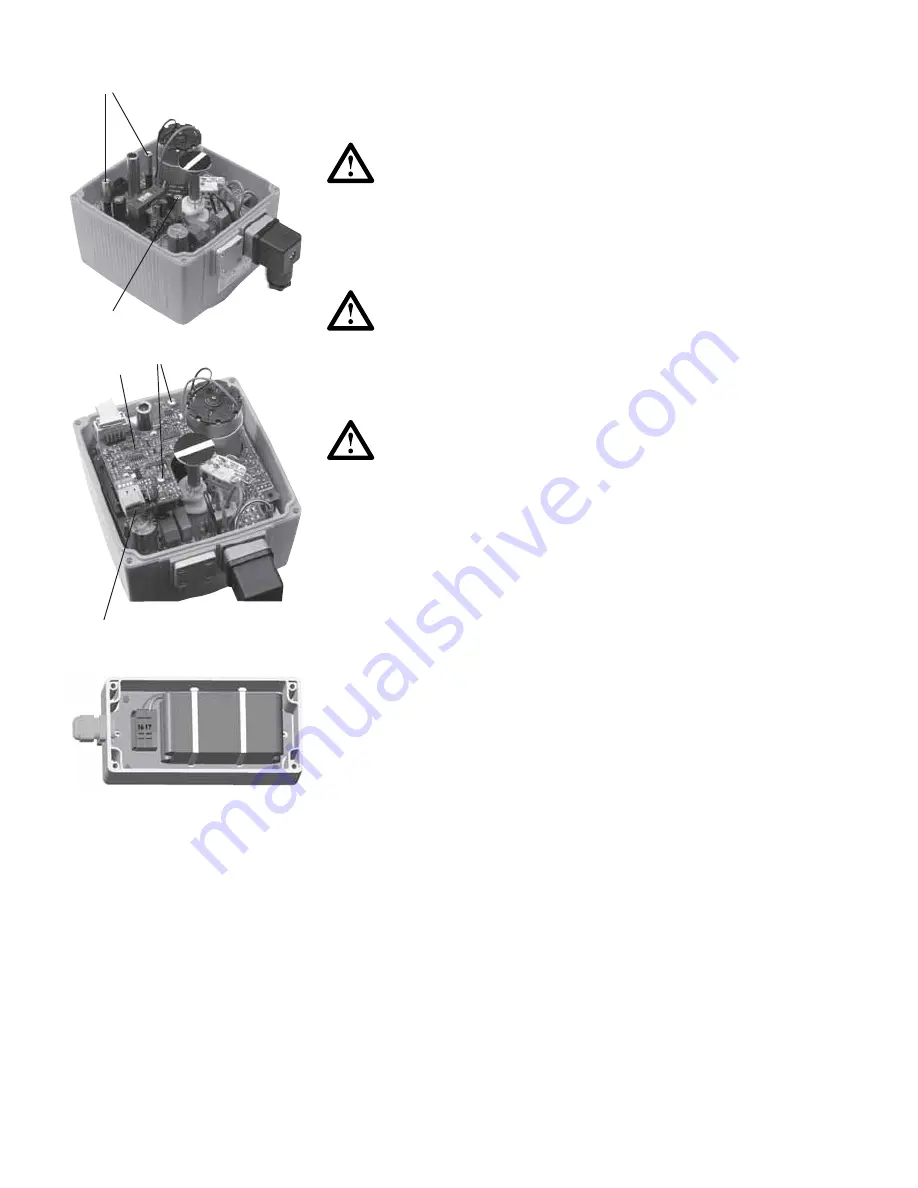
Mounting the fail-safe return (board)
Disconnect the actuator from the supply vol-
tage.
Take the board out of its packaging and
check for damages.
Do not touch the board itself. Electrostatic
discharge can damage the components.
Screw the three distance bolts (1) into the
assembly bolts.
Screw hand-tight.
Fasten the board (3) to the distance bolts
with the screws (2).
Plug the flat cable into the X1 connector.
Reconnect to supply voltage.
Rechargeable battery
Connect the battery via the second plug or cable
gland to the terminals ¢6 and ¢7 (4).
Attention must be given to the polarity.
Charge the battery for at least ¢2 hours.
LxWxH
¢86x80x55
!
!
V
§
$
Содержание EA 11
Страница 18: ...18 Heizelement Bausatz LED leuchtet Normalbetrieb LED leuchtet Heizbetrieb...
Страница 21: ...21 R ckstelleinheit Bausatz LED leuchtet Normalbetrieb LED leuchtet Akkubetrieb...
Страница 24: ...24 Endschalter Bausatz...
Страница 29: ...Instruction de service Servom canisme lectrique Type EA 1...
Страница 46: ...46 Jeu de montage l ment chauffant LED luire Service normale LED luire Chauffage en service...
Страница 49: ...49 Jeu de montage r tropositionneur LED luire Service normale LED luire Accu en service...
Страница 52: ...52 Jeu de montage 2 interrupteurs de fin de course...
Страница 57: ...Instruction Manual Electrical Actuator Unit Type EA 1...
Страница 74: ...74 Heating element kit LED shines normal operation LED shines heating operation...
Страница 77: ...77 Fail safe return kit LED shines normal operation LED shines accu operation...
Страница 80: ...80 Limit switches kit...
Страница 85: ...85 Notes...
Страница 86: ...86...
Страница 87: ...87...


