2.9.1
OmniLink™ Tab
fig.57:
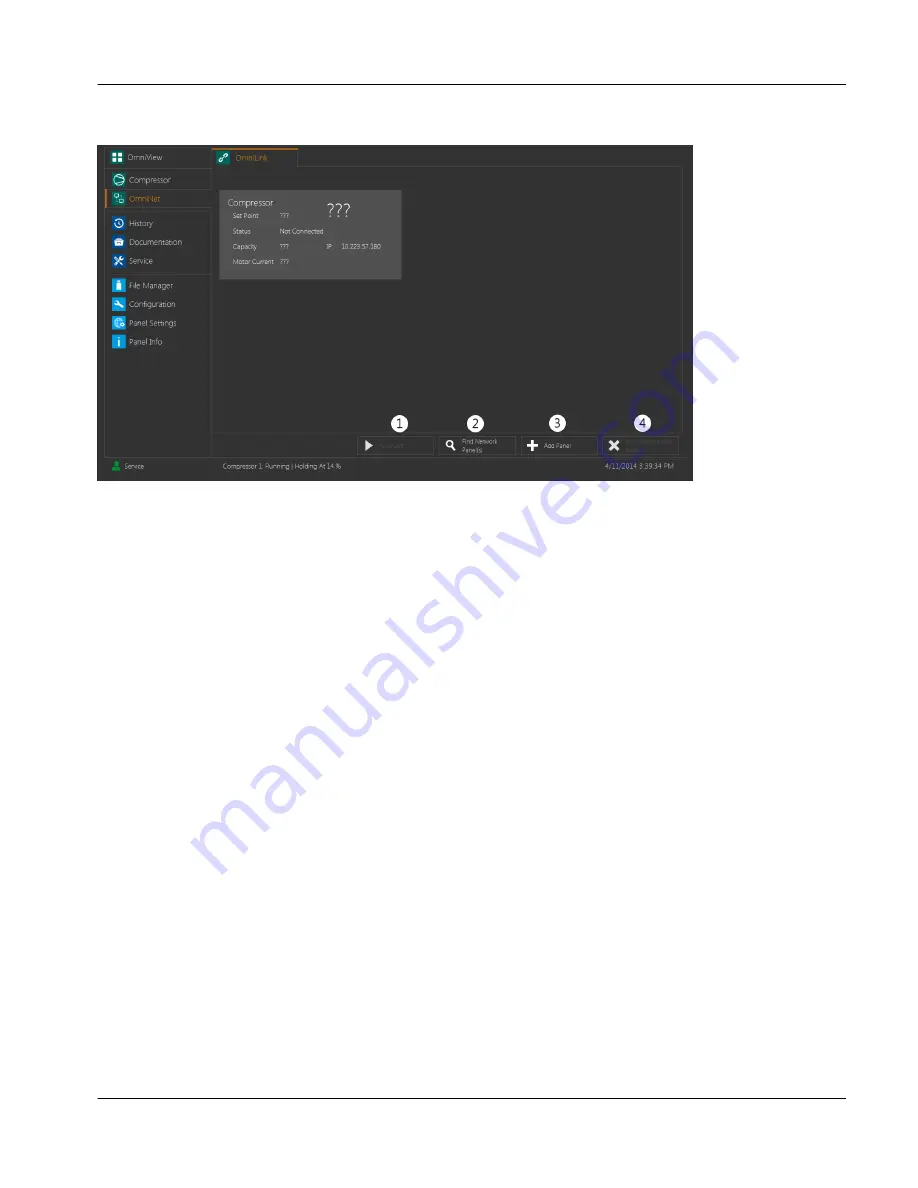
OmniLink™ tab display
This screen is used to remotely view and operate other panels on the same network.
The main portion of the screen contains a tile display detailing each individual panel connected to the system.
Panel types that are compatible with OmniLink™ include other GEA Omni™, GForce™ and GSC TP panels.
The color of a tile corresponds to the current status of the associated panel, as described in the OmniView tile
display.
The networked panels may be accessed through the four buttons displayed in the bottom right of the screen.
The buttons are:
1.
Connect
This button is enabled as long as at least one of the tiles is selected. Touching it will allow the user to
remotely view the display of the selected panel and control it remotely. Only one external panel may be
viewed at a time. If multiple tiles are selected, this button will be disabled. While a panel is connected,
this button will change to
Disconnect
, which will return the user to the tile display when clicked.
2.
Find Network Panel(s)
This button will query the network and locate any other GEA Omni™ panels. Any panel found in this
manner will appear as a new tile in the display and may be viewed or controlled normally.
3.
Add Panel
This button will bring up a keypad display, which will prompt the user to enter an IP address to manually
add a panel to the tile display.
4.
Remove Selected Panel
This button is enabled as long as at least one of the tiles is selected. Touching it will remove the selected
panel or panels from the tile display.
Instruction Manual | GEA Omni™
Control panel
User interface
OmniNet
GEA Refrigeration North America, Inc. | E_806550_2 | Generated 12.01.2016
59
Содержание Omni
Страница 1: ...Control panel GEA Omni Instruction Manual E_806550_2 ...
Страница 238: ......


