


GE Healthcare
Senographe DS
Revision 1
Service Information and Procedures Class A 2385072-16-8EN
Job Card CAL A043 - Detector Gain Calibration
Page no. 1697
Chapter 9
JC-CAL-A-043.fm
Job Card CAL A043 - Detector Gain Calibration
Chapter 9
1
SUPPLIES
None
2
APPLICABILITY
This Job Card applies to the core product. If the system has the CESM option, perform the CESM ver-
sion of this Job Card located in the CESM IM/SIP instead.
3
TOOLS
4
REQUIRED EFFORT
Personnel: 1 Field Engineer
Time: 40 minutes (15 minutes for Contact and Stereo modes, and 10 minutes for Mag mode)
5
SAFETY PRECAUTIONS
The procedures in this Job Card produce X-rays. Ensure that you take appropriate precautions when
operating with X-rays (for example, stay behind the radiation screen during an X-ray exposure).
6
PREREQUISITES
•
It is strongly recommended to perform bad pixel calibration when the detector has not been used for
a while and when Flat Field test fails.
•
The Senographe must be in the Medical Application menu.
•
Remove the compression paddle.
7
DETECTOR GAIN CALIBRATION
7-1
Principle
The goal of gain calibration is to compensate for differences in pixel responses and differences in elec-
tronic gain. This calibration makes the image of a flat uniform object look flat (flat field uniformity).
7-2
Procedure
1. Launch the Service Desktop (see
2. From the Service Desktop, click the
Calibration
button
and select
Detector Gain Calibration
,
after Summary display, click again on
Detector
.
3. Before starting the calibration, follow the on-screen instructions for pre-requisites.
4. Select the config that you want to calibrate and Initialize.
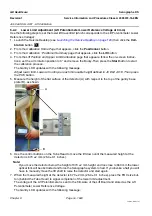
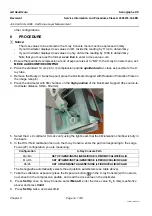
5. Follow the on-screen instructions to set up the system. Install the flat field phantom (25 mm of acrylic)
on the Image Receptor (for example).
6. You are requested to check that the collimator is in full FOV, and then to make an exposure for an
image quality check. The IQ check technique and parameters are selected automatically.