31-5000484 Rev. 0 01-20 GEA
Installation Instructions
for your new
Before you begin - Read these instructions completely and carefully.
IMPORTANT – OBSERVE ALL GOVERNING CODES AND ORDINANCES.
Note to Installer – Be sure to leave these instructions with the Consumer.
Note to Consumer – Keep these instructions with your Owner’s Manual for future reference.
RAG60 Zoneline
®
Case Rear Grille
Tools Needed
• 1/4” Nutdriver
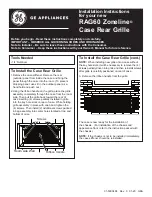
To Install the Case Rear Grille
1. Remove the case stiffener. Remove the rear
(outside) panel from inside the case and bring the
panel through the case into the room. (To prevent
dropping panel, use slit in the outdoor panel as a
hand hold and push out.)
2. Using the ribbon handle on the grille, place the grille
assembly completely through the case from the room
side. Then pull the grille back toward the rear of
case inserting (4) screws partially installed in grille
into the key hole slots on rear of case. While holding
grille assembly in place with one hand, tighten the
(4) screws. Then install (2) additional screws packed
in bag assembly into center holes located at top and
bottom of case.
Ribbon Handle
Screws
Room side Wall
To Install the Case Rear Grille (cont.)
NOTE:
When installing new grille onto a case without
the key hole slots, it will be necessary to remove the (4)
screws partially driven into grille and then reinstall screws
after grille is carefully positioned on rear of case.
3. Remove the ribbon handle from the grille.
The case is now ready for the installation of
the chassis. (For installation of the chassis and
appearance front, refer to the instruction packed with
the chassis.)
NOTE:
If the chassis is not to be installed immediately,
the case stiffener should be reinstalled.


