CHAPTER 7: SETTING UP THE D400 FOR REDUNDANCY
D400 SUBSTATION GATEWAY INSTRUCTION MANUAL
GE INFORMATION
101
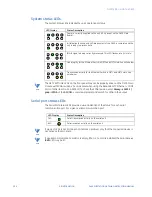
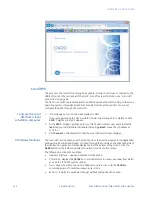
Task 2: Hot standby - Connect the D400s
To connect the two D400s:
1.
Connect to the D400s (D400 A and D400 B) through a secure shell client.
2.
Enter the root/admin login credentials.
3.
Login to and start the d400cfg local D400 configuration utility. You can also use the
Local HMI available to login to and start d400cfg.
Task 3: Hot standby - Create user accounts
Creation of user accounts follows the same procedure whether it is for hot standby or
warm standby redundancy. See the procedure for “Task 3: Warm standby - Create user
accounts” on page 98.
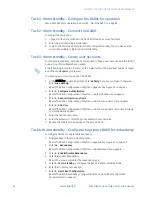
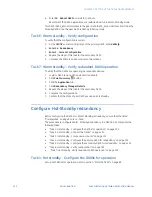
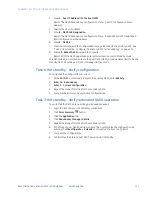
Task 4: Hot standby - Configure the primary D400 for redundancy
To configure a D400 for single LAN Redundancy:
1.
Navigate back to the main d400cfg menu.
Result: The D400 Configuration Utility Menu appears. See Figure 52 on page 92.
2.
Enter
14. Redundancy
.
Result: The D400 Configuration Utility Menu - Redundancy menu appears.
3.
Enter
2. Enable/Disable Redundancy
.
4.
Enter
Y
to enable Redundancy.
Result: You are prompted for the redundancy type.
5.
Enter
2. Hot Standby
to configure the D400s in Hot-Standby mode.
6.
Enter
Y
to confirm your selection.
7.
Enter
3. Heart Beat Configuration
.
Result: The D400 Redundancy Configuration Menu - Heart Beat Configuration
Parameters menu appears.
8.
Enter
1. Configure Heart Beat Timeout
.
9.
Enter a value for the
Heart Beat Timeout
(in milliseconds) within the suggested range
(100 to 1000 milliseconds).
10. Enter
2. Configure Heart Beat Retries
.
11. Enter the number of
Heart Beat Retries
within the suggested range (1 to 10).
12. Enter
3. Configure Heart Beat Communication Mechanism
.
Result: The D400 Redundancy Configuration Menu - Heart Beat Mechanism menu
appears.
13. Enter
1. Single LAN
(the default value).
14. Navigate back to the Redundancy menu.
15. Enter
4. Configure IP Address of PEER D400
.
16. Enter
1. Configure/Update Peer IP Address
.
17. Enter the new Primary address of the peer D400.
18. If a secondary IP for the peer D400 is available, enter the new secondary address.
19. Confirm the primary and secondary IP address changes by entering
Y
.
20. Enter
5. UserName of PEER D400
.
21. Enter the user name defined by you earlier in the peer D400.
Содержание Multilin D400
Страница 12: ...12 GE INFORMATION D400 SUBSTATION GATEWAY INSTRUCTION MANUAL PRODUCT SUPPORT ...
Страница 28: ...28 GE INFORMATION D400 SUBSTATION GATEWAY INSTRUCTION MANUAL CHAPTER 1 BEFORE YOU START ...
Страница 34: ...34 GE INFORMATION D400 SUBSTATION GATEWAY INSTRUCTION MANUAL CHAPTER 2 INSTALLING THE D400 ...
Страница 80: ...80 GE INFORMATION D400 SUBSTATION GATEWAY INSTRUCTION MANUAL CHAPTER 4 CONNECTING TO DEVICES AND NETWORKS ...
Страница 88: ...88 GE INFORMATION D400 SUBSTATION GATEWAY INSTRUCTION MANUAL CHAPTER 5 POWERING UP THE D400 ...
Страница 104: ...104 GE INFORMATION D400 SUBSTATION GATEWAY INSTRUCTION MANUAL CHAPTER 7 SETTING UP THE D400 FOR REDUNDANCY ...
Страница 118: ...118 GE INFORMATION D400 SUBSTATION GATEWAY INSTRUCTION MANUAL CHAPTER 9 ABOUT THE D400 APPLICATIONS ...
Страница 126: ...126 GE INFORMATION D400 SUBSTATION GATEWAY INSTRUCTION MANUAL CHAPTER 10 INTRODUCING THE D400 CONFIGURATION ...
Страница 158: ...158 GE INFORMATION D400 SUBSTATION GATEWAY INSTRUCTION MANUAL CHAPTER 12 USING THE D400 LOCAL CONFIGURATION UTILITY ...
Страница 174: ...174 GE INFORMATION D400 SUBSTATION GATEWAY INSTRUCTION MANUAL APPENDIX A STANDARDS PROTECTION ...
Страница 184: ...184 GE INFORMATION D400 SUBSTATION GATEWAY INSTRUCTION MANUAL APPENDIX C LIST OF ACRONYMS ...
Страница 192: ...192 GE INFORMATION D400 SUBSTATION GATEWAY INSTRUCTION MANUAL INDEX ...

