Presets
LOGIQ V2/LOGIQ V1
–
User Guide
3-29
Direction 5610736-100
Rev. 9
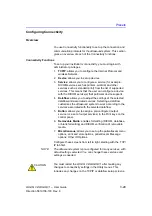
Configuring Connectivity
Overview
You use Connectivity functionality to set up the connection and
communication protocols for the ultrasound system. This section
gives an overview of each of the Connectivity functions.
Connectivity Functions
To set up your institution’s connectivity, you must login with
administrator privileges.
1.
TCPIP
: allows you to configure the Internet Protocol and
wireless Network.
2.
Device
. allows you to set up devices.
3.
Service
: allows you to configure a service (for example,
DICOM services such as printers, worklist, and other
services such as standard print) from the list of supported
services. This means that the user can configure a device
with the DICOM service(s) that particular device supports.
4.
Dataflow
: allows you to adjust the settings of the selected
dataflow and associated services. Selecting a dataflow
customizes the ultrasound system to work according to the
services associated with the selected dataflow.
5.
Button
: allows you to assign a pre-configured output
service (or a set of output services) to the Print keys on the
control panel.
6.
Removable Media
: enables formatting (DICOM, database,
or blank formatting) and DICOM verification of removable
media.
7.
Miscellaneous
: allows you to set up the patient/exam menu
options, print and store options, patient/exam Message
options, Other ID Options.
Configure these screens from left to right, starting with the TCP/
IP tab first.
NOTE:
The ultrasound system is pre-configured for many services, with
default settings selected. You can change these services and
settings as needed.
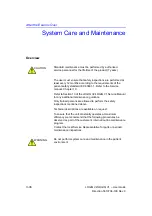
CAUTION
You must restart the LOGIQ V2/LOGIQ V1 after making any
changes to connectivity settings in the Utility menus. This
includes any changes on the TCPIP or dataflow setup screens.
Содержание LOGIQ V2
Страница 4: ...i 2 LOGIQ V2 LOGIQ V1 User Guide Direction 5610736 100 Rev 9 This page intentionally left blank...
Страница 8: ...i 6 LOGIQ V2 LOGIQ V1 User Guide Direction 5610736 100 Rev 9...
Страница 92: ...Getting Started 1 80 LOGIQ V2 LOGIQ V1 User Guide Direction 5610736 100 Rev 9...
Страница 170: ...After the Exam is Over 3 8 LOGIQ V2 LOGIQ V1 User Guide Direction 5610736 100 Rev 9 Figure 3 10 Formats selection...
Страница 242: ...After the Exam is Over 3 80 LOGIQ V2 LOGIQ V1 User Guide Direction 5610736 100 Rev 9...
Страница 288: ...Safety 4 46 LOGIQ V2 LOGIQ V1 User Guide Direction 5610736 100 Rev 9...
Страница 380: ...Index 4 LOGIQ V2 LOGIQ V1 User Guide Direction 5610736 100 Rev 9...
Страница 381: ......

