background image

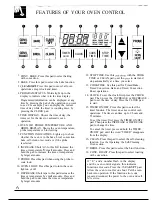
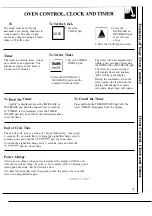
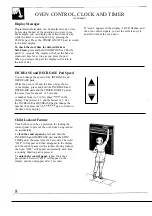
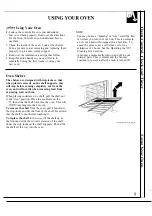
To Set the Clock

The clock must be set for the
automatic oven timing functions to

work properly. The time of day
cannot be changed during a Timed
Bake or CLEAN cycle.

1. Press the

CLOCK pad.

CLOCK

2. Press the

A

INCREASE or
DECREASE pad
to set the time
of day.

3. Press the CLOCK pad to start.

Timer

To Set the Timer

The timer is a minute timer; it does
not control oven operations. The
maximum setting on the timer is
9 hours and 55 minutes.

1. Press the TIMER

TIMER

ON/OFF pad.

2. Press the INCREASE or

DECREASE pad to set the
amount of time on timer.

The timer will start automatically
within a few seconds of releasing
the INCREASE or DECREASE pad.

The timer, as you are setting it,
will display hours and minutes;

“HR” will be in the display.

During the countdown, when the
timer reaches the last minute, the
display will change to seconds
only and a single beep will sound.


To Cancel the Timer

 is displayed, press the INCREASE or

Press and hold the TIMER ON/OFF pad 

DECREASE pad until the desired time is reached.

word “TIMER” disappears from the display.

If “TIMER” is not displayed, press the TIMER
ON/OFF pad first, then follow the instructions above
to set the timer.

the

End of Cycle Tone

The end of cycle tone is a series of 3 beeps followed by 1 beep every
6 seconds. If you would like to remove the signal that beeps every 6

seconds, press and hold the 

 pad for 10 seconds.

To return the signal that beeps every 6 seconds, press and hold the

 pad for 10 seconds.

Power Outage

After a power outage, when power is restored, the display will flash and
time shown will no longer be correct—for example, after a 5-minute power
interruption the clock will be 5 minutes slow.

All other functions that were in operation when the power went out will
have to be programmed again.


7

Содержание JKP16

Страница 1: ...Roasting Roasting Guide 23 26 Roasting with the Probe 24 25 Self Cleaning instructions 29 32 Shelves 9 10 12 Timed Baking 2O 21 Problem Sohrer 37 38 Thermostat Adjustment Do It Yourself 22 More questi...

Страница 2: ...and allow to soak Wipe dry and then apply an appliance polish to thoroughly clean and protect the surface NOTE The plastic tape must be removed from the chrome trim on the oven parts It cannot be rem...

Страница 3: ...o not allow anyone to climb stand or hang on the door They could damage the oven or cause severe personal injury CAUTION ITEMS OF INTEREST TO CHILDREN SHOULD NOT BE STORED IN 4BINETS ABOVE AN OVEN CHI...

Страница 4: ...ves must be handled when hot do not let the pot holder contact the heating elements Pulling out the shelf to the shelf stop is a convenience in lifting heavy foods It is also a precaution against burn...

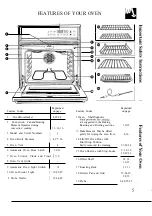
Страница 5: ...10 12 13 BakeEiement Maybe lifted gently for wiping the oven floor 3 Model and Serial Numbers 12 4 36 4 Oven Broil Element 1 4 2 7 36 14 Lift Off Oven Door with Broil Stop Position Easily removed for...

Страница 6: ...11 DECREASE Short taps to this pad decrease the time or temperature by small amounts Press and hold the pad to decrease the time or temperature by larger amounts 6 J A v T E PROBE 1 ZQZ OVEN LIGHT t...

Страница 7: ...y will change to seconds only and a single beep will sound To Reset the Timer To Cancel the Timer lIMER is displayed press the INCREASE or Press and hold the TIMER ON OFF pad unti DECREASE pad until t...

Страница 8: ...E and DECREASE pads While the oven is off and the time of day shows in the display press and hold the INCREASE and DECREASE pads and the TIMER ON OFF pad at the same time for about 2 or 3 seconds A nu...

Страница 9: ...parts This is normal and the fan may especially during the first weeks of using your continue to run even after the oven is turned off new oven Oven Shelves The shelves are designed with stop locks so...

Страница 10: ...n as A bottom B C and D top Shelf positions are suggested in the Baking Roasting and Broiling sections To remove the shelf pull it forward to the stop locks and lift the front of the shelf To replace...

Страница 11: ...ke Foods such as layer cakes have a more level top crust when not baked with convection heat Convection Roast In convection roast heat comes from the top oven element The convection fan circulates the...

Страница 12: ...need to use caution when pulling the shelf out We recommend that you pull the shelf out several inches and then using 2 pot holders pull the shelf out by holding the sides of it The offset shelf is l...

Страница 13: ...d the cook time that you entered The oven will start automatically The word ON and 100 will be displayed The Cook Time will begin to count down As the oven heats up the display will show the changing...

Страница 14: ...may need to add additional time to the length of the Cook Time 4 Press the INCREASE pad until 3HR OO appears in the display Cook Time of 3 hours now appears in the display 6 Change Stop Time frolm 5 0...

Страница 15: ...mum Convection Cookbook suggested time Convection Roasting Rack Roasting rack Roasts or poultry should be cooked on the lowest shelf position A on the offset shelf When you are convection roasting you...

Страница 16: ...words LO PROBE will replace the roasting temperature in the display After the internal temperature of the meat reaches 10O F the changing internal temperature will be shown in the display 3 7 When the...

Страница 17: ...ome food poisoning organisms may survive Source Safe Food Book Your Kitchen Guide USDA Rev June 1985 REGULAR BAKING Your oven temperature is controlled very accurately NOTE When the oven is hot the fr...

Страница 18: ...thout a preheat indicator light or tone preheat 10 higher temperature does not shorten preheat time minutes After the oven is preheated place the food in the oven as quickly as possible to prevent hea...

Страница 19: ...n aluminum cookie sheet A cake baked in a pan larger than the recipe r baking since the shiny foil pan reflects heat away recommended will usually be crisper thinner and rom the pie crwit the cookie s...

Страница 20: ...play will show the changing temperatures When the oven reaches the temperature you set a tone will sound 2 Press the INCREASE or The oven will continue to cook for the programmed DECREASE pad until th...

Страница 21: ...e display The control automatically sets the Stop Time by adding the Cook Time to the time of day In this example the time of day is 2 00 and the Cook Time is 3 hours Adding 3 hours to the time of day...

Страница 22: ...ment for Bake does not affect Convection Bake or Convection Roast To adjust these press the CONVECTION BAKE or the CONVECTION ROAST pad instead of the BAKE pad when following the steps under To Adjust...

Страница 23: ...e weight of the meat Place it fat side up or for poultry breast side up on a trivet in a 5 Press the CLEAR OFF pad when CLEAR roasting is finished OFF shallow pan The melting fat will baste the meat S...

Страница 24: ...oven automatically shuts off The temperature probe has a skewer like probe at one end and a plug at the other end that goes into the outlet on the oven wall Cable Probe Plug Handles appearance may var...

Страница 25: ...he oven has cooled Do not store the probe in the oven NOTE If the probe is removed from the food before the final temperature is reached a tone will sound and the display will flash until the probe is...

Страница 26: ...nutes per pound for roasts under 5 pounds more time for larger roasts Make sure poultry is thawed before roasting Unthawed poultry often does not cook evenly Some commercial frozen poultry can be cook...

Страница 27: ...oven is turned off Use of Aluminum Foil You can use aluminum foil to line Without the slits the foil will your broiler pan and broiler grid prevent fat and meat juices from However you must mold the...

Страница 28: ...k c c 4 Arrange in single layer Ground Beef Well Done Space evenly Up to 8 patties take about same time 10 7 Beef Steaks Rare Medium Well Done Rare Medium Well Done Chicken 1 inch thick 1 to 1 M lbs c...

Страница 29: ...not clean the gasket Never use a commercial oven cleaner in or around the self cleaning oven Clean the outside front of the oven door with soap and water Also use soap and water to clean under the ov...

Страница 30: ...efore you try to set the cycle 1 FO11OW the directions to prepare the oven for cleaning El CLEAN 2 Press the CLEAN pad 3 Press the INCREASE or DECREASE pad until the desired Clean Time is displayed Cl...

Страница 31: ...eaning 2 Press the CLEAN pad CLEAN 5 STOP TIME 4 Press the STOP TIME pad SET STOP TIME and the earliest Stop Time you can set will appear in the display The earliest Stop Time will be the Clean Time s...

Страница 32: ...ng cleaning normal A Yes This is the sound of the metal heating and cooling during both the cooking and cleaning functions Q Should there be any odor during the cleaning A Yes there will be an odor du...

Страница 33: ...oiler pan and grid may be cleaned with a commercial oven cleaner Do not store a soiled broiler pan and grid anywhere in the oven Do not clean the broiler pan and grid in the self cleaning oven Both th...

Страница 34: ...sket is cleaned during the self clean cycle you do not need to clean this by hand Any soap left on the liner causes additional stains when the oven is heated The area outside the gasket can be cleaned...

Страница 35: ...st cloth or towel When cleaning avoid touching warm lights with cleaning cloths if the light cover is removed The oven light is covered with a removable glass cover which is held in place with a wire...

Страница 36: ...ss cleaner Rinse and polish with a dry cloth Do not allow the water or cleaner to run down inside openings in the glass or the openings in the top of the oven door while cleaning F T Metal Parts Do no...

Страница 37: ...being used Food is being cooked on a hot pan Cookware is not suited for broiling Low voltage See the Broiling section Aluminum foil used on the broiler pan grid has not been fitted properly and slit a...

Страница 38: ...It Yourself section This is normal in a new oven and will disappear in time To speed the process set a self clean cycle for a minimum of 3 hours See the Operating the Self Cleaning Oven section An od...

Страница 39: ...ired hearing or speech who have Braille controls for a variety of GE access to a TDD or a conventional teletypewriter may appliances and a brochure to call 800 TDD C EAC 800 833 4322 to request assist...

Страница 40: ...roduct please contact your dealer or our Consumer Affairs office at the address below or call toll free GE Answer Cente 800 626 2000 consumer information service Replacement of house fuses or resettin...

Отзывы: