background image

Содержание JBS02P

Страница 1: ...ergy Saving Tips 5 Safety Instructions 3 4 Features 6 7 Surfhce Cooking 8 11 Flooring under the Range 5 Control Settings 8 Installation Instructions 25 27 Cookware Tips 10 11 Leveling 5 Warmnty Back C...

Страница 2: ...oven Immediately contact the dealer or builder that sold you the oven Save time and money Before you request service Check the Problem Solver in the If you need service 4 To obtain service see the Co...

Страница 3: ...e range and even tip it over causing severe personal injury CAUTION ITEMS OF INTEREST TO CHILDREN SHOULD NOT BE STORED IN CABINETS ABOVE A RANGE OR ON THE BACKSPLASH OF A RANGE CHILDREN CLIMBING ON TH...

Страница 4: ...nship of cookware to burner will also improve efficiency s Never leave surface units unattended at high heat settings Boilover causes smoking and greasy spillovers that may catch on fire Be sure drip...

Страница 5: ...8 inch between the range and the leveling screw that is to be installed into the Anti Tip devi ea Energy Saving Tips Surface Cooking Use cookware of medium weight aluminum with tight fitting covers a...

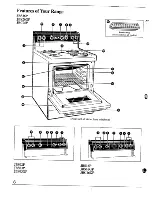
Страница 6: ...Features of Your Range JBS26P JBS26GP JBC26P Broiler Pan not included on all modek I I I I B I ll f Note not all doors have windows JBS02P JBS03P JBS03GP 6 JBS16P JBS16GP JBC16GP...

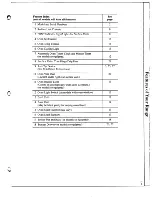
Страница 7: ...e Units Trim Rings Drip Pans I 21 9 Anti Tip Device 3 25 27 See Installation Instructions 10 Oven Vent Duct 20 Located under right rear surface unit 11 Oven Interior Light Comes on automatically when...

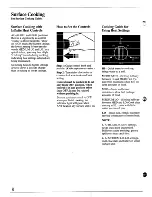
Страница 8: ...in to set only from OFF position When control is in any position other than OFF it maybe rotated without pushing in Be sure you turn control to OFF when you finish cooking An indicator light will glo...

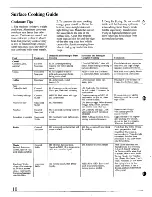
Страница 9: ...one on surface units only Pots that extend beyond one inch of cooking element s trim ring are not recommended for most surface cooking However when canning with water bath or pressure canner larger di...

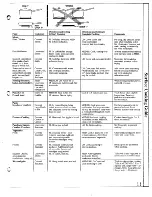
Страница 10: ...HI until whites are just set about 3 to 5 more minutes LO then add eggs When bottoms of eggs have just set carefully turn over to cook other side LO Carefully add eggs Cook uncovered about 5 minutes...

Страница 11: ...ench toast Skillet or Griddle longer time Turn over pancakes when bubbles rise to surfiice Pasta Noodles or spaghetti Covered Large Kettle or Pot HI In covered kettle bring salted water to a boil unco...

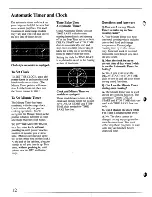
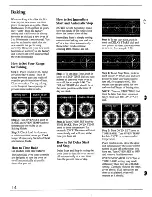
Страница 12: ...and STOP TIME dials to automatically start and stop oven at a later time of day It takes the worry out of not being home to start or stop the oven Setting the dials for TIME BAKE is explained in detai...

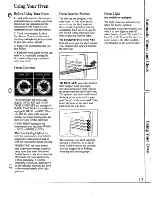
Страница 13: ...y when necessary Most foodswillcook satisfactorily withoutpreheating Ifyou find preheatingis necessary keep an eye on the indicator light and put food in the oven promptly after light goes out Oven In...

Страница 14: ...a later time automatically Remember foods continue cooking after controls are off Step 1 To set Stop Time push in knob on STOP TIME dial and turn pointer to time you want oven to turn off for example...

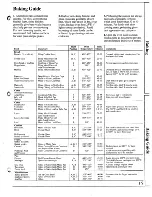
Страница 15: ...f B may be used Plain rolls Sweet roils Cakes without shortening Angel food Jelly roil Sponge 325 3750 375 4000 325 3500 30 55 1O I5 45 60 Two piece pan is convenient Line pan with waxed paper Aluminu...

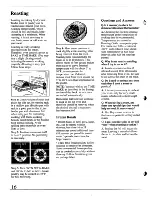
Страница 16: ...oven and therefore should be removed when the desired internal temperature has been reached Frozen Roasts sFrozen roasts of beef pork lamb etc can be started without thawing but allow 10 to 25 minutes...

Страница 17: ...pound more for roasts is 10 to 20 minutes This time than givenin guidefor allowsroaststo firmup and makes refrigerated roasts 10 minutes per them easier to carve Internal pound for roasts under 5 poun...

Страница 18: ...the rack Without the slits the foil will prevent fat and meat juices from draining to the broiler pan The juices could become hot enough to catch on fire If you do not cut the slits you are frying not...

Страница 19: ...ne 1 lb 4 patties Xto Xin thick Space evenly Up to 8 patties take about same time c 7 4 5 Beef Steaks Rare Medium Well Done Rare Medium Well Done 1 in thick 1 to IX lbs c c c c c c 7 9 13 10 15 25 7 9...

Страница 20: ...t with aluminum foil or any other material This prevents the oven vent from working properly during any cooking cycle Lamp Replacement on models so equipped CAUTION Before replacing your oven lamp bul...

Страница 21: ...Guide the surface unit into place so it rests evenly Note The drip pan must be under the trim ring CAUTION Do not attempt to clean plug in surface units in an automatic dishwasher Do not immerse plug...

Страница 22: ...oven is reheated FOR HEAVY SOIL Choose a non abrasive cleaner and follow label instructions using thin layer of cleaner Use of rubber gloves is recommended Wipe or rub lightly on stubborn 3 spots Rins...

Страница 23: ...excess spills and boilovers from aluminum foil oven bottom liner before removing liner from oven This is to prevent excess liquids from spilling onto the porous finish Then remove aluminum foil bottom...

Страница 24: ...commended Improper shelf position being used Check Necessary preheating was not done c Food is being cooked on hot pan Utensils are not suited for broiling Broiling Guide Aluminum foil used on the bro...

Страница 25: ...use as noted on the rating plate Wtig must conformto NationalElectricCodes Ifthe electric service provideddoes not meet the abovespecifications it is recommended that a licensed electricianinstallan a...

Страница 26: ...to support the flexible cord strain relief which must be securely attached to the cord set WIRING COVER J CTOR STEP 4 3 VIRE SYSTEM Power Cord Installation Insert screws through power cord terminals s...

Страница 27: ...lation Read the IMPORTANT SAFETYINSTRUCTIONS and the instructions that fit your situation before beginning installation WARNING 1 Range must be secured by ANTI TIPbracket supplied 2 See instructions t...

Страница 28: ...Notes 28...

Страница 29: ...Notes J t m...

Страница 30: ...Notes 30...

Страница 31: ...ll be answered promptly and courteously And you can call any time GE Answer Cente service is open 24 hours a day 7 daysa week year contrac you re assured of fut e service at today s prices IUecommunic...

Страница 32: ...how to use the product resetting of circuit breakers 1 Read your Use and Care material Failure of the product if it is used If you then have any questions for other than its intended purpose about op...

Отзывы: