background image

 Care & Installation Guide

Self-Cleaning Electric Range

/

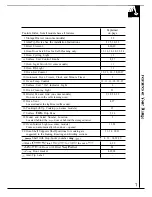
Safety instructions....................3-5

Anti-Tip Device .........................3, 25,30,32

Operating Instructions

Tips

Aluminum Foil ..........................5, 15, 18–20

AutomaticTimers and Clock.. ...........11,17

Features . . . . . . . . . . . . . . . . .......................6,7

Oven . . . . . . . . . . . . . . . . . . . . ................12-24

Baking . . . . . . . . . . . . . . . . . . . ...........13-15

Broiling, Broiling Guide . ...............20,21

Control Settings . . . . . . .........................12

 Bulb Replacement.. ..............13,28

Roasting, Roasting Guide.. .............18,19

Self-Cleaning Instructions ..............22-24

Timed Baking . . . . . . . . . . . . ............16,17

Surface Cooking . . . . . . . .....................8-10

Canning Tips . . . . . . . . . . . . . ...................10

Control Settings 

 9

Cooktop Comparison ................................8

Cookware Tips . . . . . . . . . .................9,10

Care and Cleaning ...................25-29

Anti-Tip Device . . . . . . . .............................25

 Pans . . . . . . . . . . . . . . . .........................28

Lift-OffDoor . . . . . . . . . . . . . . . . . . . . . . . . . . . . . . . . . . . . . . . . . . . . . . . . . .

26

Oven Vent . . . . . . . . . . . . . . .........................27

Self-Cleaning Instructions .................22-24

Storage Drawer . . . . . . . . ..........................29

Surface Units . . . . . . . . . . ..........................26

Problem Solver . . . . . . .

.

..33,34

ThermostatAdjustment–

Dolt Yourself . . . . . . . . . . . . . ..................17

More 


 ....30-32

Anti-Tip Device . . . . . . . . ...........................32

Flooring Under the Range .........................31

 . . . . . . . . . . . . . . . .   ........................32

Consumer Services . .

...........35

Appliance Registration ...............................2

Important Phone Numbers ......................35

Model andSerial Number Location ..........2

Warranty . . . . . . . . . . . . . . . . ........Back Cover

Models: JBP22 JBP23

GE Appliances

Содержание JBP2

Страница 1: ...7 Surface Cooking 8 10 Canning Tips 10 Control Settings 8 9 CooktopComparison 8 Cookware Tips 9 10 Care and Cleaning 25 29 Anti Tip Device 25 Dtip Pans 28 Lift OffDoor 26 Oven Vent 27 Self Cleaning In...

Страница 2: ...u received a damaged range Immediately contact the dealer or builder that sold you the range Save time and money Before you request service Check the Problem Solver in the back of this guide It lists...

Страница 3: ...nd even tip it over causing severe personal injury WARNING AN ranges can tip and injury could result To prevent accide tal tipping of the range attach it to the wall and floor by installing the Anti T...

Страница 4: ...l trim parts above the door Remember The inside surface of the oven may be hot when the door is opened When cooking pork follow the directions exactly and always cook the meat o an internal temperatur...

Страница 5: ...ure To minimize the possibility of burns ignition of flammable materials and sp Hage the handle of a container should be turned toward the center of the range withou extending o er the nearby surface...

Страница 6: ...FEATURES OF YOUR RANGE JBP22 JBP23 A Broiler Pan and Grid not included on all models Some models have cooktops for easier lift up cleaning 6...

Страница 7: ...3 14 Broiler Pan and Grid on some models 5 18 20 29 Do not clean in the self cleaning oven 15 Oven Vent 4 27 Located under the right rear surface unit 16 Cooktop Lift Up Cooktop on some models 25 17 S...

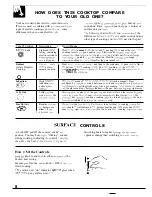
Страница 8: ...Pan must he made of terrous metas metal that attracts a magnet Heat i illlw 1 ll f A l induction coi s produced by a magneiic circuit between the coil and he pan l leats up right aw O __ under a glaw...

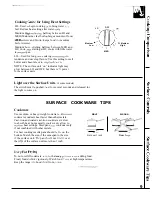
Страница 9: ...MED Light over the Surface Units cm some models The switch must be pushed held for several seconds and released for the light to come on SURFACE COOKWARE TIPS Cookware Use medium or heavy weight cook...

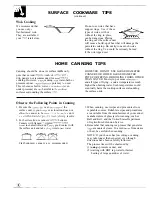
Страница 10: ...boiling water Such temperatures could eventually harm the cooktop surfaces surrounding the surface units Observe the Following Points in Canning 1 Be sure the canner fit over the center of the surface...

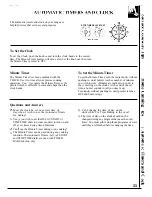
Страница 11: ...shape than the the center ring on the clock At the end of the set clock hands time a buzzer sounds to tell you time is up Turn knob without pushing in until pointer reaches OFF and buzzer stops Questi...

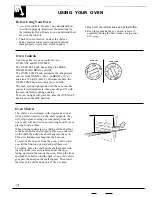
Страница 12: ...ven reaches your selected temperature then goes off and on with the oven element s during cooking The oven on light will glow any time the OVEN SET knob is not in the OFF position OVEN SET OVEN TEMP O...

Страница 13: ...n temperature is controlled very accurately Your se instructions on how to adjust the thermostat using an oven control system We recommend that NOTE When the oven gets hot the top and outside you oper...

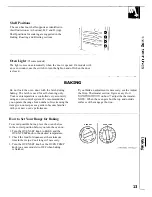
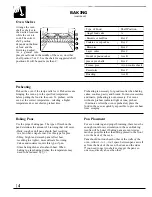
Страница 14: ...t the correct temperature selecting a higher without a preheat indicator light or tone preheat temperature does not shorten preheat time 10 minutes After the oven is preheated place the food in the ov...

Страница 15: ...baked in a pan larger than the recipe for baking since the shiny foil pan reflects heat away recommends will usually be crisper thinner and drier from the pie crust the cookie sheet helps retain it th...

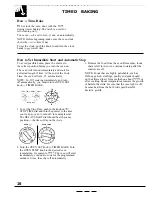
Страница 16: ...T 12 2 9 3 29 a 3 9 6 JJ I PUSH TO TURN 1 To set the Stop Time push in the knob on the STOP TIME dial and turn the pointer to the time you want he oven to turn off for example 6 00 The DELAY START dia...

Страница 17: ...re promotes the growth of harmful bacteria Be sure that the oven light is off because heat from the bulb ulill speed harmful bacteria growth The oven indicator light s at the TIMED BAKE setting may wo...

Страница 18: ...f desired remove roast from oven sooner at 5 to 10 F less than temperature in the guide Remember that food will continue to cook in the hot oven and therefore should be removed when the desired intern...

Страница 19: ...s more time for larger roasts Type Meat Tender cuts rib high quality sirloin tip rump or top round Lamb leg or bone in shoulder Veal shoulder leg or loin Pork loin rib or shoulder Ham precooked Poultr...

Страница 20: ...foil to line your broiler pan and broiler grid However you must mold the foil tightly to the grid and cut slits in it just like the grid Without the slits the foil will prevent fat and meat juices fro...

Страница 21: ...fat Rare Medium Well Done 1 X inch thick 2 to 2X lbs 10 15 25 Chicken 1 whole 2 to 2J lbs split lengthwise A 35 10 15 Reduce time about 5 to 10 minutes per side for cut up chicken Brush each side with...

Страница 22: ...a dampened cloth The oven front frame and the oven door outside the gasket do not get cleaned by the self clean cycle On these areas use detergent and hot water or a soap filled steel wool pad Rinse w...

Страница 23: ...r 3 hours later than present time of day for example if it is 6 00 now set Stop Time for 9 00 The oven cycling light below the OVEN TEMP knob the cleaning light and the oven on light will glow indicat...

Страница 24: ...ycle Q Can I use commercial oven cleaners on any part of my self cleaning oven A No cleaners or coatings should be used around any part of this oven If yOLI do use them and do not wipe the oven absolu...

Страница 25: ...has cooled wash with soap and juices tomato or vinegar should not be permitted water Rinse well to remain on the finish For other spills such as fat smatterings wash with soap and water or cleansing...

Страница 26: ...drip pans For best results clean the drip pans by hand Place them in a covered container or a plastic bag with 1 4 cup ammonia to loosen the soil Then scrub with a soap filled scouring pad if necessar...

Страница 27: ...steel wool abrasives ammonia or commercial oven cleaners To safely clean surfaces wash rinse and then dry with a soft cloth Glass Surfaces To clean the outside glass finish use a glass cleaner Rinse...

Страница 28: ...e bottom to allow for proper air circulation Inside Gasket Gasket Outside Gasket Outside of the door bTse soap and water to thoroughly clean the top sides and front of the oven door Rinse well You may...

Страница 29: ...ner If the g id is grey enamel it can also be cleaned with an oven cleaner If the grid is chrome do not use an oven cleaner to clean it Both the broiler pan and grid can also be cleaned in the dishwas...

Страница 30: ...the electric service provided does not meet the above specifications it is recommended that a licensed electrician install an approved outlet Because range terminals are not accessible after range is...

Страница 31: ...where local codes do not permit grounding through the neutral STEP 3 1 Locate connector block at the bottom rear of range and remove rear wiring cover 2 Directly below the connector block is a hole wi...

Страница 32: ...situation before beginning installation 32 WARNING 1 Range must be secured by ANTI TIP bracket supplied 2 See instructions to install supplied with bracket 3 Unless properly installed range could be...

Страница 33: ...The OVEN TEMP knob not set at BROIL Door not left open to the broil stop position as recommended Improper shelf position being used See the Broiling Guide Food is being cooked on hot pan Cookware is...

Страница 34: ...set at the CLEAN setting c During the self cleaning function a thick pile of spillover in the oven can leave a heavy layer of ash that can insulate the area from further heat The door latch handle not...

Страница 35: ...nces and a brochure to assist in planning a barrier free kitchen for persons with limited mobility To obtain these items free of charge call 800 626 2000 Special Needs Consumers with impaired hearing...

Страница 36: ...product please contact your dealer or our Consumer Affairs office at the address below or call toll free GE Answer Center 800 626 2000 consumer information service Improper installation If you have a...

Отзывы: