HOT COLD
IN
OUT
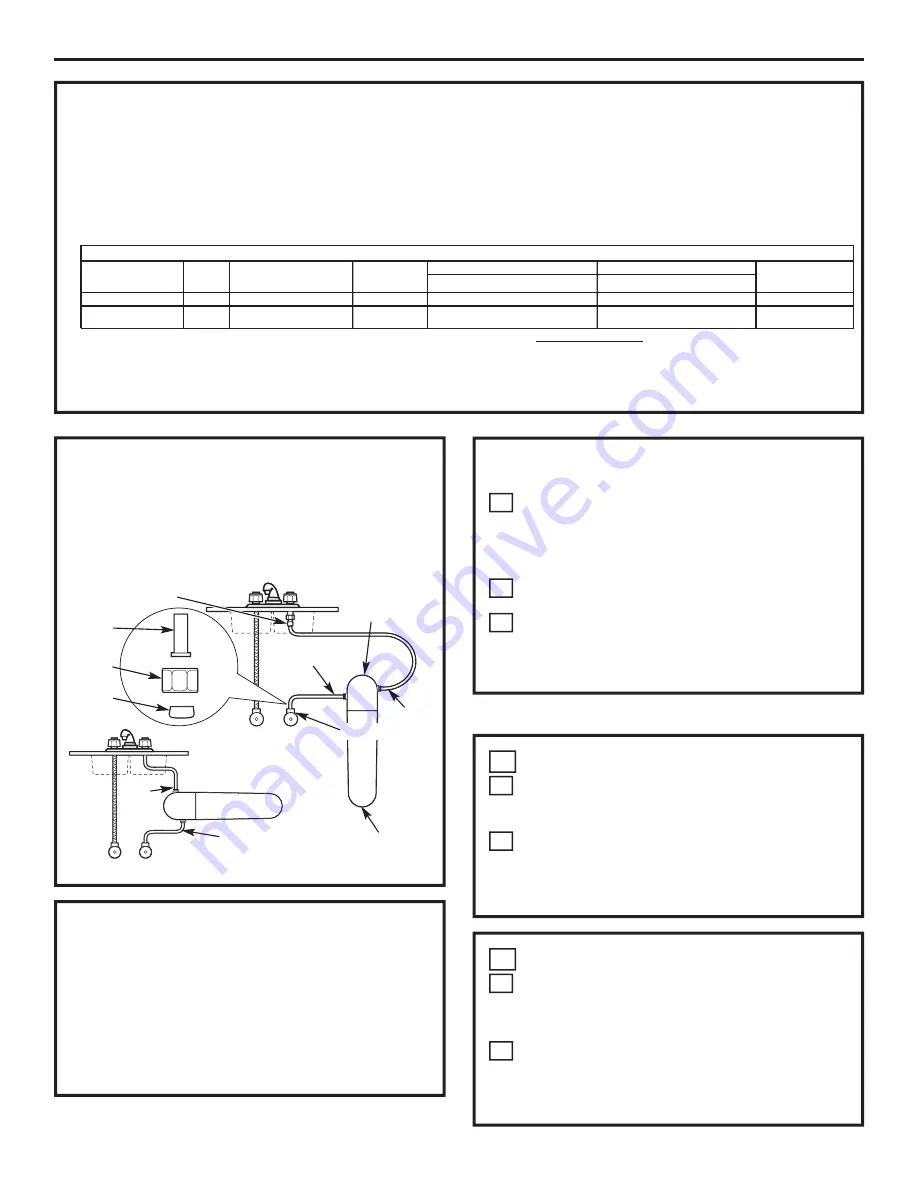
Optional installation
STEP-BY-STEP INSTALLATION INSTRUCTIONS
Installation Overview
NOTE:
Be sure to allow a minimum space of 1
1
/
2
”
–2
”
under the system for removing the filter cartridge.
If you have copper tubing with 3/8
”
compression fittings,
you’ll need to follow Step 3 Option B (Optional Installation).
CARTRIDGE SPECIFICATIONS
Performance Data –
Filtration System GXULQ Using Filter GXULQR
n
This System has been tested according to NSF/ANSI 42 for the reduction of the substances listed below. The concentration of the indicated
substances in water entering the system was reduced to a concentration less than or equal to the permissible limit for water leaving the
system, as specified in NSF/ANSI 42.
n
Actual performance may vary with local water conditions.
n
Do not use with water that is microbiologically unsafe or with water of unknown quality without adequate disinfection before or after
the system.
2
Installation Instructions
FILTER CARTRIDGE REPLACEMENT
Replacement Filter Canister/Estimated Replacement Costs
GXULQR—Replacement filter canister $29–34
For replacement parts, call toll-free 800.626.2002 (U.S.),
800.663.6060 (Canada–English), 800.361.3869 (Canada–French)
TO REMOVE FILTER:
•
Turn filter 1/4 turn to the left. The top surface of
the filter will move away from the bottom of the
head. Pull the filter down to remove.
HOT
COLD
IN
OUT
Filter
Cartridge
INSTALLING THE SYSTEM
SELECT A LOCATION
Select a location for the system that is:
•
Protected from freezing.
•
Not exposed to direct sunlight.
Select and mark a location under the sink that allows
access for a filter cartridge change. See Section 4.
The system can be mounted vertically or horizontally.
DO NOT MOUNT THE SYSTEM UPSIDE DOWN.
B
A
1
DISCONNECT COLD WATER SUPPLY
Remove items from under the sink. Place a
bucket and some towels under the sink to collect
any water that may run out when disconnecting
the water supply lines.
Turn off the cold water supply valve and remove
the existing water supply tubing and fittings.
NOTE:
For copper tubing, leave the 3/8
”
compression
fitting on the faucet stem. Go to Step 3, Option B.
B
A
2
3/8” x 1/2” Push to
Connect Adapter
Filter Head/
Bracket
Standard No. 42: Aesthetic Effects
USEPA
Influent
Influent
Effluent
% Reduction
Reduction
Parameter
MCL
Challenge Concentration
Average
Average
Maximum
Average
Minimum
Requirement
Chlorine taste and odor
—
2.0 mg/L ± 10%
1.9 mg/L
<0.05 mg/L
0.05 mg/L
>97.4%
97.4%
≥50%
Particulate, Class I
particles 0.5 to <1um**
—
≥10000 particles/mL
10333333 #/mL
20,500 #/mL
41,000 #/mL
99.8%
99.6%
≥85%
*Tested using a flow rate of 2 gpm (7.6 l/min); pressure of 60 psig;
Operating Specifications
pH of 7.5 ± 0.5; temp. of 68° ± 5°F (20° ± 3°C)
Capacity: certified for up to 2000 gallons (7,571 l); up to six months
**Measurement in particles/mL. Particles used were 0.5–1 microns.
Pressure requirement: 20–100 psi (1.4–6.9 bar)
Temperature: 34°–100°F (1.1°–38°C)
FILTER CARTRIDGE REPLACEMENT (cont.)
TO REPLACE FILTER:
Push filter into the filter head/bracket. Turn filter
1/4 turn to the right until it stops. The top surface
of the filter will be flush with the bottom of the filter
head/bracket when fully installed.
NOTE:
When correctly installed, the label will face out.
Turn on the cold water faucet to flush the filter for
5 minutes to remove air.
Change the batteries in the timer.
NOTE:
Remove the water in the line to minimize the water released
during filter cartridge replacement. Turn off the cold water supply
valve and turn on the faucet for 5 seconds.
C
B
A
Shut-Off Valve
Ferrule
Hex nut
Tubing
insert
Содержание GXULQ
Страница 5: ...5 Notes...
Страница 11: ...Notes 11...


