background image

8

Operating Instructions

Safety Instructions

Consumer Support

Troubleshooting T

ips

About reversing the door.

Reversing the Door

Tools needed:

Standard #2

Tape-tipped 

Flat-blade

Phillips screwdriver 

putty knife

screwdriver

Remove the four hinge attaching screws.

Remove all nine (9) screws from the door and hinges.

Pull the bottom of the door liner out (A), then pull

down (B), removing the door liner from the door

panel.

Rotate the door panel 180° as shown.

Remove the door strike from the door liner and

reinstall on the opposite side.

Insert the liner under the flange on the bottom of 

the door (A), then push the top of the door liner

into place (B). 

Reinstall the nine (9) screws removed in Step 2. 

Using a screwdriver or tape-tipped putty knife,

remove the two door plugs and reinstall on the

opposite side of the door opening. 

Reinstall the four hinge attaching screws removed 

in Step 1. 

9

8

7

6

5

4

3

2

1

1

2

3

4

5

6

7

8

9

B

A

B

A

Содержание DDSS475

Страница 1: ... Dryer Features 7 Loading and Using the Dryer 9 Reversing the Door 8 Venting the Dryer 10 Troubleshooting Tips 11 12 Consumer Support Consumer Support Back Cover Product Registration 13 14 Warranty 15 Write the model and serial numbers here Model __________________ Serial ____________________ You can find them on a label on the front of the dryer behind the door ...

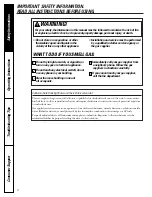
Страница 2: ...utdoors WARNING For your safety the information in this manual must be followed to minimize the risk of fire or explosion electric shock or to prevent property damage personal injury or death WHAT TO DO IF YOU SMELL GAS Do not try to light a match or cigarette or turn on any gas or electrical appliance Do not touch any electrical switch do not use any phone in your building Clear the room building...

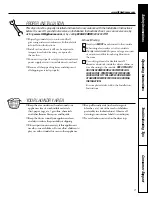
Страница 3: ...ON For complete details follow the Installation Instructions 3 2 1 3 PROPER INSTALLATION This dryer must be properly installed and located in accordance with the Installation Instructions before it is used If you did not receive an Installation Instructions sheet you can receive one by visiting www GEAppliances com or by calling 800 GE CARES 800 432 2737 Consumer Support Troubleshooting Tips Opera...

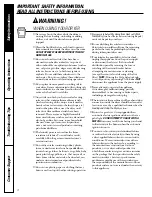
Страница 4: ...ring operation Garments labeled Dry Away from Heat or Do Not Tumble Dry such as life jackets containing Kapok must not be put in your dryer Do not dry fiberglass articles in your dryer Skin irritation could result from the remaining particles that may be picked up by clothing during subsequent dryer uses To minimize the possibility of electric shock unplug this appliance from the power supply or d...

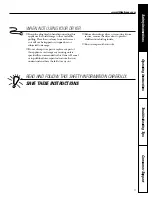
Страница 5: ...r attempt any servicing unless specifically recommended in this Owner s Manual or in published user repair instructions that you understand and have the skills to carry out Before discarding a dryer or removing it from service remove the dryer door to prevent children from hiding inside Do not tamper with controls READ AND FOLLOW THIS SAFETY INFORMATION CAREFULLY SAVE THESE INSTRUCTIONS 5 Consumer...

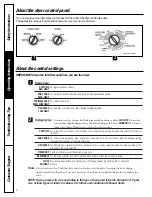
Страница 6: ...he optimum setting located at the midpoint of the cycle selection TIMED DRY Set the Cycle Selector at the desired drying time DEWRINKLE For removing wrinkles from items that are clean and dry or that are very lightly damp FLUFF Provides no heat tumbling for freshening or fluffing up already dry clothing fabric linens and NO HEAT pillows Start Close the dryer door Push the Cycle Selector knob to st...

Страница 7: ...etting you have chosen for this load it would be EASY CARE 2 1 End of Cycle Signal If a volume level is selected the signal will sound when the cycle is done The signal will stop when the door is opened or when the Cycle Selector knob is advanced to an OFF position NOTE Remove garments promptly at the sound of the signal Place clothes on hangers so wrinkles won t set in Use the END OF CYCLE SIGNAL...

Страница 8: ...ull down B removing the door liner from the door panel Rotate the door panel 180 as shown Remove the door strike from the door liner and reinstall on the opposite side Insert the liner under the flange on the bottom of the door A then push the top of the door liner into place B Reinstall the nine 9 screws removed in Step 2 Using a screwdriver or tape tipped putty knife remove the two door plugs an...

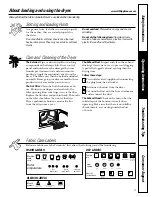
Страница 9: ... filled items Care and Cleaning of the Dryer The Exterior Wipe or dust any spills or washing compounds with a damp cloth Dryer control panel and finishes may be damaged by some laundry pretreatment soil and stain remover products Apply these products away from the dryer The fabric may then be washed and dried normally Damage to your dryer caused by these products is not covered by your warranty Th...

Страница 10: ...ot vented to the below specifications Carefully follow the details on Exhausting in the Installation Instructions Use only rigid metal or flexible metal 4 diameter ductwork inside the dryer cabinet or for exhausting to the outside Do not use plastic or other combustible ductwork Use the shortest length possible Do not crush or collapse Avoid resting the duct on sharp objects Venting must conform t...

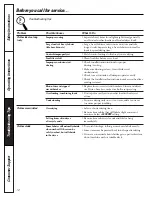
Страница 11: ... softener Follow directions on fabric softener package Drying dirty items Use your dryer to dry only clean items Dirty items can with clean ones stain clean items and the dryer Clothes were not Sometimes stains which cannot be seen when the clothes completely clean are wet appear after drying Use proper washing procedures before drying Lint on clothes Lint filter is full Clean lint screen before e...

Страница 12: ...e fuses or reset circuit breakers Since most dryers circuit breaker use 2 fuses breakers make sure both are operating Overloading combining loads Do not put more than one washer load in the dryer at a time Underloading If you are drying only one or two items add a few items to ensure proper tumbling Clothes are wrinkled Overdrying Select a shorter drying time Remove items while they still hold a s...

Страница 13: ...otection or you may request your money back on the remaining value of your contract No questions asked It s that simple Protect your refrigerator dishwasher washer and dryer range TV VCR and much more any brand Plus there s no extra charge for emergency service and low monthly financing is available Even icemaker coverage and food spoilage protection is offered You can rest easy knowing that all y...

Страница 14: ...ct is registered or register online at www GEAppliances com 1 2 3 Model Number Serial Number Cut here Complete and mail your Consumer Product Ownership Registration today Have the peace of mind of knowing we can contact you in the unlikely event of a safety modification After mailing the registration below store this document in a safe place It contains information you will need should you require...

Страница 15: ...al damage caused by possible defects with this appliance This warranty is extended to the original purchaser and any succeeding owner for products purchased for home use within the USA In Alaska the warranty excludes the cost of shipping or service calls to your home Some states do not allow the exclusion or limitation of incidental or consequential damages This warranty gives you specific legal r...

Страница 16: ...rn about special discounts that are available while your warranty is still in effect You can purchase it on line anytime or call 800 626 2224 during normal business hours GE Consumer Home Services will still be there after your warranty expires Parts and Accessories www GEAppliances com Individuals qualified to service their own appliances can have parts or accessories sent directly to their homes...

Отзывы: