background image

13

Finding your specifications

www.gateway.com

Finding your specifications

For more information about your notebook, such as memory size, memory type, 
and hard drive size, go to the 

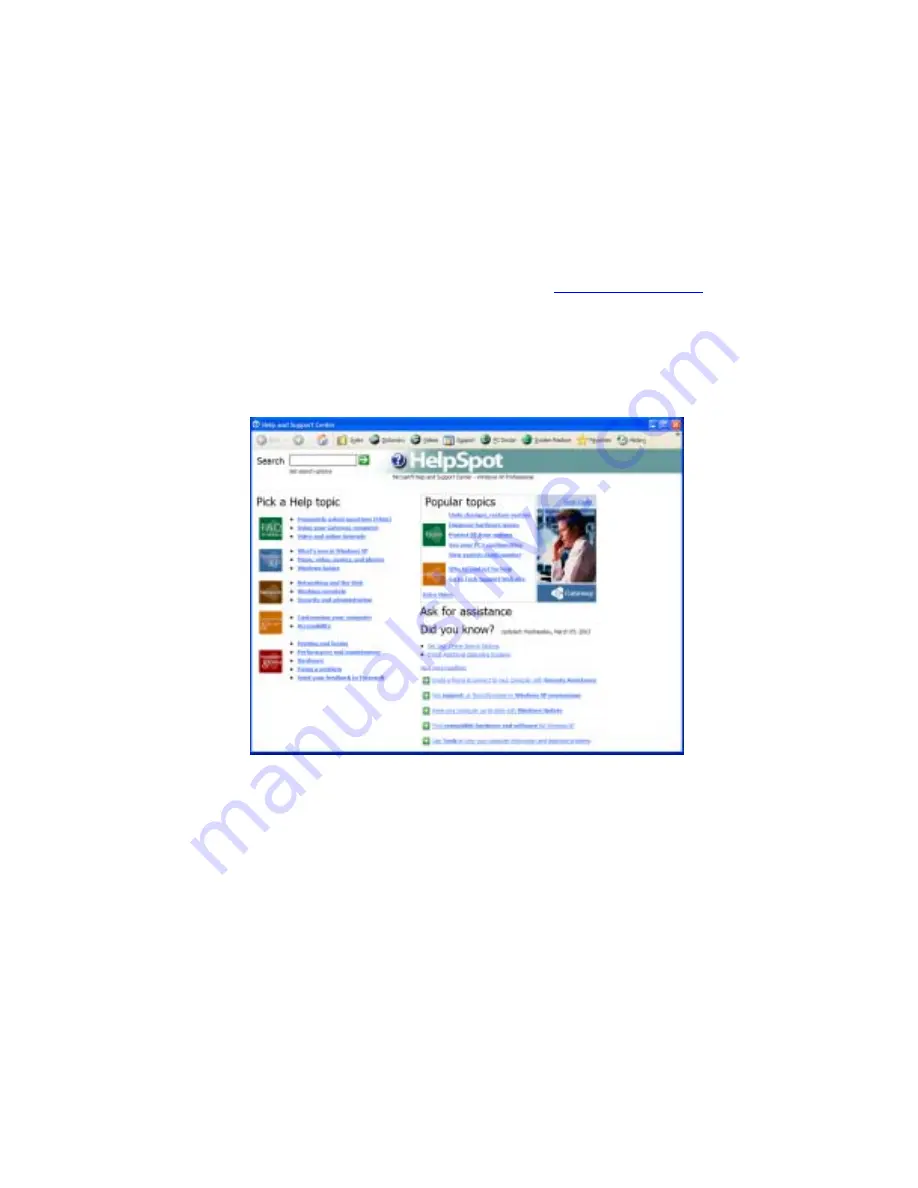
See your PC’s configuration 

link in HelpSpot in 

Windows XP or visit Gateway’s eSupport page at 

support.gateway.com

. Th

eSupport page also has links to additional Gateway documentation and detailed 
specifications.

In Windows XP, view your notebook’s serial number by clicking 

Start

Help and 

Support

, then clicking 

View system serial number

. Check your specifications by 

clicking 

Start

Help and Support

, then clicking 

See your PC’s configuration

.

Содержание M350

Страница 1: ...Gateway M350 Notebook Customizing Troubleshooting user sguide ...

Страница 2: ......

Страница 3: ... power source problems 20 Starting your notebook 21 Waking up your notebook 22 Turning off your notebook 22 Restarting rebooting your notebook 23 Status indicators 24 Using the keyboard 26 Key types 27 System key combinations 28 Multi function buttons 30 Using the audio controls 31 Using the EZ Pad touchpad 32 Using the touchpad 33 Connecting the modem 35 Connecting to a wired Ethernet network 36 ...

Страница 4: ...s 60 Searching for files 62 Using the Windows Search utility 63 Working with documents 65 Creating a new document 65 Saving a document 66 Opening a document 67 Printing a document 68 Shortcuts 69 5 Using the Internet 71 Learning about the Internet 72 Setting up an Internet account 73 Accessing your Internet account 74 Using the World Wide Web 75 Connecting to a Web site 76 Downloading files 77 Usi...

Страница 5: ...data CDs and DVDs 106 Creating video DVDs 111 Creating music CDs 112 Copying CDs and DVDs 117 Creating CDs and DVDs using Nero Express 120 Creating a data CD or DVD 121 Copying a CD or DVD 125 Copying music tracks 128 Creating a music CD 131 Advanced features 135 Using the optional diskette drive 136 Using the optional memory card reader 137 Memory card types 138 Using a memory card 139 Connecting...

Страница 6: ...ing the power scheme 165 Changing alarm options 167 Changing advanced settings 168 Activating and using Hibernate mode 169 Changing SpeedStep settings 171 9 Travel Tips 173 Modem 174 Radio frequency wireless connections 174 Files 175 Security 175 Power 176 Additional tips 177 10 Customizing Your Notebook 179 Adjusting the screen and desktop settings 180 Adjusting the color depth 180 Adjusting the ...

Страница 7: ... peer to peer wireless Ethernet network 207 For more information 207 Using your notebook on a network 208 Installing and configuring your notebook for Ethernet networking 208 Turning your wireless Ethernet emitter on or off 208 12 Moving From Your Old Computer 211 Using the Windows XP Files and Settings Transfer Wizard 212 Transferring files 212 Finding your files 212 Transferring Internet setting...

Страница 8: ...4 15 Upgrading Your Notebook 247 Adding and removing a PC Card 248 Preventing static electricity discharge 250 Adding or replacing memory 251 Adding or replacing memory in the memory bay 252 Replacing memory under the keyboard 255 Replacing the hard drive kit 263 16 Troubleshooting 269 Safety guidelines 270 First steps 271 Software support tools 271 Troubleshooting 272 CD or DVD drives 272 Cleanin...

Страница 9: ...er 288 Printer 289 Sound 291 Video 291 Telephone support 292 Before calling Gateway Technical Support 292 Telephone numbers 293 Tutoring and training 294 Self help 294 Tutoring 294 Training 295 A Safety Regulatory and Legal Information 297 Index 311 ...

Страница 10: ...viii ...

Страница 11: ...he features of your Gateway notebook How to locate your notebook s model and serial number How to locate the Microsoft Certificate of Authenticity How to locate the specifications for your notebook What accessories are available for your notebook Tips Tricks You can download an electronic copy of this guide from support gateway com support manlib ...

Страница 12: ...on see Using the audio controls on page 31 LCD panel release latch Open the LCD panel by pressing the release latch Battery charge indicator The LED shows the battery activity and status LED green battery is fully charged LED orange battery is charging LED blinking red battery charge is very low LED solid red battery is malfunctioning This LED only lights up when your notebook is connected to AC p...

Страница 13: ...formation see Connecting to a wired Ethernet network on page 36 and Networking Your Notebook on page 195 Microphone jack Plug a microphone into this jack Headphone jack Plug amplified speakers or headphones into this jack The built in speakers are turned off when speakers or headphones are plugged into this jack Modem jack Ethernet jack Microphone jack Headphone jack Diskette drive or memory card ...

Страница 14: ...built in diskette drive or a built in memory card reader If your notebook has a built in memory card reader and you need to use a diskette drive Gateway recommends purchasing a USB diskette drive To order a USB diskette drive visit the Accessory Store at accessories gateway com CD DVD DVD CD RW or DVD RW CD RW drive Insert CDs or DVDs into this drive For more information see Using the CD or DVD dr...

Страница 15: ...port For more information see Connecting a digital video camera on page 141 PC Card slot Insert one Type II PC Card into this slot For more information see Adding and removing a PC Card on page 248 USB ports Plug USB Universal Serial Bus devices such as a diskette drive flash drive Iomega Zip drive printer scanner camera keyboard or mouse into these ports IEEE 1394 port PC Card slot USB ports ...

Страница 16: ...llel device such as a printer into this port Monitor port Plug an analog VGA monitor into this port Ventilation fan Helps cool internal components Do not block or insert objects into these slots Kensington lock slot Secure your notebook to an object by connecting a Kensington cable lock to this slot Power connector Parallel port Monitor port Ventilation fan Kensington lock slot ...

Страница 17: ...s into these slots Memory bay cover Open this cover to install a memory module For more information see Adding or replacing memory in the memory bay on page 252 Reset hole Insert a straightened paper clip into this hole to manually restart the notebook Ventilation fan Memory bay cover Battery bay Reset hole Hard drive bay Battery latch ...

Страница 18: ... The hard drive is located in this bay For more information see Replacing the hard drive kit on page 263 Battery latch Slide to release the battery Battery bay Insert the battery into this bay For more information see Changing batteries on page 161 Component Icon Description ...

Страница 19: ...se buttons are set to open your default e mail program your default Web browser online help and the My Computer window For more information see Multi function buttons on page 30 Status indicators Inform you when a drive is in use or when a button has been pressed that affects how the keyboard is used For more information see Status indicators on page 24 Multi function buttons Status indicators Pow...

Страница 20: ...e mode For more information on configuring the power button mode see Changing power settings on page 165 Keyboard Provides all the features of a full sized 86 key keyboard For more information see Using the keyboard on page 26 Touchpad Provides all the functionality of a mouse For more information see Using the EZ Pad touchpad on page 32 Component Icon Description ...

Страница 21: ...ce received Materiel brouilieur du Cet appareil numerique de la classe B respecte toutes les exigences du Reglement sur le This class B digital apparatus meets all requirements of the Canadian interference FOR USE WITH FSP150 1ADE11or ADP 150CB B POUR UTILSER AVEC MODEL FSP150 1ADE11 ADP 150CB B ou INPUT 19V 7 9A Apparatus Claims of U S Patent Nos 4 631 603 4 577 216 4 819 098 and 4 907 093 licens...

Страница 22: ...our customer ID number Displayed in HelpSpot in Windows XP Click Start Help and Support then click View product serial number Internal wireless label A label similar to the following indicates your notebook contains a wireless communications device The label is located on the bottom of your notebook Microsoft Certificate of Authenticity The Microsoft Certificate of Authenticity label found on the ...

Страница 23: ...ink in HelpSpot in Windows XP or visit Gateway s eSupport page at support gateway com The eSupport page also has links to additional Gateway documentation and detailed specifications In Windows XP view your notebook s serial number by clicking Start Help and Support then clicking View system serial number Check your specifications by clicking Start Help and Support then clicking See your PC s conf...

Страница 24: ...apter 1 Checking Out Your Gateway M350 www gateway com You can also find out more about your notebook at the Gateway eSupport site Visit support gateway com For more information see Using eSupport on page 47 ...

Страница 25: ...f memory If your programs are running more slowly than you think they should try adding more memory See Adding or replacing memory in the memory bay on page 252 and Replacing memory under the keyboard on page 255 for more information Printers You can attach almost any type of printer to your notebook The most common types are inkjet and laser printers which print in color or black and white See In...

Страница 26: ...16 Chapter 1 Checking Out Your Gateway M350 www gateway com ...

Страница 27: ...ut your Gateway notebook Read this chapter to find out how to Connect the AC adapter Start and turn off your notebook Identify the status indicators Use the keyboard Use the EZ Pad touchpad Connect the modem Connect to an Ethernet network Install peripheral devices ...

Страница 28: ...ery is not fully charged before you use your notebook on battery power for the first time the battery life may be much shorter than you expect If the battery life seems short even after being charged for 24 hours the battery may need to be recalibrated For more information see Recalibrating the battery on page 160 Warning Make sure that you use the AC adapter that came with your notebook or one of...

Страница 29: ... 4 When you finish using your notebook for the first time turn your notebook off and leave your notebook connected to AC power for at least 24 hours 5 If the battery charge indicator does not show a full charge after 24 hours contact Gateway Technical Support at support gateway com support ask_gateway asp Warning Do not attempt to disassemble the AC adapter The AC adapter has no user replaceable o...

Страница 30: ...m reaching your notebook Warning High voltages can enter your notebook through both the power cord and the modem connection Protect your notebook by using a surge protector If you have a telephone modem use a surge protector that has a modem jack If you have a cable modem use a surge protector that has an antenna cable TV jack During an electrical storm unplug both the surge protector and the mode...

Страница 31: ...s the power button located above the keyboard The power button is preset to On Off mode However you can also set it to function in Standby Resume mode For instructions on changing the power button mode see Changing power settings on page 165 3 If you are starting your notebook for the first time follow the on screen instructions to set up your notebook Power button ...

Страница 32: ...notebook To turn off your notebook in Windows XP 1 Click Start then click Turn Off Computer The Turn Off Computer dialog box opens 2 Click Turn Off Windows shuts down and turns off your notebook To turn off your notebook in Windows 2000 1 Click Start then click Shut Down The Shut Down Windows dialog box opens 2 Click the arrow button to open the What do you want your computer to do list then click...

Страница 33: ...ram that is not responding 2 Click the program that is not responding 3 Click End Task 4 If your notebook does not respond turn it off wait ten seconds and turn it on again As a part of the regular startup process a program to check the disk status runs automatically When the checks are finished Windows starts Important If your notebook does not turn off immediately complete the following steps un...

Страница 34: ...ton has been pressed that affects how the keyboard is used Indicator Icon Description Hard drive The hard drive is in use Disc drive The CD or DVD drive is in use Diskette drive The diskette drive or the memory card reader is in use Caps Lock Caps Lock is turned on Hard drive Disc drive Caps lock Scroll lock Pad lock Diskette drive ...

Страница 35: ...way com Pad Lock Numeric keypad is turned on For more information see System key combinations on page 28 Scroll Lock Scroll Lock is turned on For more information see System key combinations on page 28 Indicator Icon Description 1 ...

Страница 36: ... functions including shortcut keys for Windows function keys for specific system operations and the Pad Lock keys for the numeric keypad You can attach an external keyboard to your notebook using a USB port You do not need to shut down your notebook to connect a USB keyboard Function keys System keys Navigation keys Volume keys FN key Windows key Numeric keypad Application key Arrow keys LCD brigh...

Страница 37: ... of a line up the page down the page to the beginning of a document or to the end of a document Volume keys Press these colored keys in combination with the FN key to increase or decrease the volume or to turn off all sound FN key Press the FN key in combination with a colored system key such as STATUS STANDBY or PAUSE to perform a specific action Windows key Press this key to open the Windows Sta...

Страница 38: ...nitor must be plugged into the monitor port on your notebook Enter Standby mode Press the power button to leave Standby mode For more information see Changing power modes on page 164 Turn on Pad Lock so you can use the numeric keypad Press this key combination again to turn off Pad Lock The Pad Lock status indicator appears when this function is turned on Pause the text scrolling in a DOS screen P...

Страница 39: ...y combination again to restore the sound For more information see Adjusting the volume on page 82 Increase volume For more information see Adjusting the volume on page 82 Decrease volume For more information see Adjusting the volume on page 82 Press and hold FN then press this system key To Home PgUp PgDn ...

Страница 40: ...Press the multi function buttons to open the programs associated with them Button Icon Press to E mail Open your default e mail program Internet Open your default Web browser Help Open online help My Computer Open the My Computer window E mail Internet Help My Computer ...

Страница 41: ...n Back Skip back one song or track Play Pause Start or pause playing Stop Stop playing Next Skip ahead one song or track Volume down Press to decrease the volume Volume up Press to increase the volume Mute Press the volume down and volume up buttons to mute the sound Press the button combination again to restore the sound Back Stop Play Pause Next Volume ...

Страница 42: ...nt The volume buttons control the volume level of the built in speakers and headphones plugged into the headphone jack The play pause back next and stop buttons may control multimedia programs such as Windows Media Player Windows CD Player MusicMatch and the InterVideo DVD Player Left touchpad button Right touchpad button Rocker switch Touchpad ...

Страница 43: ...he touchpad buttons This function can be to scroll up or down maximize or minimize the active window or open and close the Start menu For more information about programming the rocker switch see Changing the touchpad settings on page 191 Using the touchpad To Do this Move the pointer on the screen Move your finger around on the touchpad If you run out of space and need to move the pointer farther ...

Страница 44: ...en a file or folder Position the pointer over the object Press the left button twice in rapid succession This action is called double clicking Access a shortcut menu or find more information about an object on the screen Position the pointer over the object Quickly press and release the right button once This action is called right clicking Move an object on the screen Position the pointer over th...

Страница 45: ...em 1 Insert one end of the modem cable into the modem jack on the left side of your notebook 2 Insert the other end of the modem cable into a telephone wall jack The modem will not work with digital or PBX telephone lines 3 Start your notebook then start your communications program Important To reduce the risk of fire use only No 26 AWG or larger telecommunications line cord ...

Страница 46: ...de of your notebook 2 Insert the other end of the network cable into a network jack Ask your network administrator to help you select the correct network jack Important Your notebook may be equipped with built in wireless Ethernet or you may have a wireless Ethernet PC Card For information about connecting to a wired or wireless Ethernet network see Networking Your Notebook on page 195 For informa...

Страница 47: ...ut port locations see Checking Out Your Gateway M350 on page 1 IEEE 1394 and USB ports support plug and play and hot swapping which means that your notebook will usually recognize such a device whenever you plug it into the appropriate port When you use an IEEE 1394 or USB device for the first time your notebook will prompt you to install any software the device needs After doing this you can disc...

Страница 48: ...38 Chapter 2 Getting Started www gateway com ...

Страница 49: ...ing Help This chapter tells you about additional information resources available to help you use your notebook Read this chapter to learn how to access HelpSpot Do More With Gateway Online help Gateway Web site ...

Страница 50: ...cover and use the many features of your Gateway notebook HelpSpot also has an area called Who to contact for help that helps you find the right resource at Gateway to answer your questions or help solve your problems To start HelpSpot in Windows XP Click Start then click Help and Support HelpSpot opens If this is the first time you have started HelpSpot you may experience a brief wait while HelpSp...

Страница 51: ...ou can find help information by clicking a link performing a search or browsing the index To learn about using your Gateway notebook your touchpad and other tasks click the Using your Gateway computer link on the HelpSpot main page ...

Страница 52: ... Full text Search Matches These topics are located in HelpSpot and contain the words you entered in the Search box Microsoft Knowledge Base These topics are located on the Microsoft Web site and contain the words you entered in the Search box You must be connected to the Internet to search for and access these topics Gateway com Search These topics are located on the Gateway Web site and contain t...

Страница 53: ... topic click the topic name in the Search Results list HelpSpot videos HelpSpot contains several short videos to help introduce you to new concepts or show you how to perform various tasks To play a HelpSpot video To watch a video in HelpSpot click Video and online tutorials on the HelpSpot home page then click a video title The video plays ...

Страница 54: ...Gateway notebook for digital music digital photography digital video gaming and other programs To access Do More With Gateway in Windows XP click Start then click Do More With Gateway Click the topics listed on the left side of the page to learn more about the software already installed on your notebook as well as partnerships and special offers available through Gateway ...

Страница 55: ...earn how to perform a task while you are using the program You can access most online help information by selecting a topic from a Help menu or by clicking a Help button You can search for information by viewing the help contents checking the index searching for a topic or keyword or browsing through the online help ...

Страница 56: ... 24 hours per day 7 days per week and provides the most current drivers product specifications tutorials and personalized information about your system Visit the Gateway eSupport Web site at support gateway com For more information about connecting to the Internet see Using the Internet on page 71 ...

Страница 57: ... documents related to your system You can also browse through the reference area to locate an article specific to the question you have Click Support Home then click General Tutorials to access an extensive library of how to articles and videos on topics such as making audio CDs and installing a hard drive Downloads Click Downloads then click My Downloads to get the latest software updates for BIO...

Страница 58: ...ww gateway com Account Info Click Account Info to access support for non technical issues like the status of your order or changing your account address PC Tools Click PC Tools to access utilities to help you manage your notebook ...

Страница 59: ...4 49 Windows Basics Read this chapter to learn how to Use the Windows desktop Manage files and folders Work with documents Use shortcuts ...

Страница 60: ...al desk Think of the desktop as your personalized work space where you open programs and perform other tasks Your desktop may be different from this example depending on how your notebook is set up Help and Support For more information about the Windows XP desktop click Start then click Help and Support Type the keyword Windows desktop in the HelpSpot Search box then click the arrow ...

Страница 61: ...submenu opens and reveals related files programs or commands Desktop elements Description The taskbar is the bar at the bottom of the computer display containing the Start button on the left and a clock on the right Other buttons on the taskbar represent programs that are running Click a program s button on the taskbar to open the program s window The Start button provides access to programs files...

Страница 62: ...that you use frequently To add icons to the desktop 1 Click Start then click All Programs 2 Right click press the right touchpad button the program that you want to add to the desktop Help and Support For more information about the Windows XP Start menu click Start then click Help and Support Type the keyword Windows Start menu in the HelpSpot Search box then click the arrow ...

Страница 63: ...ive folder file or program a window opens on the desktop This example shows the Local Disk C window which opens after you double click the Local Disk C icon in the My Computer window Help and Support For more information about desktop icons in Windows XP click Start then click Help and Support Type the keyword desktop icons in the HelpSpot Search box then click the arrow Minimize Maximize Close Ti...

Страница 64: ... the taskbar Clicking the program button in the taskbar opens the window again Clicking the maximize button expands the active window to fit the entire computer display Clicking the maximize button again restores the window to its former size Clicking the close button closes the active window or program Clicking an item on the menu bar starts an action such as Print or Save Help and Support For mo...

Страница 65: ... away information in a file cabinet Viewing drives Drives are like file cabinets because they hold files and folders A notebook almost always has more than one drive Each drive has a letter usually Local Disk C for the hard drive and 3 Floppy A for the optional diskette drive You may also have more drives such as a CD DVD or recordable drive To view the drives on your notebook In Windows XP click ...

Страница 66: ...e much like the folders in a file cabinet They can contain files and other folders Files are much like paper documents letters spreadsheets and pictures that you keep on your notebook In fact all information on a computer is stored in files Help and Support For more information about files and folders in Windows XP click Start then click Help and Support Type the keyword files and folders in the H...

Страница 67: ...the folder then press ENTER The new folder name appears by the folder icon For information about renaming folders see Shortcuts on page 69 Copying and moving files and folders The skills you need to copy and move files are called copying cutting and pasting When you copy and paste a file or folder you place a copy of the file or folder on the Windows clipboard which temporarily stores it Then when...

Страница 68: ...e or folder you want to move For more information see Viewing drives on page 55 and Searching for files on page 62 2 Right click press the right touchpad button the file or folder that you want to move A pop up menu opens on the desktop 3 Click Cut on the pop up menu 4 Open the destination folder 5 With the pointer inside the destination folder right click 6 Click Paste The file or folder you move...

Страница 69: ...hat you want to delete For instructions on how to select multiple files and folders see Shortcuts on page 69 If you cannot find the file you want to delete see Searching for files on page 62 2 Click File then click Delete Windows moves the files and folders to the Recycle Bin Help and Support For more information about copying files and folders or moving files and folders in Windows XP click Start...

Страница 70: ...n on the desktop The Recycle Bin window opens 2 Click File then click Empty Recycle Bin Windows asks you if you are sure that you want to empty the bin 3 Click Yes Windows permanently deletes all files in the Recycle Bin Browsing for files and folders A file or folder that you need is rarely right on top of your Windows desktop It is usually on a drive inside a folder that may be inside yet anothe...

Страница 71: ...is called browsing To browse for a file 1 In Windows XP click Start then click My Computer The My Computer window opens OR In Windows 2000 double click the My Computer icon on the desktop The My Computer window opens 2 Double click the drive or folder that you think contains the file or folder that you want to find If you do not see the contents of a folder click Show the contents of this drive or...

Страница 72: ...reation date Modification date File type Text contained in the file Time period in which it was created or modified You can also combine search criteria to refine searches Files and folders found using this utility can be opened copied cut renamed or deleted directly from the list in the results window Help and Support For more information about browsing for files and folders in Windows XP click S...

Страница 73: ... In Windows 2000 click Start Search then click For Files or Folders The Search Results window opens 2 If you want to search by file or folder name type in all or part of the file or folder name in the name box in the left pane of the window If you type all of the name Search will list all files and folders of that name If you type part of the name Search will list all of the file and folder names ...

Страница 74: ...search options Search can find files meeting more criteria than file name You can narrow your search by selecting the search options that you want You can search by the Date the file was created or modified Size of the file Type of file such as a program or a text document Help and Support For more information about searching for files and folders in Windows XP click Start then click Help and Supp...

Страница 75: ...eate save open and print a document using Microsoft WordPad Similar procedures apply to other programs such as WordPerfect Microsoft Word and Microsoft Excel For more information about using a program click Help on its menu bar Creating a new document To create a new document 1 Click Start All Programs Accessories then click WordPad Microsoft WordPad starts and a blank document opens 2 Begin compo...

Страница 76: ... to open the Save in list then click the folder where you want to save the file If you do not see the folder you want browse through the folders listed below the Save in list 3 Type a new file name in the File name box 4 Click Save Help and Support For more information about saving documents in Windows XP click Start then click Help and Support Type the keyword saving in the HelpSpot Search box th...

Страница 77: ...Open 3 Click the arrow button to open the Look in list then click the folder you want to open If you do not see the folder you want browse through the folders listed below the Look in list 4 Double click the document file name The document opens Help and Support For more information about opening documents in Windows XP click Start then click Help and Support Type the keyword opening files in the ...

Страница 78: ...r documentation To print a document 1 Make sure that the printer is turned on and loaded with paper 2 Start the program and open the document 3 Click File then click Print The Print dialog box opens 4 Set the print options then click OK The document prints Help and Support For more information about printing documents in Windows XP click Start then click Help and Support Type the keyword printing ...

Страница 79: ... then click each of the remaining items Select multiple adjacent items in a list or window Click the first item in the list press and hold down the SHIFT key then click the last item in the list Permanently delete a file or folder Click the file or folder then press SHIFT DELETE The file or folder is permanently deleted The file or folder is not stored in the Recycle Bin Rename a file or folder Cl...

Страница 80: ...70 Chapter 4 Windows Basics www gateway com ...

Страница 81: ...tion about the Internet and the World Wide Web Read this chapter to learn how to Set up and access an Internet account using America Online Connect to a Web site using a browser Download files from the Internet Send and receive e mail using America Online ...

Страница 82: ...et service provider ISP Cable and DSL modems a connection known as broadband use your TV cable or special telephone lines to connect to your ISP and access the Internet Cable and DSL modems connect to your notebook through an Ethernet jack and provide a faster connection speed than a standard telephone modem Important For the location of your modem and Ethernet jacks see Left side on page 3 Your c...

Страница 83: ... Setting up an Internet account Before you can view the information on the World Wide Web you need to set up an Internet account with an Internet service provider ISP If you have chosen America Online as an ISP follow these instructions to set up and connect to your account To set up a different ISP service or to transfer an existing account to this notebook contact the ISP directly If you set up ...

Страница 84: ...om your America Online Internet account Click X in the top right corner of the America Online window Your notebook disconnects from the Internet If you are using a service other than America Online check with your ISP for the correct procedure for disconnecting Important Make sure that your notebook disconnects correctly from your Internet account If you do not have an unlimited hours ISP account ...

Страница 85: ...Navigator or the browser built into America Online Web pages can contain text animations music and other multimedia features A group of related Web pages is called a Web site You can access Web sites to shop track investments read the news download programs and much more You can explore a Web site or visit other Web sites by clicking areas on a Web page called links or hyperlinks A link may be col...

Страница 86: ...y com then click GO on the browser address bar OR On the current Web page click a link to a Web site The Web browser locates the server computer on the Internet downloads transfers data to your notebook and displays the page on the site that you requested Sometimes Web pages display slowly The speed that a Web page displays on your screen depends on the complexity of the Web page and other Interne...

Страница 87: ...wnload 3 Create or locate the folder where you want to store the file on your notebook For more information see Working with files and folders on page 55 4 Click the link on the Web page for the file that you want to download 5 Follow the on screen instructions for saving the file in the folder that you want A copy of the file is downloaded to your notebook The time that it takes to transfer the f...

Страница 88: ...vice provider ISP or company that hosts that user Your e mail address is assigned when you sign up for an account with an ISP For example a person with an account with America Online might have an e mail address that is similar to this one Sending e mail To send e mail using America Online 1 Connect to your America Online account 2 Click Write 3 Type the e mail address of the recipient you want to...

Страница 89: ...ad 3 Double click the message you want to read For more information about managing and organizing your e mail messages see the online help in your e mail program Help and Support For general information about using e mail in Windows XP click Start then click Help and Support Type the keyword e mail in the HelpSpot Search box then click the arrow ...

Страница 90: ...80 Chapter 5 Using the Internet www gateway com ...

Страница 91: ...tebook Read this chapter to learn how to Adjust the volume Record and play audio files Use Windows Media Player Use a CD or DVD drive Play CDs Use MusicMatch Play DVDs Create CDs or DVDs Use the optional diskette drive or memory card reader Attach a digital camera or digital video camera to your notebook ...

Страница 92: ...mute and volume control buttons on the keyboard For more information see System key combinations on page 28 OR Use the mute and volume control buttons on the audio control panel For more information see Using the audio controls on page 31 To adjust the overall volume level from Windows 1 Click Start then click Control Panel The Control Panel window opens If your Control Panel is in Category View c...

Страница 93: ...e Control Panel window opens If your Control Panel is in Category View click Sounds Speech and Audio Devices 2 Click Double click the Adjust the system volume or Sounds and Audio Devices The Sounds and Audio Devices Properties dialog box opens Help and Support For more information about adjusting the volume in Windows XP click Start then click Help and Support Type the keyword adjusting volume in ...

Страница 94: ...just does not appear in the window click Options Properties the check box next to the audio device you want to adjust then click OK 5 Drag the volume level and balance sliders for the device you want to adjust For more information about the volume controls click Help in the window 6 Click X in the top right corner of the window to close it ...

Страница 95: ...xternal speakers turn the knob on the front of the speakers OR Use the mute and volume control buttons on the keyboard For more information see System key combinations on page 28 OR Use the mute and volume control buttons on the audio control panel For more information see Using the audio controls on page 31 To adjust overall volume level from Windows Click the speaker icon on the taskbar then dra...

Страница 96: ...vice you want to adjust does not appear in the Volume Control window click Options Properties the audio device you want to adjust then click OK 2 Drag the volume level and balance sliders for the device you want to adjust For more information about the volume controls click Help in the Volume Control window 3 Click X in the top right corner of the window to close it ...

Страница 97: ... location of the Microphone jack see Left side on page 3 2 Click Start All Programs Accessories Entertainment then click Sound Recorder The Sound Recorder opens 3 Click record then speak into the microphone 4 When you finish recording click stop 5 Click File then click Save As The Save As dialog box opens 6 Name the recording specify the location where you want to save the recording then click Sav...

Страница 98: ... opens 3 Click the file you want to play then click Open 4 Play the file by clicking play then stop playing the file by clicking stop Help and Support For more information about making or playing an audio recording in Windows XP click Start then click Help and Support Type the keyword recording audio or playing audio in the HelpSpot Search box then click the arrow ...

Страница 99: ...IDI MP3 AU AVI and MPEG formats For more information about the using the Windows Media Player click Help To play a file using the Windows Media Player 1 In Windows XP click Start All Programs then click Windows Media Player The Windows Media Player opens OR In Windows 2000 click Start Programs Accessories Entertainment then click Windows Media Player The Windows Media Player opens Video file infor...

Страница 100: ...e by clicking play then stop playing the file by clicking stop Important If the menu bar does not appear click the show menu bar button Help and Support For more information about playing audio and video using the Windows Media Player in Windows XP click Start then click Help and Support Type the keyword Media Player in the HelpSpot Search box then click the arrow ...

Страница 101: ...ing DVDs and accessing data You cannot use this drive to create CDs or DVDs Combination DVD CD RW drive Use a combination DVD CD RW drive for installing programs playing audio CDs playing DVDs accessing data and recording music and data to CD R or CD RW discs You cannot use this drive to create DVDs For more information see Creating CDs and DVDs using Nero Express on page 120 Combination DVD RW CD...

Страница 102: ...h the label facing up then press down carefully on the disc until it snaps into place 3 Push the tray in until it is closed Important Some music CDs have copy protection software You may not be able to play these CDs on your notebook Important When you place a single sided disc in the tray make sure that the label side is facing up If the disc has two playable sides place the disc so the name of t...

Страница 103: ...ch on page 96 You can use the audio buttons on the front of your notebook to control how you play your CDs For more information see Using the audio controls on page 31 To play a CD 1 Insert a CD into the CD or DVD drive 2 If a dialog box opens with a list of CD players click Windows Media Player The Windows Media Player opens OR If a dialog box does not open with a list of CD players click Start A...

Страница 104: ...und or you want to change the volume see Adjusting the volume in Windows XP on page 82 Help and Support For more information about playing CDs in Windows XP click Start then click Help and Support Type the keyword playing CDs in the HelpSpot Search box then click the arrow Play Stop Next Previous Mute Volume ...

Страница 105: ...n see Using the audio controls on page 31 To play a CD Insert a CD into the CD or DVD drive The CD Player opens and the CD plays OR If the CD does not start playing automatically click Start Programs Accessories Entertainment then click CD Player When the CD Player opens click play If you do not hear sound or you want to change the volume see Adjusting the volume in Windows 2000 on page 85 Play St...

Страница 106: ... Use your music files to build a music library Listen to Internet Radio MusicMatch is only available on Gateway computers having Windows XP For more information on using MusicMatch see its online help Playing CDs You can use the MusicMatch program to play music CDs Important Some music CDs have copy protection software You may not be able to play these CDs on your notebook ...

Страница 107: ... names of your CD connect to the Internet before inserting your CD 2 Insert the music CD into the CD or DVD drive on your notebook The Audio CD dialog box opens 3 Click Play Audio CD using MUSICMATCH Jukebox then click OK MusicMatch opens the CD begins playing and the names of the music tracks appear in the playlist area ...

Страница 108: ...ically list the album artist and track names of your CD then use that information for naming and storing your MP3 files connect to the Internet before inserting your CD 2 Insert a music CD into your CD or DVD drive 3 If an Audio CD dialog box opens click Play Audio CD using MUSICMATCH Jukebox then click OK The MusicMatch window opens OR If a dialog box does not open click Start All Programs MusicM...

Страница 109: ...ecorder window opens 6 Click to clear the check box for any track you do not want to record 7 Click Record 8 When a message appears that tells you the CD drive needs to be configured click OK A progress bar appears next to each track as it is recorded Record ...

Страница 110: ...on To edit track information 1 In MusicMatch click My Library The library window opens 2 In the library window right click the file then click Edit Track Tag s The Edit Track Tag s dialog box opens 3 Enter information such as track title lead artist album and genre 4 Click OK The new track information appears in the MusicMatch playlist music library and recorder window ...

Страница 111: ...3 files from the tracks on your music CD MusicMatch automatically adds these files to your music library Dragging and Dropping Drag and drop files from Windows Explorer or your desktop to the music library Downloading files from the Internet When you are connected to the Internet MP3 files that you download are automatically added to your music library Caution During the download process MP3 files...

Страница 112: ...he music library display settings 1 In MusicMatch click Options then click Settings The Settings window opens 2 Click the Music Library tab 3 Click an arrow button to open a column list then click the category that you want to display in the column 4 When you have finished selecting categories click OK ...

Страница 113: ...station then click the arrow in the play this station box MusicMatch connects to the station and plays the audio If you do not see Featured Radio Stations or Radio Stations drag the scroll bar on the left OR To play another Internet radio station click Broadcast Radio the appropriate category in the Broadcast Stations list the radio station then click the arrow in the play this station box MusicMa...

Страница 114: ...ingle disc If your notebook has a DVD drive you can play DVDs with the InterVideo DVD Player program or Windows Media Player For more information about playing DVDs click Help in the DVD player program To play a DVD 1 Make sure that the speakers are turned on or headphones are plugged in and that the volume is turned up 2 Turn off your screen saver and standby timers Tips Tricks In Windows XP see ...

Страница 115: ... into the DVD drive then click play The DVD plays Use the volume controls in the DVD player or the audio buttons on the front of your notebook to adjust the volume For more information on using the DVD player see its online help Important If the InterVideo DVD player is not on your Start menu or if Windows Media Player cannot play a DVD you will need to install the InterVideo DVD program To instal...

Страница 116: ...movies or photos For information on creating music CDs see Creating music CDs on page 112 Use your movie creator software to create video DVDs For more information about using the movie creator software that came with your notebook see its online help To create a data CD or DVD 1 Insert a blank writable CD or DVD into your recordable CD or DVD drive Important We recommend that you do not use your ...

Страница 117: ...g box opens click Create a CD using Roxio Easy CD Creator then click OK The Select a Project window opens OR If a dialog box does not open click Start All Programs Roxio Easy CD Creator then click Project Selector The Select a Project window opens make a data CD dataCD project dataDVD project ...

Страница 118: ...The Easy CD Creator window opens 4 Click the arrow button to open the Select Source Files list then click the drive or folder where the files you want to add to the writable CD or DVD are located If you do not see the folder you want browse through the folders in the Source pane Source Pane Add Select Source Files ...

Страница 119: ...ting CDs and DVDs using Roxio Easy CD Creator www gateway com 5 Click the file you want to record hold down the CTRL or SHIFT key when you click to select multiple files in the Source pane then click Add record ...

Страница 120: ...files click record The Record CD Setup dialog box opens 7 Click Start Recording Help and Support For more information about creating CDs in Windows XP click Start then click Help and Support Type the keyword creating CDs in the HelpSpot Search box then click the arrow Start Recording ...

Страница 121: ...ng program such as Pinnacle Expression to create video DVDs For more information about using the program that came with your notebook see its online help After you connect your digital camcorder to your notebook creating a video DVD typically consists of three basic steps capture the video edit the video and record the video to a DVD R or DVD RW disc Important We recommend that you do not use your...

Страница 122: ...rtant If you record copyrighted material to a CD or DVD you need permission from the copyright owner Otherwise you may be violating copyright law and be subject to payment of damages and other remedies If you are uncertain about your rights contact your legal advisor Important Some CDs have copy protection software You cannot create MP3 files from these CDs and you may not be able to listen to the...

Страница 123: ...e dialog box opens click Create a CD using Roxio Easy CD Creator then click OK The Select a Project window opens OR If a dialog box does not open click Start All Programs Roxio Easy CD Creator then click Project Selector The Select a Project window opens make a music CD musicCD project ...

Страница 124: ...he Easy CD Creator window opens 4 Click the arrow button to open the Select Source Files list then click the drive or folder where the music files that you want to add to the writable CD are located If you do not see the folder you want browse through the folders in the Source pane Source pane Add Select Source Files ...

Страница 125: ...CTRL or SHIFT key when you click to select multiple files in the Source pane then click Add Tips Tricks You can add any combination of music tracks or MP3 files to a music CD project You can add up to 99 tracks and files or up to 650 MB 74 minute CD or 700 MB 80 minute CD of tracks and files to a music CD project record ...

Страница 126: ...box opens 7 Click Start Recording When the recording is complete you may see a Record Complete dialog box Select the appropriate option Help and Support For more information about creating CDs in Windows XP click Start then click Help and Support Type the keyword creating CDs in the HelpSpot Search box then click the arrow Start Recording ...

Страница 127: ...le CD or DVD drive 2 If a dialog box opens click Take no action Important We recommend that you do not use your notebook for other tasks while creating a CD or DVD Important If you record copyrighted material on a CD or DVD you need permission from the copyright owner Otherwise you may be violating copyright law and be subject to payment of damages and other remedies If you are uncertain about you...

Страница 128: ...og box opens click Create a CD using Roxio Easy CD Creator then click OK The Select a Project window opens OR If a dialog box does not open click Start All Programs Roxio Easy CD Creator then click Project Selector The Select a Project window opens CD copier CD copier ...

Страница 129: ... the arrow button to open the Record to list then click the recordable drive 7 Click Copy CD Copier copies the information on the source CD or DVD to your hard drive prompts you to insert the blank CD or DVD then copies the information from the hard drive to the blank CD or DVD Help and Support For more information about copying CDs and DVDs in Windows XP click Start then click Help and Support Ty...

Страница 130: ...use your notebook for other tasks while creating CDs Important If you record copyrighted material on a CD or DVD you need permission from the copyright owner Otherwise you may be violating copyright law and be subject to payment of damages and other remedies If you are uncertain about your rights contact your legal advisor Important Some CDs have copy protection software You cannot create MP3 file...

Страница 131: ...a data CD or DVD To create a data CD or DVD 1 Click Start All Programs Burn a CD or Data DVD Nero Programs then click Nero Express Nero Express opens 2 Insert a blank writable CD or DVD into your recordable drive 3 If a dialog box opens click Take no action then click OK ...

Страница 132: ...122 Chapter 6 Using Multimedia www gateway com 4 Move your pointer over Data then click Data Disc The Disc Content screen opens ...

Страница 133: ...the folder that contains the files you want to add You can click the arrow to open the Location list then click a drive or folder or you can click folders in the Name list Press and hold the CTRL key to select multiple files 7 Click Add You can continue to select files and click Add 8 After you select all your files click Finished ...

Страница 134: ...ck the arrow to open the Current recorder list then click your recordable drive 11 Click Burn The Burning Process screen opens and Nero Express burns the files to the CD 12 When a message tells you that the recording is complete click OK 13 Click Next to return the main Nero Express screen 14 Click Exit ...

Страница 135: ...then click Nero Express Nero Express opens 2 Click Copy entire disc The Select source and destination screen opens 3 Insert the music CD or data CD or DVD you want to copy into your recordable drive 4 Click the arrow to open the Source drive list then click the drive that contains your source disc 5 Click the arrow to open the Destination drive list then click your recordable drive ...

Страница 136: ...126 Chapter 6 Using Multimedia www gateway com 6 Click Burn The Nero s Title and CD Database dialog box opens ...

Страница 137: ...les to your hard drive 8 A message prompts you to insert a CD or DVD Remove the source CD or DVD insert a blank writable CD or DVD then wait for the message box to close Nero Express copies the files from your hard drive to the writable CD or DVD 9 When a message tells you that the recording is complete click OK 10 Click Next to return to the main Nero Express screen 11 Click Exit ...

Страница 138: ... hard drive 1 Click Start All Programs Burn a CD or Data DVD Nero Programs then click Nero Express Nero Express opens 2 Insert the music CD that has the tracks you want to copy into your CD drive 3 If an Audio CD dialog box opens click Take no action then click OK 4 Click More The Nero Toolbar opens ...

Страница 139: ...129 Creating CDs and DVDs using Nero Express www gateway com 5 Click the Save Tracks icon The Nero s Title and CD Database dialog box opens 6 Wait until the dialog box closes OR Click Cancel ...

Страница 140: ...ow button to open the Output file format list then click the format you want for the saved tracks 9 To record all the tracks click GO The recording process begins OR To record selected tracks hold down the CTRL key click the tracks you want then click GO The recording process begins 10 After the recording is complete click Close ...

Страница 141: ...Music then click one of the following options Audio CD to create a music CD that will play on all CD players Nero Express converts MP3 and WMA files to Audio CD format Audio and Data CD to create a CD that contains tracks and data files You can play the music files in a CD player and you can view all files on your notebook MP3 Disc to create a CD using MP3 files You can play the CD on your noteboo...

Страница 142: ...132 Chapter 6 Using Multimedia www gateway com The screen you use to add files opens ...

Страница 143: ...the folder that contains the files you want to add You can click the arrow to open the Location list then click a drive or folder or you can click folders in the Name list Press and hold the CTRL key to select multiple files 7 Click Add You can continue to select files and click Add 8 After you select all your files click Finished ...

Страница 144: ...ck the arrow to open the Current recorder list then click your recordable drive 11 Click Burn The Burning Process screen opens and Nero Express burns the files to the CD 12 When a message tells you that the recording is complete click OK 13 Click Next to return the main Nero Express screen 14 Click Exit ...

Страница 145: ... to create labels for your CDs and DVDs covers for your CD and DVD cases booklets to include with your CDs and DVDs and more Nero DriveSpeed to control CD or DVD drive read speed and spin down time Nero InfoTool to find out about your drive capabilities and your notebook configuration To use these programs click Start All Programs Burn a CD or Data DVD Nero Programs then click the program you want...

Страница 146: ...the diskette in Windows 2000 double click the My Computer icon the drive letter for example the A drive then double click the file name 3 To remove the diskette make sure that the diskette drive status indicator see Status indicators on page 24 is off then press the diskette eject button Warning Do not expose diskettes to water or magnetic fields Exposure could damage the data on the diskette Impo...

Страница 147: ...k and a device that uses memory cards such as a PDA MP3 player or cellular telephone Important Your notebook comes with either a built in diskette drive or a built in memory card reader If your notebook has a built in diskette drive and you need to use a memory card reader Gateway recommends purchasing a USB or IEEE1394 memory card reader To order a USB or IEEE1394 memory card reader visit the Acc...

Страница 148: ...the following card types Each slot is assigned a different drive letter for example the E and F drives so data can be transferred from one card type to another Card Type Slot CompactFlash right IBM Microdrive right Memory Stick left MultiMediaCard left Secure Digital left SmartMedia 3 3V only left ...

Страница 149: ...access a file on the memory card in Windows XP click Start then click My Computer Double click the drive letter for example the E drive then double click the file name OR To access a file on the memory card in Windows 2000 double click the My Computer icon the drive letter for example the E drive then double click the file name Important Insert the SmartMedia card with the label facing down Your n...

Страница 150: ...f the notebook Connecting a digital camera You can connect most digital cameras to your notebook s USB port to transfer pictures To connect a digital camera 1 Connect one end of the USB cable to your digital camera and connect the other end of the cable to the USB port on the right side of your notebook Important Do not use the remove hardware icon in the taskbar to remove the memory card ...

Страница 151: ...be used to connect to a digital video camera To find the location of the IEEE 1394 port see Right side on page 5 Pinnacle Expression is a video capture program that lets you capture and edit full motion video single images and audio through the IEEE 1394 port Help and Support For more information about using the Scanner and Camera Wizard in Windows XP click Start then click Help and Support Type t...

Страница 152: ...rts Important If Pinnacle Expression is not on your Start menu install it from the Pinnacle Expression CD Insert the CD into your CD or DVD drive and follow the instructions in the setup wizard For more information on using Pinnacle Expression see its online help and the online guide located on the program CD Tips Tricks In Windows XP see Do More With Gateway for more information about using your ...

Страница 153: ...ets you send and receive faxes using the modem Read this chapter to learn how to Install and configure Fax Create and send a new fax Set up a fax cover page template Fax a document you scanned or created in another program Receive view and print a fax ...

Страница 154: ... Install optional Windows components The Windows Components Wizard opens OR If the Welcome to Microsoft Windows XP dialog box does not open click Start then click Control Panel The Control Panel window opens Click Double click Add and Remove Programs The Add or Remove Programs dialog box opens Click Add Remove Windows Components The Windows Components Wizard opens 3 Click Fax Services then click N...

Страница 155: ...P Before you send your first fax you need to set up your user information Your fax cover sheets and fax headers contain this information some of which is required by law The Fax Configuration Wizard opens the first time you try to send a fax Important The first time you run the Fax Configuration Wizard you may need to provide information in the Location Information and the Phone and Modem Options ...

Страница 156: ...en opens 3 Type the information about yourself that you want to appear on your fax cover page then click Next The Select Device for Sending or Receiving Faxes screen opens 4 Click the arrow to open the Please select the fax device list then click the modem you are using to send and receive faxes 5 If you want the modem to automatically answer the telephone in order to receive faxes click the Enabl...

Страница 157: ...es type the receiving fax identifier information then click Next This identifier information is required by law and can be the same identifier that you typed in Step 7 The Routing Options screen opens 10 If you set up your notebook to receive faxes select a folder you want to store received faxes in and a printer you want to print received faxes on then click Next The Configuration Summary screen ...

Страница 158: ...k the Advanced Options tab 6 Click Open Fax Service Management Console The Fax Service Management window opens 7 Click Devices in the left column 8 Double click the name of your modem The Modem Properties dialog box opens 9 Click Enable send 10 Type the transmitting fax identifier information This identifier information is required by law You can type up to 20 characters in the text box We suggest...

Страница 159: ...the Send Fax Wizard to send a simple one page fax to one or more recipients To send a simple fax 1 In Windows XP click Start All Programs Accessories Communications Fax then click Send a Fax The Send Fax Wizard opens OR In Windows 2000 click Start Programs Accessories Communications Fax then click Send Cover Page Fax The Send Fax Wizard opens 2 On the Welcome to Fax Configuration Wizard screen cli...

Страница 160: ...k Next The Preparing the Cover Page screen opens 7 Click the arrow to open the Cover page template then click the cover page template you want to use 8 Type the subject text in the Subject line area 9 Type the message text in the Note area then click Next The Schedule screen opens 10 Select when you want to send the fax and a priority for the fax then click Next The Completing the Send Fax Wizard ...

Страница 161: ...ick the Fax icon The Fax Properties dialog box opens Click the Cover Pages tab Click New The Cover Page Fax Cover Page Editor opens 2 If you want to include fields that are imported from either the Send Fax Wizard or the Fax Configuration Wizard such as To or From add them to the page by using the Insert menu then move them to the appropriate place on your template You can also use the Insert menu...

Страница 162: ... printer 4 Click Print or OK The Send Fax Wizard opens 5 Complete the wizard by following the instructions in Sending a simple fax on page 149 Faxing a scanned document To fax a document that you have scanned 1 Scan the document using the program for your scanner 2 With the scanned file open click File then click Print The Print dialog box opens 3 Click the arrow button to open the Name list then ...

Страница 163: ...and view a fax in Windows 2000 1 Click Start Programs Accessories Communications Fax then click My Faxes The My Faxes folder opens 2 To view a fax double click Received Faxes then double click the fax you want to view The fax viewer opens where you can view and print the fax Canceling a fax You can cancel a fax that you have set up to send at a time in the future To cancel a fax that has not been ...

Страница 164: ... automatically retry sending a fax in Windows XP 1 Click Start then click Control Panel The Control Panel window opens 2 If your Control Panel is in Category View click Printers and Other Hardware Click View installed printers or fax printers The Printers and Faxes window opens OR If your Control Panel is in Classic View double click the Printers and Faxes icon The Printers and Faxes window opens ...

Страница 165: ...l The Control Panel window opens 2 If your Control Panel is in Category View click Printers and Other Hardware Click View installed printers or fax printers The Printers and Faxes window opens OR If your Control Panel is in Classic View double click the Printers and Faxes icon The Printers and Faxes window opens 3 Right click Fax then click Properties The Fax Properties dialog box opens 4 Click th...

Страница 166: ...156 Chapter 7 Sending and Receiving Faxes www gateway com ...

Страница 167: ...e power consumption to get the most use out of the battery Read this chapter to learn how to Check and recharge the battery Recalibrate the battery Change batteries Extend the life of the battery by conserving battery power and using alternate power sources Change power saving settings ...

Страница 168: ...d LED orange battery is charging LED blinking red battery charge is very low LED solid red battery is malfunctioning Waiting for a Low Battery warning message to appear If your battery charge indicator displays what looks like an inaccurate charge you may need to recalibrate the battery For more information see Recalibrating the battery on page 160 Important If the power cord or battery icon does ...

Страница 169: ... charge indicator turns orange and the battery icon in the taskbar has a lightning bolt Important If the power cord or battery icon does not appear on the taskbar click the show hidden icons button If the icon still does not appear make sure that Always show icon on the taskbar is checked on the Power Options Properties Advanced tab See Changing advanced settings on page 168 for more information ...

Страница 170: ...nced menu 4 Highlight Battery Auto Learning then select Enabled by pressing the spacebar 5 Open the Exit menu then highlight Exit Saving Changes and press ENTER 6 Select Yes then press ENTER The battery recalibration process begins and a screen opens showing you the progress The entire process will take several hours When the recalibration has finished the message Press Esc key to exit appears 7 P...

Страница 171: ...power go to Step 2 OR If your notebook is on and is not connected to AC power save your work and turn off your notebook 2 Close the LCD panel 3 Turn your notebook over so the bottom is facing up Warning Danger of explosion if battery is incorrectly replaced Replace only with a Gateway M350 battery Discard used batteries according to the manufacturer s instructions The battery used in this device m...

Страница 172: ...gateway com 4 Slide the battery release latch 5 Lift the battery out of the bay 6 Place a recharged battery into the bay and press down until it snaps into place 7 Turn your notebook over 8 Open the LCD panel and press the power button ...

Страница 173: ...ation see Activating and using Hibernate mode on page 169 Using the CD DVD or recordable drive only when necessary These drives use a large amount of power Recharging the battery often taking an extra battery and fully recharging the batteries before traveling For more information see Recharging the battery on page 159 and Changing batteries on page 161 Using alternate power sources To extend batt...

Страница 174: ...e 169 Using power saving modes Always save your work before using Standby mode In Standby mode your notebook reduces or turns off the power to most devices except memory However the information in memory is not saved to the hard drive If power is interrupted the information is lost When in Hibernate mode your notebook saves all memory information to the hard drive then turns the power completely o...

Страница 175: ...power schemes or create a custom power scheme In Windows XP power schemes also set the speed of an Intel SpeedStep equipped processor For more information see Changing SpeedStep settings on page 171 Alarms can alert you when the battery charge is low Advanced power settings let you assign different power saving modes to the power button and Standby system key You can also select which power saving...

Страница 176: ...the arrow button to open the Power Schemes list then click the power scheme you want OR Set the timers then click Save As and type a name for the scheme 4 Click OK Help and Support For more information about changing the power scheme in Windows XP click Start then click Help and Support Type the keyword power scheme in the HelpSpot Search box then click the arrow ...

Страница 177: ...Panel window opens If your Control Panel is in Category View click Performance and Maintenance OR In Windows 2000 click Start Settings then click Control Panel The Control Panel window opens 2 Click Double click the Power Options or Power Management icon The Power Options Properties dialog box opens 3 Click the Alarms tab 4 Adjust the alarm settings 5 Click OK ...

Страница 178: ...mance and Maintenance OR In Windows 2000 click Start Settings then click Control Panel The Control Panel window opens 2 Click Double click the Power Options or Power Management icon The Power Options Properties dialog box opens 3 Click the Advanced tab Help and Support For more information about changing the alarm options in Windows XP click Start then click Help and Support Type the keyword alarm...

Страница 179: ...ens If your Control Panel is in Category View click Performance and Maintenance OR In Windows 2000 click Start Settings then click Control Panel The Control Panel window opens 2 Click Double click the Power Options or Power Management icon The Power Options Properties dialog box opens Help and Support For more information about changing the power management settings in Windows XP click Start then ...

Страница 180: ... dialog box and in the Turn Off Computer or Shut Down Windows dialog box To use Hibernate mode As an automatic power savings mode Open the Power Options Properties dialog box then click the Power Schemes tab Click the arrow button to open a System hibernates list then click the time you want to use OR Open the Power Options Properties dialog box then click the Advanced tab Hibernate is now an opti...

Страница 181: ...e the processor at full speed while connected to AC power and at reduced speed which uses less power while using battery power If you are using Windows XP you can modify the Intel SpeedStep settings by the power scheme you select For more information see Changing power settings on page 165 If you are using Windows 2000 you can change the SpeedStep settings using the Intel SpeedStep technology tab ...

Страница 182: ...rmance To run the processor at reduced speed using less power regardless of the power source click the arrow button to open the Plugged in list then click Battery Optimized Performance To turn off the SpeedStep technology control click the Advanced button click the Disable Intel SpeedStep technology control check box then click Apply To remove the SpeedStep icon from the taskbar click the Advanced...

Страница 183: ...ad this chapter to learn about Using the modem Using your radio frequency wireless connections Transferring files Protecting your notebook from loss and theft Managing your notebook s power efficiently Tips Tricks You can download an electronic copy of this guide from support gateway com support manlib ...

Страница 184: ...s on the use of wireless devices If your notebook is equipped with a wireless device check with the local radio approval authorities prior to your trip for any restrictions on the use of a wireless device in the destination country If your notebook came equipped with an internal embedded wireless device see Safety Regulatory and Legal Information on page 297 for general wireless regulatory guideli...

Страница 185: ...e ready to claim your notebook as soon as it passes through the x ray machine in security checkpoints Write down your notebook model number and serial number see Identifying your model on page 11 in case of theft or loss and keep the information in a safe place Also tape your business card or an address label to your notebook and accessories Whoever sits next to you or behind you can see your note...

Страница 186: ... menu highlight Exit Saving Changes then press ENTER When you start your notebook you are prompted to enter the user password you set in Step 3 Power Take your AC power adapter to recharge the battery If you are traveling internationally take power plug adapters Take a portable surge protector to protect your notebook from power surges To get the best performance from your notebook avoid using the...

Страница 187: ...al USB ports Take a network cable if you need to connect to a network Some hotels provide Internet connectivity only through their networks If your notebook has been exposed to cold temperatures allow it to warm to room temperature before turning it on Take your System Restoration CDs in case you need to install an additional driver or software ...

Страница 188: ...178 Chapter 9 Travel Tips www gateway com ...

Страница 189: ...ormation about customizing your notebook by changing settings in Windows Read this chapter to learn how to Change screen and display settings Change the background and screen saver Adjust the touchpad settings Add change and switch user accounts in Windows XP ...

Страница 190: ... millions of colors to be displayed with optimum quality Windows lets you choose from several color depth settings We recommend that you use the 32 bit True Color setting at all times If the color in your images seems false or jumpy especially after you have played a game or run a video intensive program check the color depth setting and return it to 32 bit True Color if necessary To change the co...

Страница 191: ...e color depth you want 5 To save your changes in Windows XP click OK then click Yes OR To save your changes in Windows 2000 click OK then click OK again Help and Support For more information about adjusting display settings in Windows XP click Start then click Help and Support Type the keyword changing display settings in the HelpSpot Search box then click the arrow ...

Страница 192: ...smaller individual components of the screen such as icons and menu bars appear To adjust the screen resolution 1 In Windows XP click Start then click Control Panel The Control Panel window opens If your Control Panel is in Category View click Appearance and Themes OR In Windows 2000 click Start Settings then click Control Panel The Control Panel window opens 2 Click Double click the Display icon T...

Страница 193: ...ws desktop items such as the background color and dialog box title bars To change desktop colors in Windows XP 1 Click Start then click Control Panel The Control Panel window opens If your Control Panel is in Category View click Appearance and Themes 2 Click Double click the Display icon The Display Properties dialog box opens Help and Support For more information about adjusting screen resolution...

Страница 194: ...r desktop OR If you want to create a new color scheme as part of a desktop theme a Click Advanced The Advanced Appearance dialog box opens b Click the arrow button to open the Item list then click the item you want to change c Change the color or font settings for the item d Click OK then click the Themes tab e Click Save As type a name for the new theme then click OK twice The new colors appear o...

Страница 195: ... tab 4 If you want to apply one of Windows color schemes click the arrow button to open the Scheme list click the scheme you want then click OK The new scheme appears on your desktop OR If you want to create a new color scheme a Click the arrow button to open the Item list then click the item you want to change b Change the color or font settings for the item c Click Save As type a name for the ne...

Страница 196: ...ange the Windows desktop background to a picture or an HTML document Windows provides several background pictures You can also use pictures or HTML documents that you have created or retrieved from other sources To change the desktop background in Windows XP 1 Click Start then click Control Panel The Control Panel window opens If your Control Panel is in Category View click Appearance and Themes 2...

Страница 197: ...oose to stretch or tile the image in Step 5 you can change the solid color behind the picture by clicking the arrow button to open the Color list then clicking a color 7 Click OK To change the desktop background in Windows 2000 1 Click Start Settings then click Control Panel The Control Panel window opens 2 Double click the Display icon The Display Properties dialog box opens Help and Support For ...

Страница 198: ...round picture from another location 5 If you want the picture you chose to cover the entire screen click the arrow button to open the Picture Display list then click Tile 6 If the picture you chose does not cover the entire screen and you did not choose to tile the image in Step 5 you can change the solid color behind the picture by clicking Pattern clicking a pattern in the Pattern list then clic...

Страница 199: ...from and many more are available from the Internet and as commercial products To select a screen saver 1 In Windows XP click Start then click Control Panel The Control Panel window opens If your Control Panel is in Category View click Appearance and Themes OR In Windows 2000 click Start Settings then click Control Panel The Control Panel window opens 2 Click Double click the Display icon The Displ...

Страница 200: ...tomize the screen saver you selected 6 In Windows XP if you want to display the Welcome Login screen whenever you exit the screen saver click the On resume display Welcome screen check box 7 If you want to change the time before the screen saver is activated click the up or down arrows next to the Wait box 8 Click OK Help and Support For more information about selecting a screen saver in Windows X...

Страница 201: ...r touchpad settings To change your touchpad settings 1 In Windows XP click Start then click Control Panel The Control Panel window opens If your Control Panel is in Category View click Printers and Other Hardware OR In Windows 2000 click Start Settings then click Control Panel The Control Panel window opens 2 Click Double click the Mouse icon The Mouse Properties dialog box opens ...

Страница 202: ... a setting then modify the setting 5 To assign a function to the rocker switch click the in front of Buttons click the up or down button then click the action you want 6 Click OK to save changes Help and Support For more information about changing mouse settings in Windows XP click Start then click Help and Support Type the keyword mouse settings in the HelpSpot Search box then click the arrow ...

Страница 203: ...be available in other accounts If this happens install the program or device in the accounts that need it Files created in one account are not accessible from other accounts unless the files are stored in the Shared Documents folder The Shared Documents folder is accessible from all accounts on that computer and from other computers on the network To add delete or modify user accounts in Windows X...

Страница 204: ...Windows XP 1 Click Start then click Log Off The Log Off Windows dialog box opens 2 Click Switch User The Windows Welcome screen opens 3 Click the user account that you want to use When you switch between user accounts any programs that were running for the previous user continue to run ...

Страница 205: ... Internet connection among the connected computers Read this chapter to learn about Benefits of using a network in your home small office or home office Types of network connections Purchasing additional network equipment Installing and configuring your notebook for Ethernet networking Turning the wireless Ethernet emitter on and off ...

Страница 206: ...drives With a network you can copy files from computer to computer by copying and pasting or dragging and dropping You will no longer waste your time transferring files by using recordable media In addition you can map a drive on a networked computer to another computer and access the files as if they were located on the hard drive of the computer you are using Help and Support For more informatio...

Страница 207: ...es With a home network you can play multi player games Load a game like Microsoft Midtown Madness 2 on your computers and in minutes you and your friends can race in competing cars through the streets of San Francisco Help and Support For more information about sharing network devices in Windows XP click Start then click Help and Support Type the keyword sharing in the HelpSpot Search box then cli...

Страница 208: ...ct You are creating a network in an office or business where network speed is more important than moving about with your computer Your computer has an Ethernet jack for connecting to the network Wireless Ethernet network Create a wireless Ethernet IEEE 802 11a IEEE 802 11b or IEEE 802 11g network if You are looking for an alternative to installing cable for connectivity The ability to move about w...

Страница 209: ...t using Fast or Gigabit Ethernet components To create a wired Ethernet network you or your electrician must Install special Ethernet cables in your home or office Install an Ethernet card in each of your desktop computers if your computers do not already have built in Ethernet jacks Install an Ethernet PC Card in each of your notebooks if your notebooks do not already have built in Ethernet jacks ...

Страница 210: ...ontrol point for the network Attached to the router are all of your computers or Ethernet ready devices Also connected to the router is a cable or DSL modem that provides access to the Internet Tips Tricks To add the ability to access a wireless Ethernet network to your wired Ethernet network connect an access point to the router switch or hub For more information about accessing a wireless Ethern...

Страница 211: ...ll to protect the computers on your network from intruders trying to access your data over the Internet Built in switching with enough ports for all computers and devices on the network so you will not have to purchase a hub or switch If you did not purchase a router that includes built in switching or if the router does not have enough ports to attach all your computers an Ethernet hub or switch ...

Страница 212: ...rfere with equipment on commercial aircraft Current aviation regulations require wireless devices to be turned off while traveling in an airplane IEEE 802 11a IEEE 802 11b and IEEE 802 11g communication devices are examples of devices that provide wireless communication For instructions to turn wireless Ethernet on and off see Turning your wireless Ethernet emitter on or off on page 208 Important ...

Страница 213: ...EE 802 11g networks IEEE 802 11b 11 Mbps 2 4 GHz Large number of access points already exist in airports college campuses and businesses Compatible with IEEE 802 11g networks Longer range 100 to 150 feet than IEEE 802 11a Possible interference from cordless phones and microwaves Not compatible with IEEE 802 11a networks IEEE 802 11g 54 Mbps 2 4 GHz Compatible with IEEE 802 11b networks Longer rang...

Страница 214: ...tral control point for the network Attached to the access point is the cable or DSL modem that provides access to the Internet Each of the computers or Ethernet ready devices communicate with the access point using radio waves If your computer does not have built in wireless Ethernet capabilities you need to add a wireless PCI card desktop PC card notebook or USB adapter Tips Tricks If you want to...

Страница 215: ...hernet built in A wireless Ethernet access point to connect your wireless Ethernet network to the Internet or a wired Ethernet network Important IEEE 802 11b and IEEE 802 11g use the same radio frequency IEEE 802 11a uses a different radio frequency than IEEE 802 11b and IEEE 802 11g All wireless Ethernet components must use the same frequency A combination of IEEE 802 11a and IEEE 802 11b or IEEE...

Страница 216: ...e a peer to peer also known as ad hoc wireless Ethernet network if you are setting up or joining a temporary computer to computer network This type of network does not include access into a wired network or the Internet You can create this type of network to quickly move files from one computer to another ...

Страница 217: ...tebook that does not have wireless Ethernet built in For more information For more information about purchasing equipment for your home or office Ethernet network discuss your particular needs with your Gateway store representative In addition several books and Internet sites are dedicated to networking for example www homenethelp com See these sources for more information about networking your ho...

Страница 218: ...lick Start then click Control Panel The Control Panel window opens If your Control Panel is in Category View click Network and Internet Connections The Network and Internet Connections window opens 2 Click Double click Network Connections The Network Connections window opens 3 Right click Wireless Network Connection then click Enable to turn on wireless Ethernet or click Disable to turn off wirele...

Страница 219: ... Ethernet emitter on or off in Windows 2000 using the Broadcom Wireless Configuration Utility 1 Right click the Broadcom Wireless Configuration Utility icon on the taskbar 2 Click Enable Radio to turn on the wireless emitter or Disable Radio to turn off the wireless emitter ...

Страница 220: ...210 Chapter 11 Networking Your Notebook www gateway com ...

Страница 221: ...a printer or other peripheral devices and other unique computer settings that you want to move from your old computer to your new one Read this chapter to learn about Using the Windows XP Files and Settings Transfer Wizard Transferring Files Transferring Internet Settings Installing your old printer or scanner Installing your old programs ...

Страница 222: ...ersonal data files by copying them to removable media such as a diskette writable CD or DVD USB flash drive or Zip disk or by using a home network For more information see Creating CDs and DVDs using Nero Express on page 120 and Networking Your Notebook on page 195 Finding your files Many programs automatically save your personal data files in the My Documents folder Look in your old computer s My...

Страница 223: ...he My Documents window opens and displays many of your saved personal data files 4 Copy your personal data files to removable media or to another computer on your network You can often identify different data file types by looking at the file s extension the part of the file name following the last period For example a document file might have a DOC extension and a spreadsheet file might have an X...

Страница 224: ...uter to your new one Setting up your ISP If your current Internet service provider ISP software came preinstalled on your new notebook run that setup program If it asks to set up a new account or an existing one choose to set up an existing account If your current ISP software is not preinstalled on your new notebook locate the original Internet setup program provided by your local ISP or contact ...

Страница 225: ...e old information or using your old computer to send the e mail messages to yourself then using your new notebook to retrieve the e mail messages Transferring your Internet shortcuts You can export and import your old Netscape Navigator bookmarks or Microsoft Internet Explorer favorites For more information see your Internet browser program s online help Installing your old printer or scanner Wind...

Страница 226: ...ur notebook 4 If Windows detects your printer install your printer by following the on screen instructions You are finished OR If Windows does not detect the printer go to the next step 5 In Windows XP click Start then click Control Panel The Control Panel window opens If your Control Panel is in Category View click Printers and Other Hardware OR In Windows 2000 click Start Settings then click Con...

Страница 227: ...iginal CDs and guides should contain any serial numbers or product ID keys that may be required for program installation and registration Remember to check the publisher s Web site for important program updates If you have trouble after installing your old programs you can restore your notebook s previous settings using System Restore Help and Support For more information about installing a printe...

Страница 228: ...218 Chapter 12 Moving From Your Old Computer www gateway com ...

Страница 229: ... chapter provides basic information about maintaining your notebook hardware and software Read this chapter to learn how to Care for your notebook Protect your notebook from viruses Manage hard drive space Back up files Clean your notebook ...

Страница 230: ...ook when the hard drive light is on because data on the hard drive could be lost or corrupted Avoid subjecting your notebook to extreme temperature changes The case and LCD panel can become brittle and easy to break in cold temperatures and can melt or warp in high temperatures Damage due to either extreme is not covered by your warranty As a general rule your notebook is safest at temperatures th...

Страница 231: ...e Check for viruses X X page 222 Manage hard drive space X page 225 Clean up hard drives X X page 226 Scan hard drive for errors X X page 227 Defragment hard drive X X page 229 Back up files X X page 231 Recalibrate the battery X page 160 Clean computer case X page 233 Clean keyboard X page 233 Clean computer screen X page 234 Clean mouse X page 234 ...

Страница 232: ...o check files and programs that are on diskettes attached to e mail messages or downloaded from the Internet Checking all programs for viruses before installing them Disabling macros on suspicious Microsoft Word and Excel files These programs will warn you if a document that you are opening contains a macro that might have a virus Periodically updating the Norton AntiVirus program to protect again...

Страница 233: ...can for viruses 1 Click Start All Programs Norton AntiVirus then click Norton AntiVirus 2003 Norton AntiVirus opens 2 Click Scan for Viruses 3 Click the type of scan you want to make in the Scan for Viruses area then under Actions click Scan Scan for viruses Scan ...

Страница 234: ... least 30 seconds 3 Turn on your notebook and rescan for the virus To update Norton AntiVirus 1 Make sure that you are connected to the Internet 2 Click Start All Programs Norton AntiVirus then click LiveUpdate Norton AntiVirus The LiveUpdate wizard opens 3 Follow the on screen instructions to update your Norton AntiVirus program with the latest virus protection files 4 When the program has finish...

Страница 235: ...ive Checking hard drive space To check hard drive space 1 In Windows XP click Start then click My Computer The My Computer window opens OR In Windows 2000 double click the My Computer icon The My Computer window opens 2 Right click the drive that you want to check for available file space then click Properties Drive space information appears ...

Страница 236: ...p program 1 In Windows XP click Start then click My Computer The My Computer window opens OR In Windows 2000 double click the My Computer icon The My Computer window opens 2 Right click the hard drive that you want to delete files from for example Local Disk C then click Properties The Properties dialog box opens at the General tab 3 Click Disk Cleanup The Disk Cleanup dialog box opens ...

Страница 237: ...y day you probably want to run Error checking once a week If you use your notebook less frequently once a month may be adequate Also use Error checking if you encounter hard drive problems To check the hard drive for errors 1 In Windows XP click Start then click My Computer The My Computer window opens OR In Windows 2000 double click the My Computer icon The My Computer window opens 2 Right click ...

Страница 238: ...ral minutes After Windows has finished checking the drive for errors it provides a summary of the problems that it found 6 Correct any problems that are found by following the on screen instructions 7 Click OK Help and Support For more information about checking the hard drive for errors in Windows XP click Start then click Help and Support Type the keyword checking for disk errors in the HelpSpot...

Страница 239: ...ifferent areas of the drive Defragmenting the information stored on the drive can improve hard drive performance While the Disk Defragmenter program is running do not use your keyboard or mouse because using them may continuously stop and restart the defragmenting process Also if you are connected to a network log off before starting Disk Defragmenter Network communication may stop the defragmenta...

Страница 240: ... progress on the computer display When finished Disk Defragmenter asks if you want to quit the program 6 Click Close or Yes then click the X in the top right corner to close the Disk Defragmenter window Help and Support For more information about defragmenting the hard drive in Windows XP click Start then click Help and Support Type the keyword defragmenting in the HelpSpot Search box then click t...

Страница 241: ...ive to do a complete hard drive backup For more information see Creating CDs and DVDs using Nero Express on page 120 If you do not have a high capacity backup device and you want to purchase one you can contact Gateway s Add on Sales department or visit the Accessories Store at accessories gateway com Using the Scheduled Task Wizard The Scheduled Task Wizard lets you schedule maintenance tasks suc...

Страница 242: ... Wizard opens 3 Click Next then click the task or program you want to schedule and follow the on screen instructions to customize the task Important Your notebook must be on during scheduled tasks If your notebook is off scheduled tasks will not run Help and Support For more information about using the Scheduled Tasks Wizard in Windows XP click Start then click Help and Support Type the keyword Sc...

Страница 243: ... not use abrasive or solvent cleaners because they can damage the finish on components Your notebook is cooled by air circulated through the vents on the case so keep the vents free of dust With your notebook turned off and unplugged brush the dust away from the vents with a damp cloth Be careful not to drip any water into the vents Do not attempt to clean dust from the inside of your notebook Cle...

Страница 244: ...with the cloth Cleaning the mouse If you have a mouse and the mouse pointer begins moving erratically across the computer screen or becomes difficult to control precisely cleaning the mouse will likely improve its accuracy Clean your optical mouse by wiping the bottom of the mouse with a damp lint free cloth Warning The computer screen is made of specially coated glass and can be scratched or dama...

Страница 245: ...ining ring on the bottom of the mouse counter clockwise then remove the retaining ring and mouse ball 3 Remove any dust lint or dirt from the mouse ball with a soft cloth 4 Clean the mouse rollers with a cotton swab dipped in isopropyl alcohol 5 Replace the mouse ball and lock the retaining ring into place Mouse rollers ...

Страница 246: ...236 Chapter 13 Maintaining Your Notebook www gateway com ...

Страница 247: ...learn how to Reinstall device drivers Update device drivers Reinstall programs Reinstall Windows If you are not comfortable with the procedures covered in this chapter seek help from a more experienced computer user or a computer service technician ...

Страница 248: ...e information about diagnostics and troubleshooting tools in Windows XP click Start then click Help and Support Type the keyword troubleshooting in the HelpSpot Search box then click the arrow Run System Restore For more information about System Restore in Windows XP click Start then click Help and Support Type the keyword System Restore in the HelpSpot Search box then click the arrow See the Trou...

Страница 249: ...sage tells you that there is a problem with a device driver reinstall the device drivers by following the instructions below If you just reinstalled Windows XP or Windows 2000 the device drivers were automatically reinstalled To reinstall device drivers 1 Insert the red Drivers and Applications CD into the CD or DVD drive If the program starts automatically go to Step 5 OR If the program does not ...

Страница 250: ...tion 7 Click Install 8 Follow any additional on screen instructions Depending on the device driver you are reinstalling you may only need to restart your notebook to complete the installation However if a setup wizard opens when you restart your notebook follow the on screen instructions Help and Support For more information about reinstalling device drivers in Windows XP click Start then click He...

Страница 251: ...time you have inserted the red Drivers and Applications CD accept the End User License Agreement EULA by clicking Yes I accept it then clicking Continue The Gateway Driver and Application Recovery program starts and the Drivers and Application Recovery tab appears 6 Click the Web Updates tab 7 Click Check Now The Connect window opens Important If your system came equipped with a wireless device on...

Страница 252: ...r program CDs follow the installation instructions on each CD If you want to reinstall a program uninstall the old version first To reinstall programs from the Drivers and Applications CD 1 If you just reinstalled Windows go to Step 4 Otherwise go to the next step 2 In Windows XP click Start Control Panel then click Add or Remove Programs OR In Windows 2000 click Start Settings Control Panel then ...

Страница 253: ...Recovery program starts and the Drivers and Application Recovery tab appears 9 Select a single program to reinstall OR Click Automatic Installation then select multiple programs to reinstall Grayed out programs are not available for Automatic Installation To select these programs click Manual Installation 10 Click Install 11 Follow any additional on screen instructions Depending on the programs yo...

Страница 254: ...l then click Change Remove and follow the on screen instructions 4 Insert the program CD into the CD or DVD drive 5 Complete the program reinstallation by following the instructions included with the program CD Reinstalling Windows If your notebook is not working correctly try the following options to correct the problem Troubleshooting For more information see Troubleshooting on page 269 Running ...

Страница 255: ...ion 5 Select 1 Delete all files Automated Fdisk Format 6 Select 1 Continue deleting all files and restart 7 When prompted press any key to continue 8 Select 2 Boot from CD ROM 9 Select a language option 10 Select 2 Automated installation of Windows XP or 2000 11 When prompted remove the red Drivers and Applications CD and insert the blue Operating System CD into the CD or DVD drive then press any ...

Страница 256: ...s your drivers and programs Your notebook restarts several times during this process Do not press any keys or buttons during this process unless prompted to do so 15 When the Gateway Application Loader has finished go to the Windows desktop by clicking OK 16 Install additional programs by following the instructions in Reinstalling programs on page 242 17 Install other software such as Microsoft Wo...

Страница 257: ...Upgrading Your Notebook This chapter provides information about adding hardware devices to your notebook Read this chapter to learn how to Add and remove PC Cards Add and replace memory Replace the hard drive ...

Страница 258: ...ebook when changing most cards because your notebook supports hot swapping Hot swapping means that you can insert a PC Card while your notebook is running If your PC Card does not work after hot swapping see the PC Card manufacturer s documentation for further information To insert a PC Card Push the card firmly into the PC Card slot label side up until the outer edge of the card is flush with the...

Страница 259: ... in the taskbar the PC Card name then click Stop OR Turn off your notebook 2 Press the PC Card eject button once to release the eject button 3 Press the PC Card eject button again to eject the PC Card Important If the remove hardware icon does not appear on the taskbar click the show hidden icons button ...

Страница 260: ...workbench or other grounded object Unplug the power cord and the modem and network cables Remove the battery For more information see Changing batteries on page 161 Disconnect all peripheral devices and remove any PC Cards Warning ESD can permanently damage electrostatic discharge sensitive components in your notebook Prevent ESD damage by following ESD guidelines every time you install memory or ...

Страница 261: ...mponents over any surface Adding or replacing memory Your notebook uses memory modules called SO DIMMs Small Outline Dual Inline Memory Modules The modules are available in various capacities and any module can be placed in the memory bay Use only memory modules designed for the Gateway M350 for upgrading your memory SO DIMMs are located in two places inside your notebook Both SO DIMMs can be upgr...

Страница 262: ... modules 1 Follow the instructions under Preventing static electricity discharge on page 250 2 Turn off your notebook disconnect the AC adapter and modem and network cables 3 Turn your notebook over so the bottom is facing up Important Use only memory modules designed for the Gateway M350 for upgrading your memory Memory bay ...

Страница 263: ...r more information see Replacing the battery on page 161 5 Loosen the five memory bay cover screws then remove the memory bay cover 6 If you are removing a module gently press outward on the clip at each end of the memory module until the module tilts upward Screws Screws ...

Страница 264: ...ed in one direction If the module does not fit make sure that the notch in the module lines up with the tab in the memory bay 9 Gently push the module down until it clicks in place 10 Replace the memory bay cover and tighten the cover screws 11 Insert the battery then turn your notebook over 12 Connect the power adapter and modem and network cables then turn on your notebook Important Use only mem...

Страница 265: ... open the keyboard compartment 1 Follow the instructions under Preventing static electricity discharge on page 250 2 Turn off your notebook disconnect the AC adapter and modem and network cables 3 Turn your notebook over so the bottom is facing up 4 Remove the battery For more information see Replacing the battery on page 161 5 Turn your notebook over so the top is facing up 6 Open the LCD panel t...

Страница 266: ...com 7 Insert the small flat blade screwdriver under the bottom right corner of the keyboard bezel and gently pry it up Important Inserting a piece of cloth between the screwdriver and keyboard and notebook case will help prevent damage to your notebook ...

Страница 267: ... your notebook You will hear small snapping sounds as the bezel comes away from your notebook Be careful not to break off the tabs found on the left end of the bezel 9 With a small Phillips screwdriver remove the four keyboard screws and put them in a safe place Screws ...

Страница 268: ...Chapter 15 Upgrading Your Notebook www gateway com 10 Lift the back edge of the keyboard then slowly rotate it toward you so it lies keys down on top of your notebook Be careful not to damage the LCD panel ...

Страница 269: ... replacing memory www gateway com Replacing the memory To replace the memory 1 Gently press outward on the clip at each end of the memory module until the module tilts upward 2 Pull the memory module out of the slot ...

Страница 270: ... the tab in the memory bay 4 Gently push the module down until it clicks in place Reattaching the keyboard To reattach the keyboard 1 Rotate the keyboard toward the LCD panel until the keyboard is almost face up 2 Insert the tabs on the front of the keyboard under the palm rest 3 Gently press the keyboard down until it is flat all the way across The keyboard should easily fall into place Be carefu...

Страница 271: ...261 Adding or replacing memory www gateway com 4 Replace the four keyboard screws 5 Slide the two tabs on the left end of the bezel under your notebook frame Screws ...

Страница 272: ...along the bezel and find no loose spots The bezel should be flat all the way across 7 Turn your notebook over so the bottom is facing up 8 Insert the battery then turn your notebook over 9 Connect the power adapter and modem and network cables then turn on your notebook Warning If the bezel is not correctly replaced your notebook could be damaged when you try to close the LCD panel ...

Страница 273: ... a higher capacity drive To replace the hard drive kit 1 Follow the instructions under Preventing static electricity discharge on page 250 2 Turn off your notebook disconnect the AC adapter and modem and network cables 3 Turn your notebook over so the bottom is facing up 4 Remove the battery For more information see Replacing the battery on page 161 Hard drive ...

Страница 274: ...264 Chapter 15 Upgrading Your Notebook www gateway com 5 Remove the two hard drive kit screws Tips Tricks Use a magnetic screwdriver or turn the notebook over to remove the screws Screws ...

Страница 275: ...265 Replacing the hard drive kit www gateway com 6 Slide the old hard drive kit away from the connector 7 Lift the end of the hard drive kit furthest from the connector then remove the kit from the bay ...

Страница 276: ...d drive already includes the hard drive kit bracket go to Step 13 OR If you need to move the hard drive kit bracket from your old hard drive kit to your new hard drive go to Step 9 9 Remove the four screws that secure the hard drive to the hard drive kit bracket Screw Screw ...

Страница 277: ...ine up 12 Replace the four screws that secure the bracket to the drive 13 Place the new hard drive kit into the bay and slide it into the connector 14 Replace the screws that secure the hard drive kit to your notebook 15 Insert the battery and turn your notebook over 16 Connect the power adapter and modem and network cables then turn on your notebook ...

Страница 278: ...268 Chapter 15 Upgrading Your Notebook www gateway com ...

Страница 279: ...is chapter to learn how to Troubleshoot typical hardware and software problems Get telephone support Use automated troubleshooting systems Get tutoring and training If the suggestions in this chapter do not correct the problem see Getting Help on page 39 for more information about how to get help ...

Страница 280: ... accessing internal components For more information about preventing damage from static electricity see Preventing static electricity discharge on page 250 After you complete any maintenance tasks where you remove the memory bay cover or hard drive kit make sure that you replace the cover or hard drive kit reinstall any screws then replace the battery before you start your notebook Warning Do not ...

Страница 281: ...ipheral devices review the installation procedures you performed and make sure that you followed each instruction If an error occurs in a program see the program s printed documentation or the online help Software support tools Your notebook may include the following support tool to help you diagnose and fix problems PC Doctor is a comprehensive hardware diagnostic and system information tool that...

Страница 282: ...y memory problems Shut down and restart your notebook Clean the disc For more information see Cleaning CDs or DVDs on page 274 An audio CD does not produce sound Make sure that the CD label is facing up then try again Some music CDs have copy protection software You may not be able to play these CDs on your notebook Make sure that the volume control on your notebook is turned up For more informati...

Страница 283: ...e DVD For more information see Cleaning CDs or DVDs on page 274 DVD discs and drives contain regional codes that help control DVD title exports and help reduce illegal disc distribution To be able to play a DVD the disc s regional code and your DVD drive s regional code must match The regional code on your DVD drive is determined by your notebook s delivery address The regional code for the United...

Страница 284: ...check IRQ usage in Windows XP 1 Click Start then click Control Panel The Control Panel window opens If your Control Panel is in Category View click Performance and Maintenance 2 Click Double click System click the Hardware tab then click Device Manager The Device Manager window opens 3 Click View then click Resources by type Double click Interrupt request IRQ All IRQs and their hardware assignment...

Страница 285: ...on point in a yellow circle 2 Remove the device you are trying to install then determine which one of the existing devices or ports you can disable 3 Right click the device or port you want to disable then click Disable The device or port is disabled Diskette drive The diskette drive is not recognized Shut down and restart your notebook You see an Access Denied or Write protect error message Move ...

Страница 286: ...R Make sure that the diskette you are using is IBM compatible The diskette drive status indicator is lit continuously Remove the diskette from the drive If the indicator stays on try restarting your notebook Display The screen is too dark Adjust the brightness using the system keys For more information see System key combinations on page 28 The screen resolution is not correct Change the screen re...

Страница 287: ...to a minimum If you feel these pixels are unacceptably numerous or dense on your display contact Gateway Technical Support to identify whether a repair or replacement is justified based on the number of pixels affected File management A file was accidentally deleted If a file was deleted at a DOS prompt or in Windows while holding down the SHIFT key the file cannot be restored To restore deleted f...

Страница 288: ...ard drive for errors on page 227 The hard drive cannot be accessed or you see a General failure reading drive C error message If a diskette is in the diskette drive eject it and restart your notebook Make sure that the hard drive is installed correctly Remove it firmly reinsert it then restart your notebook For more information see Replacing the hard drive kit on page 263 If your notebook has been...

Страница 289: ...modem For more information see Modem dial up on page 281 You see an Unable to locate host message and are unable to browse the Internet This problem can occur when you have typed a URL Web address incorrectly you have lost your Internet connection or your ISP is having technical difficulties Double check the URL or try a different URL If the error message still appears disconnect from the ISP conn...

Страница 290: ... Make sure that the keyboard cable is plugged in correctly Remove all extension cables and switchboxes Clean the keyboard by using an aerosol can of air with a narrow straw like extension to remove dust and lint trapped under the keys Try a keyboard that you know works to make sure that the keyboard port works If you spilled liquid in the keyboard turn off your notebook and unplug the keyboard Cle...

Страница 291: ...oot your notebook Modem dial up Your modem does not dial or does not connect Make sure that the modem cable is plugged into the modem jack and not the Ethernet network jack See Left side on page 3 to make sure that the connections have been made correctly Make sure that your notebook is connected to the telephone line and the telephone line has a dial tone Make sure that the modem cable is less th...

Страница 292: ...ling Rules tab 3 Click the location from which you are dialing then click Edit 4 Make sure that all settings are correct To check the dialing properties in Windows 2000 1 Click Start Settings then click Control Panel The Control Panel window opens 2 Click Double click the Modems icon then click Dialing Properties tab The Dialing Properties dialog box opens 3 Make sure that all settings are correct...

Страница 293: ...connect call your telephone service The telephone line may be too noisy You cannot connect to the Internet The ISP may be having technical difficulties Contact your ISP for technical support See if the modem works with a different communications program The problem may be with just one program Your 56K modem does not connect at 56K Current FCC regulations restrict actual data transfer rates over p...

Страница 294: ...that the line connected to the modem is working and plugged into the appropriate port on your notebook See Left side on page 3 to make sure that the connections have been made correctly If the modem shares the telephone line with another device make sure that the telephone line is not in use for example someone is on the telephone or another modem is in use Use the modem cable that came with your ...

Страница 295: ...click More Info The Modem Info dialog box opens If information about the modem appears the modem passed diagnostics If no modem information is available a white screen appears with no data or if you get an error such as port already open or the modem has failed to respond the modem did not pass diagnostics The modem is noisy when it dials and connects When your modem tries to connect to another mo...

Страница 296: ...ol 5 Click OK twice to close the Phone and Modem Options dialog box To turn down the modem volume in Windows 2000 1 Click Start Settings then click Control Panel The Control Panel window opens 2 Double click the Modems icon The Modems Properties dialog box opens 3 Click the General tab click the modem you want to adjust then click Properties 4 Adjust the Speaker volume control 5 Click OK Mouse The...

Страница 297: ...ned off then retype the password You forgot your startup password The password feature which is set in the BIOS Setup utility is very secure with no easy way to recover a forgotten password You must return your notebook for repair Call Gateway Technical Support for instructions Help and Support For a video tutorial about cleaning the mouse click Start then click Help and Support Type the keyword m...

Страница 298: ...ical outlet turned on and working correctly To test the outlet plug a working device such as a lamp into the outlet and turn it on Make sure that the AC power adapter cables are free from cuts or damage Replace any damaged cables Your notebook is not working on battery power Make sure that the battery is installed correctly For more information see Changing batteries on page 161 Make sure that the...

Страница 299: ...ut the printer online Check the port and cable for bent or broken pins If the printer you want to print to is not the default printer make sure that you have selected it in the printer setup To set a default printer in Windows XP 1 Click Start then click Control Panel The Control Panel window opens If your Control Panel is in Category View click Printers and Other Hardware 2 Click Double click the...

Страница 300: ... a check mark next to Use Printer Offline click Use Printer Offline to clear the check mark To make sure that the printer is not set to work offline in Windows 2000 1 Click Start Settings then click Printers 2 Right click the name of the printer you want to use If the menu shows a check mark next to Use Printer Offline click Use Printer Offline to clear the check mark Wait until files have been pr...

Страница 301: ...controls on page 31 Make sure that the Windows volume control is turned up For more information see Adjusting the volume on page 82 Make sure that Mute controls are turned off For more information about the mute setting see System key combinations on page 28 or Using the audio controls on page 31 or Adjusting the volume on page 82 Video The external monitor is not working Make sure that you have p...

Страница 302: ... software from Gateway see the manufacturer s documentation and technical support resources If you have how to questions about using a program see Online Help Printed documentation The Microsoft Windows documentation The software publisher s Web site See the troubleshooting section of this chapter Have your customer ID serial number and order number available along with a detailed description of y...

Страница 303: ...ial assistance for software issues billed by the minute 800 229 1103 charged to your credit card 900 555 4695 chargedto your telephone bill Gateway Technical Support Talk to a Gateway Technical Support representative about a non tutorial technical support question See Before calling Gateway Technical Support on page 292 before calling TDD Technical Support for hearing impaired is available Weekday...

Страница 304: ...re In many cases additional product information and online documentation for Gateway supplied hardware can be found in our Web site s Documentation Library This user s guide The software publisher s Web site Tutoring For help on using hardware or software that came with your Gateway notebook contact Gateway s fee based tutorial hotline 800 229 1103 rate charged per minute charged to a major credit...

Страница 305: ...ams including Microsoft Word Excel and PowerPoint www gateway com store Gateway Learning Libraries A variety of courses and tutorials are available on CD Select from several easy to use learning libraries www gateway com training Online Training from Learn Gateway More than 450 online courses are available from Learn Gateway All you have to do is go online and log in You select the subject matter ...

Страница 306: ...296 Chapter 16 Troubleshooting www gateway com ...

Страница 307: ...the latest standards for safety of information technology equipment However to ensure safe use of this product it is important that the safety instructions marked on the product and in the documentation are followed Warning Always follow these instructions to help guard against personal injury and damage to your Gateway system ...

Страница 308: ...e appropriate outlet If you use an extension cord with this system make sure that the total ampere rating on the products plugged into the extension cord does not exceed the extension cord ampere rating If your system is fitted with a TV Tuner cable or satellite receiver card make sure that the antenna or cable system is electrically grounded to provide some protection against voltage surges and b...

Страница 309: ...ries recommended by Gateway Important Do not use Gateway products in areas classified as hazardous locations Such areas include patient care areas of medical and dental facilities oxygen laden environments or industrial facilities Warning To reduce the risk of fire use only No 26 AWG or larger telecommunications line cord ...

Страница 310: ...edded in your notebook is well below the RF exposure limits as known at this time Because the wireless devices which may be embedded into your notebook emit less energy than is allowed in radio frequency safety standards and recommendations Gateway believes these devices are safe for use Regardless of the power levels care should be taken to minimize human contact during normal operation As a gene...

Страница 311: ...countries with your system check with the local Radio Approval authorities prior to any move or trip for any restrictions on the use of a wireless device in the destination country Warning If your system came equipped with an internal embedded wireless device do not operate the wireless device unless all covers and shields are in place and the system is fully assembled Warning Wireless devices are...

Страница 312: ...ived including interference that may cause undesired operation of the device Unintentional emitter per FCC Part 15 This device has been tested and found to comply with the limits for a Class B digital device pursuant to Part 15 of the FCC rules These limits are designed to provide reasonable protection against harmful interference in a residential installation This equipment generates uses and can...

Страница 313: ... device complies with Part 15 of the FCC Rules Operation of this product is subject to the following two conditions 1 this device may not cause harmful interference and 2 this device must accept any interference received including interference that may cause undesired operation Caution Changes or modifications not expressly approved by Gateway could void the FCC compliance and negate your authorit...

Страница 314: ...e telephone company may request that you disconnect the equipment until the problem is resolved The telephone company may make changes in its facilities equipment operations or procedures that could affect the operation of this equipment If this happens the telephone company will provide advance notice in order for you to make necessary modifications to maintain uninterrupted service This equipmen...

Страница 315: ... notebook is well below the RF exposure limits as set by Industry Canada Operation of this device is subject to the following two conditions 1 This device may not cause harmful interference and 2 this device must accept any interference received including interference that may cause undesired operation of the device Warning To prevent radio interference to licensed service or co channel Mobile Sat...

Страница 316: ...with a single line individual service may be extended by means of a certified connector assembly The customer should be aware that compliance with the above conditions may not prevent degradation of service in some situations Repairs to certified equipment should be made by an authorized Canadian maintenance facility designated by the supplier Any repairs or alterations made by the user to this eq...

Страница 317: ... limits as set by SCT Unintentional emitter At this time there are no mandatory requirements for Unintentional Emitters However this device does comply with multiple requirements for other countries and regions as listed on the system label and in the user s manual Laser safety statement All Gateway systems equipped with CD and DVD drives comply with the appropriate safety standards including IEC ...

Страница 318: ...gulatory and Legal Information www gateway com California Proposition 65 Warning Warning This product contains chemicals including lead known to the State of California to cause cancer and or birth defects or reproductive harm ...

Страница 319: ...ed trademarks and black and white spotted box logo GATEWAY Gateway Astro Gateway Work Gateway Connected touch pad Gateway Connected music player Gateway Cyber Ware Gateway Education Ware Gateway Flex Case Gateway Gaming Ware Gateway GoBack Gateway Gold Gateway Learning Ware Gateway Magazine Gateway Micro Server Gateway Money Ware Gateway Music Ware Gateway Networking Solutions Gateway Online Netwo...

Страница 320: ...310 Appendix A Safety Regulatory and Legal Information www gateway com ...

Страница 321: ...ack 3 microphone jack 3 muting 29 31 82 85 next button 31 pause button 31 play button 31 playing 87 89 93 95 96 recording 87 stop button 31 streaming 197 troubleshooting 291 using controls 31 volume down button 29 31 volume up button 29 31 audio CD copying 117 creating 112 See also CD audio file streaming 197 AVI file 89 B background 186 backing up files 135 231 battery alarm options 165 167 alter...

Страница 322: ...rd 139 replacing PC Card 248 troubleshooting memory card 281 troubleshooting PC Card 288 carrying case 15 CD adding tracks to your library 101 cleaning 274 copying 117 125 creating audio 112 131 creating data 106 121 creating label 135 creating music 112 131 drive 91 editing track information 100 inserting 92 playing audio with MusicMatch 96 playing music 93 95 troubleshooting 272 CD Copier 117 CD...

Страница 323: ...37 141 keyboard 5 microphone 3 modem 3 35 monitor VGA 6 mouse 5 network 3 36 parallel 6 power 6 18 printer 5 6 scanner 5 speaker 3 USB 5 37 VGA 6 video camera 5 141 Zip drive 5 copying CD 117 125 data CD 117 125 data DVD 117 125 files and folders 57 69 music CD 117 125 music tracks 128 text and graphics 69 copyright notice 309 creating CD label 135 data CD 106 data DVD 106 desktop icons 52 desktop...

Страница 324: ...splay changing resolution 182 settings 180 switching 28 troubleshooting 276 using screen saver 189 Do More With Gateway 44 documentation eSupport 46 Gateway Web site 46 help 40 HelpSpot 40 online help 45 documents creating 65 opening 67 printing 68 saving 66 double clicking 34 downloading files 77 dragging 34 drivers reinstalling 239 updating 47 241 drives backing up files 231 CD 4 91 checking for...

Страница 325: ...mputer 215 using 78 EmPower power adapter 163 Error checking 227 eSupport finding specifications 13 using 47 Ethernet connecting 36 jack 3 36 turning wireless Ethernet on or off 208 wired network 198 199 wireless network 198 202 external monitor 6 28 EZ Pad touchpad See touchpad F fan 6 7 Fast Ethernet 199 faxes automatically canceling 155 canceling 153 configuring Fax 145 148 failed transmission ...

Страница 326: ...l up server 283 gigabit Ethernet 199 H hard drive backing up files 231 bay 8 checking for errors 227 checking for free space 225 defragmenting 229 deleting files and folders 226 installing 263 replacing 263 scanning for errors 227 status indicator 24 troubleshooting 278 headphone jack 3 help button 30 online 45 using 40 HelpSpot playing video 43 searching 42 starting 40 using 40 Using your compute...

Страница 327: ...vice provider ISP connecting to 74 disconnecting from 74 setting up account 73 transferring settings from old computer 214 using 72 73 InterVideo DVD Player 104 IRQ conflicts 274 ISP See Internet service provider J jacks See connections K Kensington cable lock lock slot 6 using while traveling 175 key combinations 28 keyboard buttons 26 cleaning 233 connecting 26 features 26 locating 10 shortcuts ...

Страница 328: ...mputer display 234 cleaning keyboard 233 cleaning mouse 234 defragmenting 229 deleting files 226 suggested schedule 221 using Scheduled Task Wizard 231 virus protection 222 maximize button 54 Media Player 89 93 memory adding 251 bay 7 installing 251 purchasing 15 removing 252 255 replacing 251 troubleshooting 281 upgrading 251 memory card reader locating 4 memory card types supported 138 status in...

Страница 329: ...ng 101 changing settings 102 music tracks copying 128 MusicMatch building music library 101 changing library settings 102 creating MP3 files 98 creating music files 98 editing track information 100 listening to Internet radio 103 playing audio CD 96 muting sound 29 31 82 85 My Computer button 30 N navigation keys 26 27 Nero Express 120 network jack 3 36 troubleshooting 287 network equipment shoppi...

Страница 330: ...gital photography Pinnacle Expression 141 playing audio CD 93 95 audio CD with MusicMatch 96 audio file 87 89 DVD 104 Media Player file 89 multimedia files 89 multi player games 197 music CD 93 95 Windows Media Player file 89 Plug and Play devices IEEE 1394 support for 37 USB support for 37 pointer moving 33 ports See connections power AC adapter 18 163 advanced settings 165 168 alarms 165 167 bat...

Страница 331: ...or 24 troubleshooting 272 using 91 106 120 recording audio file 87 CD tracks 98 128 data CD 106 121 data DVD 106 121 music CD 112 131 video DVD 111 recovering files and folders 59 Recycle Bin deleting files and folders 59 emptying 60 recovering files and folders 59 using 51 re dialing telephone 154 reinstalling drivers 239 peripheral devices 215 printer 215 programs 217 242 scanner 215 software 21...

Страница 332: ...mber 12 13 175 serial port 37 setting up safety precautions 298 sharing devices 197 drives 196 Internet connection 196 printer 197 See also networking shortcut menus accessing 34 shortcuts adding to desktop 52 buttons 30 closing programs 69 closing windows 69 copying 69 cutting 69 deleting files and folders 69 keyboard 69 opening menu 34 pasting 69 renaming files and folders 69 selecting adjacent ...

Страница 333: ...293 telephone acoustic handset coupler 174 automatically canceling fax 155 canceling fax 153 configuring Fax 145 148 installing Fax 144 line protector 174 line tester 174 receiving and viewing faxes 153 retrying fax 154 sending fax 149 sending faxes from program 152 sending scanned image fax 152 setting up fax cover page template 151 using Fax 143 telephone support 292 testing CD drive 135 DVD dri...

Страница 334: ...er 289 reinstalling drivers 239 safety guidelines 270 screen 276 291 screen area 276 screen resolution 276 sound 291 support tool 271 technical support 292 telephone support 292 video 291 Web site connection speed 279 turning off notebook 22 23 wireless Ethernet 208 turning on notebook 21 wireless Ethernet 208 tutoring fee based 294 U updating device drivers 47 Norton AntiVirus 222 upgrading 247 U...

Страница 335: ...lling 244 reinstalling drivers 239 Search utility 63 updating drivers 241 Windows key 26 27 Windows Media Player 89 93 104 wired Ethernet network creating a network 198 equipment list 201 example 200 using 199 wireless Ethernet label 12 using while traveling 174 wireless Ethernet network access point equipment list 205 access point example 204 ad hoc equipment list 207 ad hoc example 206 creating ...

Страница 336: ...326 ...

Страница 337: ......

Страница 338: ...NSK DWL M350 USR GDE R0 7 03 ...

Отзывы: