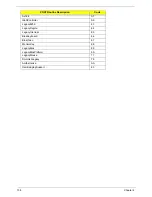
134
Chapter 4
TcgDxe
A2
PhysicalPresence
A3
TpmDriver
AE
TcgSmm
AE
PhysicalPresenceReadyToBoot
AE
DataHubRecordPolicy
AD
Undi
86
SNP
90
BC
91
PxeDhcp4
92
Ebc
93
IsaBus
4D
IsaSerial
4E
Ps2Mouse
6D
IdeBus
4F
LightPciBus
50
UsbBot
6E
UsbCbi0
6F
UsbCbi1
70
UsbKb
71
UsbMassStorage
72
UsbMouse
74
Ehci
8F
Uhci
73
UsbBus
75
SmmBase
C2
SmmDisp
C5
SmmReloc
C4
SmmRuntime
C7
SmmThunk
C9
OemServices
D8
ChipsetInit
44
SmmAccess
C0
PciHostBridge
46
PciExpress
47
GmchMbi
CD
IchInit
48
IdeController
49
SataController
4A
IchSmbusLight
4B
SmmControl
C1
Ich7MSmmDispatcher
C8
IsaAcpiDriver
4C
POST Routine Description
Code
Содержание EC14
Страница 6: ...VI ...
Страница 10: ...X Table of Contents ...
Страница 34: ...24 Chapter 1 ...
Страница 50: ...40 Chapter 2 ...
Страница 60: ...50 Chapter 3 5 Pull the memory module out ...
Страница 71: ...Chapter 3 61 8 Lift up and pull the button board to main board FCC free ...
Страница 75: ...Chapter 3 65 4 Lift off the LCD Board 5 Unlock and remove the LED board FCC from the mainboard ...
Страница 89: ...Chapter 3 79 4 Lift the LCD panel out lifting the bottom of the panel first ...
Страница 93: ...Chapter 3 83 5 Remove the antennas completely ...
Страница 99: ...Chapter 3 89 3 Apply adhesive and stick the microphone down ...
Страница 104: ...94 Chapter 3 Replacing the RTC Battery 1 Place the RTC battery into the holding clips on the main board ...
Страница 108: ...98 Chapter 3 3 Connect the speaker connector ...
Страница 116: ...106 Chapter 3 5 Relay the WLAN cables around and through the lower case ...
Страница 127: ...Chapter 3 117 4 Place the HDD cover in from one edge 5 Tighten the four captive screws ...
Страница 128: ...118 Chapter 3 Replacing the Battery 1 Slide the battery into position 2 Close the locking latch ...
Страница 129: ...Chapter 3 119 Replace the Dummy Card Push the dummy card into the slot until it clicks into place ...
Страница 130: ...120 Chapter 3 ...
Страница 170: ...160 ...


