2
Chapter 1
•
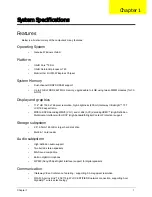
LAN: 10/100 Mbps Fast Ethernet
•
WPAN: Bluetooth® 2.0 or 2.1+EDR
•
WWAN: UMTS/HSPA at 850/1900/2100MHz and quad-band GSM/GPRS/EDGE(850/900/1800/
1900 MHz)(for 3G models)
Privacy control
•
BIOS user, supervisor, HDD passwords,
•
Kensington lock slot
Dimensions and Weight)
•
285 (W) x 204 (D) x 22.1/30 (H) mm (11.22 x 8.03 x 0.87/1.18 inches)
•
1.35 kg (2.97 lbs.) with 6-cell battery pack
Power subsystem
•
47.52 W 4400 mAh 6-cell Li-ion battery pack:
•
6-hour battery life9
•
62.16 W 5600 mAh 6-cell Li-ion battery pack:·
•
8-hour battery life9
•
Energy Star®
•
30W adaptor with power cord
Input devices
•
84-/85-/88-key full size keyboard, with inverted "T" cursor layou
•
Touchpad pointing device with two buttons
I/O interface
•
Multi-in-1 card reader
•
Three USB 2.0 ports
•
HDMI™ port with HDCP support HDMI™ port with HDCP support
•
External display (VGA) port
•
Headphone/speaker/line-out jack with S/PDIF support
•
Microphone-in jack
•
Ethernet (RJ-45) port
•
DC-in jack for AC adapter
Environment
•
Temperature:
•
Operating: 5°C to 35°C
•
Non-operating: -20°C to 65°C
•
Humdity (non-condensing):
•
Operating: 20% to 80%
Содержание EC14
Страница 6: ...VI ...
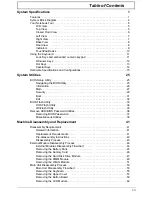
Страница 10: ...X Table of Contents ...
Страница 34: ...24 Chapter 1 ...
Страница 50: ...40 Chapter 2 ...
Страница 60: ...50 Chapter 3 5 Pull the memory module out ...
Страница 71: ...Chapter 3 61 8 Lift up and pull the button board to main board FCC free ...
Страница 75: ...Chapter 3 65 4 Lift off the LCD Board 5 Unlock and remove the LED board FCC from the mainboard ...
Страница 89: ...Chapter 3 79 4 Lift the LCD panel out lifting the bottom of the panel first ...
Страница 93: ...Chapter 3 83 5 Remove the antennas completely ...
Страница 99: ...Chapter 3 89 3 Apply adhesive and stick the microphone down ...
Страница 104: ...94 Chapter 3 Replacing the RTC Battery 1 Place the RTC battery into the holding clips on the main board ...
Страница 108: ...98 Chapter 3 3 Connect the speaker connector ...
Страница 116: ...106 Chapter 3 5 Relay the WLAN cables around and through the lower case ...
Страница 127: ...Chapter 3 117 4 Place the HDD cover in from one edge 5 Tighten the four captive screws ...
Страница 128: ...118 Chapter 3 Replacing the Battery 1 Slide the battery into position 2 Close the locking latch ...
Страница 129: ...Chapter 3 119 Replace the Dummy Card Push the dummy card into the slot until it clicks into place ...
Страница 130: ...120 Chapter 3 ...
Страница 170: ...160 ...


