


6
7
6
6
PRIOR INSTALLATION - IMPORTANT NOTICE
Please read the entire instruction manual before
installing the Rangehood.
The installation in this manual is intended for
qualified installers, service technicians or persons
with similar qualified backgrounds. DO NOT
attempt to install this appliance yourself. Injury
could result from installing the unit due to lack of
appropriate electrical and technical background.
Always ensure this Rangehood is installed as per
the requirements noted in AS/NZS 3000:2007.
There shall be adequate ventilation of the room
when the Rangehood is used at the same time
as appliances burning gas or other fuels (not
applicable to appliances that only discharge the
air back in to the room.
If the supply cord of this equipment is damaged,
it must only be replaced by the manufacturer or
its service agent or a similarly qualified person in
order to avoid a hazard.
Always switch power off prior to installation.
All electrical work must be done in accordance
with local and national electrical codes as
applicable and installed by a licenced electrician.
For safety, this product must be earthed.
A power outlet should be within 1000mm of the
power cord exit from the Rangehood.
The socket must be accessible and enable the end
user to isolate the Rangehood from the power for
the purpose of internal cleaning or maintenance.
Stainless steel or powder coat is very easily
damaged during installation if abraded or
knocked by tools. Protect the Rangehood with the
cardboard box or plastic bag during installation.
All ducting must comply with local requirements,
building codes and gas codes.
It is not recommended to use old duct work.
It should be replaced if necessary to avoid the
possibility of a grease fire. Check all joints on duct
work to ensure proper connection all joints should
be properly taped.
The Rangehood is designed for indoor undercover
use only and must be in a dry location.
Suitable fixings will be required to mount this
Rangehood. These are not included.
Note that accessible parts may become hot when
used with cooking appliances.
The power supply must be supplied though a
residual current device (RCD) having a tripping
current not exceeding 30mA.
Incorrect installation is not covered under
warranty.
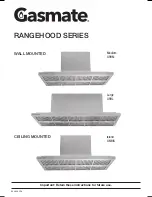
CONTENTS
Medium - GRhM
1 x Rangehood with 2 x 150mm duct adaptors fitted
2 x Chimney covers each 400mm high
1 x Chimney mounting bracket top
2 x Expanding ducts 150mm x 2m
Large - GRhL
1 x Rangehood with 3 x 150mm duct adaptors fitted
1 x Rangehood mounting plate
2 x Chimney covers each 400mm high
1 x Chimney mounting bracket top
3 x Expanding ducts 150mm x 2m
Island - GMhIS
1 x Rangehood with 2 x 150mm duct adaptors fitted
1 x Rangehood roof mounting bracket
8 x Range hood vertical brackets
2 x Chimney covers each 400mm high
2 x Expanding ducts 150mm x 2m
1 x Set hardware to attach vertical and roof brackets
together
REqUIRED FOR USE
Accessible power pointed fitted within 1m of
Rangehood mounting position. The power point must
be supplied through a residual current device (RCD)
having a tripping current not exceeding 30mA.
TYPICAL EqUIPMENT REqUIRED
FOR INSTALLATION
• Electric drill
• Suitable mounting hardware
• Drills
• Screwdriver
• Tape measure/rule
• Plumb bob
• Spirit level
• Ladder
For ducting:
• Duct tape
• Jigsaw
• Duct elbows as required for correct installation
• Roof cap or duct exit as required for correct
installation


