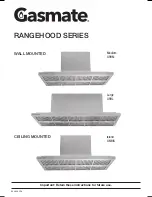
background image

14

15

14

14

OPERATION

FAN

To start the fan press the required speed (low, medium 
or high) and the red and blue LED will illuminate.
To choose a different speed just press the new speed 
regardless of whether the speed is higher or lower, the 
selected speed blue LED will illuminate as well as the 
red LED.
To stop the fan press the button below the blue 
illuminate LED. The LED’s will go out.
Note: 
Medium – 2 fans – 1 control
Island – 2 fans – 1 control
Large – 3 fans – 2 controls

LIGhTS

Note: Each pair of lights are individually controlled.
To turn on lights press the light button and the blue 
LED will illuminate. To turn off selected lights press the 
button below the blue illuminated LED. The LED’s will 
go out.

OFF/TIMER BUTTON

To turn both the fan and light off at the same time 
double press the OFF/TIMER button and the red and 
blue LED’s will go out.
Pressing the OFF/TIMER button once, the red LED will 
flash for 15 minutes, then turn the fan as well as any 
LED lights off.


Read all instructions before  installing and operating this appliance.


IMPORTANT SAFETY NOTICE 

Read all instructions in this manual before operating the appliance. Save these instructions for future reference. 
Always leave safety grills and filter in place. Without these components, operating blowers could catch on to hair, 
fingers and loose clothing. 
NEVER dispose cigarette ashes, ignitable substances or any foreign objects in to the blowers.
NEVER leave cooking area unattended. When frying, oil in the pan can easily overheat and catch fire. The risk of 
self-combustion is higher when the oil has been used several times.

CONTROLS

OFF

HIGH

MED

FAN

LOW

LIGHT

CLEANING

A build up of oil may occur if the Rangehood and baffle 
filters are not cleaned properly and regularly. Some 
discolouration of the baffle filter may occur if cleaned in 
the dishwasher.

RANGEhOOD SURFACES

Clean periodically with hot soapy water and a clean 
cotton cloth. Do not use abrasive detergent or steel 
wool/scouring pads which will scratch and damage the 
surfaces.
For heavier deposits, use a liquid degreaser.
After cleaning, you may use nonabrasive stainless steel 
polish/cleaners to polish and buff the stainless lustre. 
Always rub lightly, with a clean cotton cloth and with the 
grain of the stainless steel.
Note: Never wipe or rub across the grain as this will 
damage the surface finish. 

BAFFLE FILTERS

The baffle filters fitted by the factory are intended to 
filter out residue and grease from cooking. They are 
required to be kept clean and should be cleaned after 
every 30 hours of use or more often if required or after 
heavy cooking.
Note: Always turn the Rangehood power point off 
before removing filters.

To Remove

Lift latch and gently pull down front of baffle filter and 
remove.

To Clean

1.  Use warm soapy water and a soft cloth or put into 

dishwasher on a ‘normal’ cycle.

2.  Thoroughly clean and wipe down the inside of 

Rangehood canopy.

To Fit

1.  Position the rear of the baffle filter into the 2 slots.
2.  Gently rotate the baffle filter into position, lift latch 

and push into place and release latch.

Содержание GMHIS

Страница 1: ...03362 05 16 Important Retain these instructions for future use RANGEHOOD SERIES WALL MOUNTED CEILING MOUNTED Medium GRHM Large GRHL Island GMHIS ...

Страница 2: ...otected in a box S G A will not be responsible for any in transit loss or damage For any queries or assistance call Customer Service Australia Only 1300 174 876 Hours of operation Monday to Friday 8am 5pm EST Do not return to place of purchase This warranty does not apply to any defect deterioration loss injury or damage occasioned by or as a result of misuse or abuse negligent handling or storage...

Страница 3: ...cilitating correct combustion and allowing products of combustion to be readily dispersed to atmosphere An alfresco area veranda or balcony large area is considered outdoors when it is an open air situation with natural ventilation This ensures stagnant areas do not form as these prevent the products of combustion from being rapidly dispersed by wind and natural convection In the unlikely event of...

Страница 4: ...s smaller than or equal to its height and the open face width is at least twice the depth Examples of these situations A balcony with an open construction balustrade more than 75 per cent free open area Measure the distance from floor to roof H The maximum allowable depth D is the same as H and the minimum width W is twice D A balustrade is enclosed or has less than 75 per cent free open area Meas...

Страница 5: ...be given to ensure that any applicable regulations concerning the discharge of exhaust air is fulfilled Note that accessible parts may become hot when used with cooking appliances Remove any plastic coating from the product before use Do not attempt to modify this appliance as this could cause injury and will void your warranty Underside surfaces can become hot during use Do not touch Never leave ...

Страница 6: ...building codes and gas codes It is not recommended to use old duct work It should be replaced if necessary to avoid the possibility of a grease fire Check all joints on duct work to ensure proper connection all joints should be properly taped The Rangehood is designed for indoor undercover use only and must be in a dry location Suitable fixings will be required to mount this Rangehood These are no...

Страница 7: ...tional regulations Duct Mounting Options You will need some additional parts to complete these installations All motors need to be ducted individually and the included expanding duct is 150mm diameter REAR TOP ROOF RECOMMENDED TOP SOFFIT EAVE RANGEHOOD INSTALLATION If installing ducting at the Rear or via the Soffit Eave please review page 9 for the reductions in ducting requirements ...

Страница 8: ... bracket bottom screw hole GRHM Medium Bracket is part of the rangehood frame 1582mm GRHL Large 1562mm and top screw 1622mm 1562mm Large Wall Mount Version Only All Models Wall Ceiling Mount Version 2966mm Maximum 1200mm About 900mm Depending on BBQ Model 395mm MAX Fitted 76mm 395mm MAX Fitted Large Wall Mount Bracket 60mm RANGEHOOD INSTALLATION ...

Страница 9: ...be used Flexible ducts are provided for convenience always use rigid type metal ducts if available to maximize air flow Also use calculation above to compute total available duct run when using elbows transitions and caps ALWAYS when possible reduce the number of transitions and turns If a long duct run is required increase duct size from 150mm to 200mm If a reducer is used install a long reducer ...

Страница 10: ...ooking surface 2 Using a tape measure and level mark end holes on your wall Ensure all of these are level Domestic BBQ Cooking Surface C L Mounting Holes 1582mm A 300mm 300mm Cooking Surface A Hole C L 1582mm 3 Your rangehood is very heavy Please use suitable fixings and hole size for this weight Medium 50Kg Large 80Kg 4 If unsure of which fixings please discuss with your hardware stockist or rang...

Страница 11: ...ase use suitable fixings and hole size for this weight Medium 50Kg Large 80Kg If unsure of which fixings please discuss with your hardware stockist or rangehood installer 6 Securely fix the rangehood bracket to a solid wall Ensure it is level before tightening the fixings Domestic BBQ Cooking Surface Large Wall Bracket C L Cooking Surface C L Bottom Hole 1562mm A 280mm 280mm 280mm 60mm BBQ PLATE 1...

Страница 12: ...ghts as per Using Rangehood 4 If all okay turn off wall socket and unplug power lead Flue Surround Provided are 2 x flue surrounds both 400mm high These are used to finish and cover the motor box and installed ducting 1 Lift and fit bottom flue surround this fits into the groove in the Rangehood flat top 2 Mark 1 hole on each side for the flue surround Remove flue surround and drill holes 3 Replac...

Страница 13: ...urface and the underside of the Rangehood this should be minimum 1200mm maximum 1250mm 5 If the distance is not correct adjust the Rangehood height up or down as required Once correct securely tighten all nuts and bolts 6 Check to ensure that the Rangehood is level side to side as well as front to back Also check that it is square to the cooking surface It is imperative that the Rangehood is level...

Страница 14: ...ing area unattended When frying oil in the pan can easily overheat and catch fire The risk of self combustion is higher when the oil has been used several times CONTROLS OFF HIGH MED FAN LOW LIGHT CLEANING A build up of oil may occur if the Rangehood and baffle filters are not cleaned properly and regularly Some discolouration of the baffle filter may occur if cleaned in the dishwasher Rangehood S...

Страница 15: ...15 SPECIFICATIONS 395 400mm 395 400mm 76mm 800mm 1200mm 686mm 609mm 395 400mm 395 400mm 76mm 800mm 1480mm 966mm 609mm Medium GRHM Large GRHL ...

Страница 16: ...c induction 2 3 2 Lighting Cool white 4 x Rectangle 18 LED 6 x Rectangle 18 LED 4 x Rectangle 18 LED Controls 1 x Push button 3 x Push button 1 x Push button Flues Always duct individually 2 3 2 Duct Diameter 150mm Flue Surround 2 at 400mm high Filters Stainless steel 304 baffle style Ducts Flexible Expandable Metal 2 Total expanded length 2m each 3 Total expanded length 2m each 2 Total expanded l...

Отзывы: