Garmin nuvi 500-Series Скачать руководство пользователя страница 33

Viewing Precipitation Information

Precipitation ranging from very light rain and snow, up to strong 

thunderstorms, is indicated in varying shades and colors. 

Precipitation is shown either independently or with other 

weather information.

Select 

Weather

 > 

Precipitation

.

The time stamp in the upper-left corner of the screen 

indicates the elapsed time since the weather data provider 

last updated the information.

Precipitation Views

From the precipitation weather chart, select 

Menu

.

Radar Loop

: Shows precipitation information as an image of 

the latest update or as an animated loop of the latest 

updates. The time stamp indicates the elapsed time since 

the service provider generated the weather radar frame 

currently displayed on the screen.

Cloud Cover

: Shows cloud cover data.

Waypoints

: Shows waypoints.

Legend

: Shows the weather legend.

Storm Cell and Lightning Information

Storm cell are represented by 

 on the weather precipitation 

chart. They indicate both the present position of a storm and the 

projected path of that storm in the immediate future.
Red cones appear with a storm cell icon, and the widest part of 

each cone points in the direction of the projected path of the 

storm cell. The red lines in each cone indicate where the storm 

will most likely be in the near future. Each line represents 15 

minutes.
Lightning strikes are represented by  . Lightning appears on 

the weather precipitation chart if strikes were detected within the 

last seven minutes. The ground-based lightning detection 

network detects cloud-to-ground lightning only.

NOTE: 

This feature is not available on all devices and in all 

subscriptions.

Hurricane Information

The weather Precipitation chart can show the present position 

of a hurricane  , a tropical storm, or a tropical depression. A 

red line stemming from a hurricane icon indicates the projected 

path of the hurricane. Darkened dots on the red line indicate the 

projected locations through which the hurricane will pass, as 

received from the weather data provider.

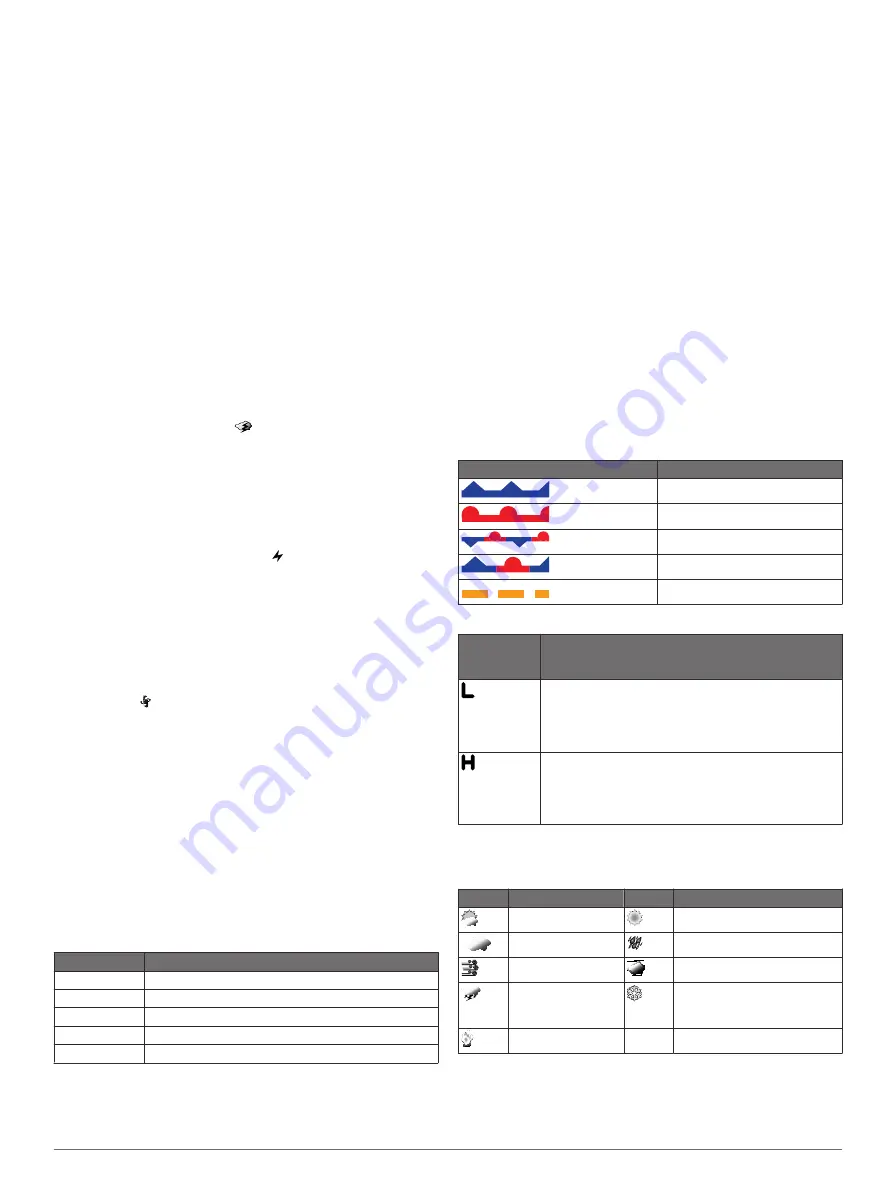
Weather Warnings and Weather Bulletins

When a marine weather warning, weather watch, weather 

advisory, weather bulletin, or other weather statement is issued, 

shading indicates the area to which the information applies. The 

aqua lines on the chart indicate the boundaries of marine 

forecasts, coastal forecasts, and offshore forecasts. Weather 

bulletins may consist of either weather watches or weather 

advisories.
To view information about the warning or bulletin, select the 

shaded area.

Color

Marine Weather Group

Cyan

Flash Flood

Blue

Flood

Red

Marine

Yellow

Severe Storm

Red

Tornado

Forecast Information

The Forecast chart shows city forecasts, marine forecasts, 

warnings, hurricane warnings, METARS, county warnings, 

weather fronts and pressure centers, surface pressure, and 

weather buoys.

Viewing Forecast Information for Another Time 

Period

1

Select 

Weather

 > 

Forecast

.

2

Select an option:
• To view the weather forecast for the next 12 hours, select 

Next Forecast

, and to view forecasts up to 48 hours, in 

12-hour increments, select 

Next Forecast

 again.

• To view the weather forecast for the previous 12 hours, 

select 

Previous Forecast

, and to view previous 

forecasts, up to 48 hours ago, in 12-hour increments, 

select 

Previous Forecast

 again.

Viewing a Marine Forecast or an Offshore Forecast

1

Select 

Weather

 > 

Forecast

.

2

Pan the chart to an offshore location.
The Marine Forecast or Offshore Forecast options appear 

when forecast information is available.

3

Select 

Marine Forecast

 or 

Offshore Forecast

.

Weather Fronts and Pressure Centers

Weather fronts appear as lines that indicate the leading edge of 

an air mass.

Front Symbol

Description

Cold front

Warm front

Stationary front

Occluded front

Trough

Pressure-center symbols often appear near weather fronts.

Pressure-
Center 
Symbol

Description

Indicates a low-pressure center, which is a region of 
relatively lower pressure. Moving away from a low-
pressure center results in increased pressure. Winds 
flow counterclockwise around low-pressure centers in 
the northern hemisphere.
Indicates a high-pressure center, which is a region of 
relatively higher pressure. Moving away from a high-
pressure center results in decreased pressure. Winds 
flow clockwise around high-pressure centers in the 
northern hemisphere.

City Forecasts

City forecasts appear as weather symbols. The forecast is 

viewed in 12-hour increments.

Symbol Weather

Symbol Weather

Partly cloudy

Fair (sunny, hot, clear)

Cloudy

Rain (drizzle, sleet, showers)

Windy

Foggy

Thunderstorms

Snow (snow showers, flurries, 
blizzard, blowing snow, sleet, 
freezing rain, freezing drizzle)

Smoke (dusty, hazy)

Viewing Sea Conditions

The Sea Conditions chart shows information about surface 

conditions, including winds, wave height, wave period, and 

wave direction.

SiriusXM Weather

27

Содержание nuvi 500-Series

Страница 1: ...GPSMAP 500 700 Series and echoMAP 50 70 Series Owner s Manual June 2014 190 01556 10_0C Printed in Taiwan...

Страница 2: ...sidiaries These trademarks may not be used without the express permission of Garmin Android is a trademark of Google Inc The Bluetooth word mark and logos are owned by the Bluetooth SIG Inc and any us...

Страница 3: ...ings 9 Navigation with a Chartplotter 9 Basic Navigation Questions 9 Destinations 9 Searching for a Destination by Name 9 Selecting a Destination Using the Navigation Chart 9 Searching for a Destinati...

Страница 4: ...nizing the Fuel Data with the Actual Vessel Fuel 22 Setting the Fuel Alarm 22 Viewing the Wind Gauges 22 Configuring the Sailing Wind Gauge 22 Configuring the Speed Source 22 Configuring the Heading S...

Страница 5: ...ng Data from a Memory Card 29 Copying Waypoints Routes and Tracks to a Memory Card 29 Copying Waypoints Routes and Tracks to or from all Chartplotters on the Network 29 Copying Built In Maps to a Memo...

Страница 6: ......

Страница 7: ...port 2 Select Manuals 3 Follow the on screen instructions to download the manual for your product Manual Conventions In this manual the term select is used to describe these actions Touching an item o...

Страница 8: ...Vessel Type You can select your boat type to configure the chartplotter settings and to use features customized for your boat type 1 Select Settings My Vessel Vessel Type 2 Select Powerboat or Sailboa...

Страница 9: ...d This view is helpful when navigating tricky shoals reefs bridges or channels and is beneficial when trying to identify entry and exit routes in unfamiliar harbors or anchorages Mariner s Eye 3D Show...

Страница 10: ...options that appear vary based on the location or object you selected 2 Select an option To view details of objects in the vicinity of the cursor select Review NOTE Review does not appear if the curso...

Страница 11: ...igation or Fishing chart select Menu Chart Setup Tides Currents 2 Select an option To show current station indicators and tide station indicators on the chart select On To show animated tide station i...

Страница 12: ...e target is calculated based on the course over ground information Showing AIS Vessels on a Chart or 3D Chart View Before you can use AIS you must connect the chartplotter to an external AIS device an...

Страница 13: ...or applicable premium charts From the Navigation chart or Fishing chart select Menu Chart Setup Satellite Photos Shows high resolution satellite images on the land or on both land and sea portions of...

Страница 14: ...to or more shallow than the dangerous depth are indicated by red text Safety Shading Sets the shades from the shoreline to the specified depth Depth Range Shading Specifies an upper and lower depth to...

Страница 15: ...To See Creating and Navigating a Route From Your Present Location How do I make the device steer my automatic pilot Navigate using Route To See Creating and Navigating a Route From Your Present Locati...

Страница 16: ...magenta line steering to avoid land shallow water and other obstacles 4 If you are off course follow the purple line corrected course to go to your destination or steer back to the magenta line direc...

Страница 17: ...e To Route To 3 Select the location of the last turn before the destination 4 Select Add Turn 5 If necessary repeat step 3 and 4 to add additional turns working backward from the destination to the pr...

Страница 18: ...iew select Menu Waypoints Tracks Tracks On A trailing line on the chart indicates your track Setting the Color of the Active Track 1 Select Nav Info Tracks Active Track Options Track Color 2 Select a...

Страница 19: ...Menu 4 Select an option To change the name select Name and enter a new name To customize the numbers shown on the screen select Overlay Numbers To change the data shown in the combination select Edit...

Страница 20: ...e side of the screen shows a full view graph of high frequency sonar data and the other side of the screen shows a full view graph of lower frequency sonar data NOTE The split frequency sonar view req...

Страница 21: ...lly select Up or Down To allow the chartplotter to adjust the gain or brightness automatically select an automatic option Adjusting the Color Intensity You can adjust the intensity of colors and highl...

Страница 22: ...gher frequency return Selecting Frequencies NOTE You cannot adjust the frequency for all sonar views and transducers You can indicate which frequencies appear on the sonar screen 1 From a sonar view s...

Страница 23: ...ntation of the SideV sonar view when the transducer is installed backward Sonar Alarm Settings NOTE Some settings require external accessories Select Settings Alarms Sonar Shallow Water Sets an alarm...

Страница 24: ...signals can increase the clutter on the Radar screen and make it more difficult to view information about shorter range targets In rain shorter range radar signals can enable you to view information a...

Страница 25: ...on point of the VRM and the EBL 2 Select Drop VRM EBL 3 Select Stop Panning Measuring the Range and Bearing to a Target Object Before you can adjust the VRM and the EBL you must show them on the Radar...

Страница 26: ...ence on the Radar Screen Side lobe interference may appear to streak outward from a target in a semi circular pattern Side lobe effects can be avoided by reducing the gain or reducing the radar range...

Страница 27: ...nfigured for use in one radar mode is applied to every other radar mode and to the Radar overlay 1 From a Radar screen or the Radar overlay select Menu Radar Setup Front of Boat 2 Select Up or Down to...

Страница 28: ...e you can set a fuel level alarm a compatible fuel flow sensor must be connected to the NMEA 2000 network You can set an alarm to sound when the total amount of remaining onboard fuel reaches the leve...

Страница 29: ...mation for today select Change Date Current If available to view information for the day after the date shown select Next Day If available to view information for the day before the date shown select...

Страница 30: ...a Navigation chart marking the location select Next Page To view the position report details select Previous Page Navigating to a Tracked Vessel 1 Select Nav Info Other Vessels DSC List 2 Select a po...

Страница 31: ...Media Player You can wirelessly connect the media player to a Bluetooth device 1 Place the Bluetooth device within 33 ft 10 m of the media player 2 From the media screen select BT Devices or Bluetooth...

Страница 32: ...not fill the entire screen To show the video using a standard aspect ratio select Aspect Standard To adjust the brightness select Brightness and select Up Down or Auto To adjust the color saturation...

Страница 33: ...ne forecasts coastal forecasts and offshore forecasts Weather bulletins may consist of either weather watches or weather advisories To view information about the warning or bulletin select the shaded...

Страница 34: ...ilable on all devices and in all subscriptions 1 From the weather Fishing chart select Weather Fishing Menu Fish Species 2 Select a species of fish 3 Select On 4 Repeat steps 2 and 3 to show areas wit...

Страница 35: ...ata from MapSource to the prepared memory card For more information see the MapSource help file Copying Data from a Memory Card 1 Insert a memory card into a card slot 2 Select Nav Info Manage Data Da...

Страница 36: ...y hides the menu bar when it is not needed GPS Settings Select Settings System GPS Skyview Shows the relative position of GPS satellites in the sky GLONASS Turns on or off GLONASS usage Russia satelli...

Страница 37: ...ing colder than it actually is Enter this value in step 5 as a negative number if the sensor connected to the chartplotter measures the water temperature as being warmer than it actually is 4 Select S...

Страница 38: ...map is structured Do not change this setting unless you are using a map or chart that specifies a different map datum Pressure Ref Time Sets the reference time used to calculate the barometer trend T...

Страница 39: ...tion through a narrow waterway 8 Select an option If the placement of the Auto Guidance line is satisfactory select Menu Stop Navigation and proceed to step 10 If the Auto Guidance line is too close t...

Страница 40: ...oltage is less than 10 volts the device will not turn on If the device is receiving enough power but does not turn on contact Garmin product support at www garmin com support My device is not creating...

Страница 41: ...02 AIS safety related broadcast message 129808 DSC call information 130310 Environmental parameters 130311 Environmental parameters obsolete 130313 Humidity 130314 Actual pressure 130576 Small craft s...

Страница 42: ...anning 3 setup 7 fuel alarm 22 32 fuel capacity 22 30 fuel gauges 21 22 configuring 22 status alarm 22 32 synchronizing with actual fuel 22 fuel onboard 30 G Garmin Marine Network 13 31 Garmin product...

Страница 43: ...ews 13 14 waypoint 14 whiteline 17 zoom 15 SOS 10 24 suspended targets 9 symbols 5 synchronizing user data 13 system information 30 T tide stations 5 23 indicators 5 touchscreen 1 calibrating 33 track...

Страница 44: ...02 36 699699 52 001 855 792 7671 0800 0233937 47 815 69 555 00800 4412 454 44 2380 662 915 35 1214 447 460 386 4 27 92 500 0861 GARMIN 427 646 27 0 11 251 9999 34 93 275 44 97 46 7744 52020 886 2 2642...

Отзывы: