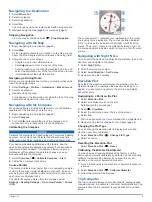
From the main menu, select
Trip Computer
.
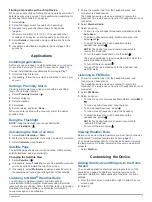
Resetting the Trip Computer
For accurate information, reset the trip information before
beginning a trip.
Select
Trip Computer
> >
Reset
>
OK
.
Photos and Video
You can take photos and videos with your device. If GPS is
), the geographic location is automatically
saved in the photo or video information.
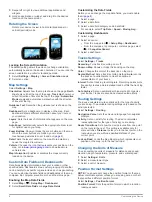
Taking a Photo
1
Select
Camera
.
2
Turn the device horizontally or vertically to change the
orientation of the photo.
3
If necessary, select one or more options to customize the
photo:
• To change shooting options, including flash, exposure,
white balance, scene, or location information, select .
• To zoom in or out, use the slider.
• To change the focus, select a part of the image.
The device focuses on the area inside of the square
brackets. When the photo is in focus, the square brackets
turn green.
4
Select to take a photo.
Taking a Panoramic Photo
You can use panorama mode to capture extra wide photos,
such as landscapes.
1
Select
Camera
> .
2
Aim the camera at the left or right edge of the shot.
3
Select .
4
Hold the device level, and slowly pan the device in one
direction, from left to right or from right to left.
If you pan too quickly, a red frame flashes around the
viewfinder to indicate you should slow down.
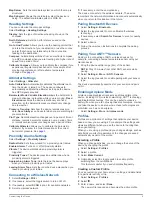
fills in with blue as you pan. The brighter blue area
indicates the area currently shown in the viewfinder.
5
Select an option:
• To stop capturing the panorama at a specific point, select
.
• To capture a full panorama, continue panning until
is
completely blue.
The device displays a preview of the photo and a progress bar
as it saves the photo.
Recording a Video
1
Select
Camera
>
.
2
Select .
3
Record a video.
4
When you have finished recording the video, select .
Viewing Photos and Videos
1
Select
Gallery
.
2
If necessary, select an album.
3
Select a photo or video.
Videos are indicated by .
4
Swipe left or right to view additional photos and videos in the
album.
Geocaches
A geocache is like a hidden treasure. Geocaching is when you
hunt for hidden treasures using GPS coordinates posted online
by those hiding the geocache.
Downloading Geocaches
1
Connect your device to a computer using the USB cable.
2
3
If necessary, create an account.
4
Sign in.
5
Follow the on-screen instructions to find and download
geocaches to your device.
Filtering the Geocache List
You can filter your geocache list based on certain conditions,
such as the level of difficulty.
1
Select
Geocaching
>
.
2
Customize the settings, and select
.
The filtered list of geocaches appears.
3
Select to save the filter (optional).
Creating and Saving a Geocache Filter
You can create and save custom filters for geocaches based on
specific factors. After you set up the filter, you can apply it in the
geocache list.
1
Select
Geocaching
> >
Manage Filters
> .
2
Enter a name.
3
Select filter options, and select
.
Applying a Saved Geocache Filter
Before you can apply a geocache filter, you must create and
save a geocache filter.
1
From the geocache list, select
All Geocaches
.
2
Select a filter.
Editing a Custom Geocache Filter
1
Select
Settings
>
Geocaching
> >
Manage Filters
.
2
Select a filter.
3
Select an item to edit.
Navigating to a Geocache
1
Select
Geocaching
.
2
Select a geocache.
3
Select
Go
.
4
).
Logging the Attempt
After you have attempted to find a geocache, you can log your
results. You can verify some geocaches at
.
1
Select
Geocaching
>
Log
.
2
Select
Found
,
Did Not Find
,
Needs Maintenance
, or
Unattempted
.
3
Enter a comment and rate the geocache (optional).
4
Select
Log
.
chirp™
A chirp is a small Garmin accessory that is programmed and left
in a geocache. You can use your device to find a chirp in a
geocache. For more information about the chirp, see the
chirp
Owner's Manual
6
Photos and Video


