background image

Chapter 4 Using Basic Applications

4.7

Basic Applications Overview: Scheduling Events

Tips for Scheduling Repeating or Continuous Events

Keep the following in mind when scheduling repeating or continuous events:

•  If you change the start date of a repeating event, your handheld calculates the number of days you moved the event. Your 

handheld then automatically changes the end date to maintain the duration of the repeating event.

•  If you change the repeat interval (e.g., daily to weekly) of a repeating event, past occurrences (prior to the day on which you 

change the setting) are not changed, and your handheld creates a new repeating event.

•  If you change the date of an occurrence of a repeating event (e.g., from January 14 to January 15) and apply the change to all 

occurrences, the new date becomes the start date of the repeating event. Your handheld adjusts the end date to maintain the 

duration of the event.

•  If you change other repeat settings (for example, time, alarm, private) of a repeating event and apply the change to all 

occurrences, your handheld creates a new event. The start date of this new event is the day on which the setting is changed. 

Past occurrences (prior to the day of the change) are not changed.

•  If you apply a change to a single occurrence of a repeating event (e.g., time), that occurrence no longer shows the Repeat 

icon.

Rescheduling Events

You reschedule events using the Details option in the Date Book. You can also use the Details option to convert untimed events into 

timed events. 

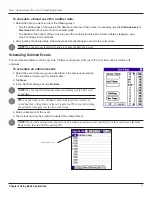
To reschedule an event:

1.  Tap the event you want to reschedule.
2.  Tap 

Details

.

3.  To change the time, tap the 

Time

 box, select a new time, and then tap 

OK

4.  To change the date, tap the 

Date

 box, select a new date, and then tap 

OK

.

Adding Address Book Information and Attaching a Location to an Event

You can add a name, address, and telephone number to an event using the Phone Lookup option. For instructions, see 

“Using Phone 

Lookup”

 in Chapter 5. For information on attaching a location to an event, please refer to the 

Que Applications Guide

.

Содержание iQUE 3600

Страница 1: ......

Страница 2: ...tion and printed materials together called the Product and grants you a limited non exclusive license to use the Product in accordance with the terms of this License Agreement The copyright and all ot...

Страница 3: ...e provided with RESTRICTED RIGHTS Use duplication or disclosure by the United States Government is subject to restrictions as set forth in subparagraph c 1 and 2 of the Commercial Computer Software Re...

Страница 4: ...s so the above limitations may not apply to you Garmin retains the exclusive right to repair or replace the unit or software or offer a full refund of the purchase price at its sole discretion SUCH RE...

Страница 5: ...the unit in a microwave oven or pressure cooker Although rechargeable the battery has a limited life span If there are any problems with the battery immediately keep the battery in a safe place and co...

Страница 6: ...ndheld Interface 1 8 Using Menus and Menu Commands 1 9 Displaying Tips 1 9 Customizing Your Handheld 1 10 Personalizing Your Handheld 1 10 Setting the Date Time and Time Zone 1 11 Formatting the Date...

Страница 7: ...lications 3 2 Changing the Applications Launcher Display 3 2 Setting Preferences for Applications 3 3 Assigning Applications to Buttons 3 3 Installing Add On Applications 3 5 Removing Applications 3 6...

Страница 8: ...ems 4 20 Using the Address Book 4 21 Adding and Using Address Book Entries 4 22 Duplicating an Entry 4 23 Selecting Different Types of Phone Numbers and Addresses 4 23 Editing Address Book Entries 4 2...

Страница 9: ...rmation 8 2 Turning Off Beaming 8 2 Chapter 9 Exchanging and Updating Data using HotSync Operations 9 1 Performing a HotSync Operation for the First Time 9 1 Performing the First Local HotSync Operati...

Страница 10: ...ion Types 10 1 Setting Modem Con gurations 10 2 Network Preferences 10 3 Customizing Service Templates 10 4 Entering DNS Numbers and IPAddresses 10 6 Creating a Login Script 10 7 Using Non ASCII Chara...

Страница 11: ...you do not lose any important information by synchronizing your data with Palm Desktop software on your computer to create a backup copy Customize your handheld and set different levels of security to...

Страница 12: ...he battery icon contains a lightning bolt symbol iQue Screen Displays the applications and data stored in your handheld The screen is touch sensitive Text Input Area Write letters and numbers in this...

Страница 13: ...in GA27C low pro le remote antenna IR Port Uses infrared technology to transmit and receive data to and from other iQue or Palm OS handhelds and to perform HotSync operations See Beaming Information i...

Страница 14: ...cally reduced Using the Stylus Just as you use a mouse pointer to click elements on your computer screen you can use the stylus to tap elements on your handheld s touch sensitive screen Tapping is the...

Страница 15: ...esktop software you could suffer data loss If you are not sure insert the Setup CD and re install the Palm Desktop software WARNING In order to change to another language you have to perform a hard re...

Страница 16: ...se the Reset button inside the hole on the back of the handheld Stylus Reset Tip Tool Reset Button A hard reset erases all records and entries stored in your handheld Never perform a hard reset unless...

Страница 17: ...pplications the Applications Launcher displays the current time battery level and application category To open an application 1 Tap the Home Applications Launcher icon Repeatedly tapping cycles throug...

Страница 18: ...in the input area activates the alphabetic keyboard when tapped Note that the cursor must be in an input eld for this option to work The 1 dot in the input area displays the numeric keyboard when tapp...

Страница 19: ...the desired command from the menu In the text input area of your device s screen drag a diagonal line from the lower left to upper right to display the Command toolbar The command bar displays for app...

Страница 20: ...ou enter in Owner Preferences appears each time you turn on your handheld To change Owner Preferences on your handheld 1 Tap the Home icon Then tap the Prefs icon 1 Tap the pick list in the upper righ...

Страница 21: ...d The Set Date screen appears 4 Tap the arrows at the top of the Set Date screen to select the current year 5 Tap the month then tap the current date The Set Date screen closes and the date you select...

Страница 22: ...and time zone 5 Tap to select your time zone Then tap OK The time zone you selected appears in the Time Zone eld TIP Choose the time zone from the list that corresponds to where you are When you trave...

Страница 23: ...de nes the format for the time of day which appears in all applications on your handheld To choose a country default 1 Tap the Home icon Then tap the Prefs icon 2 Tap the pick list in the upper right...

Страница 24: ...ease the automatic shut off setting To set the auto shutoff interval 1 Tap the Home icon Then tap the Prefs icon 2 Tap the pick list in the upper right corner and choose General 3 In the General Prefe...

Страница 25: ...eld vibrates and the LED blinks to notify you of alarms These settings are useful when you want the Alarm Sound off but you still want to be noti ed of alarms To enable the Alarm Vibrate and Alarm LED...

Страница 26: ...h your iQue handheld enables you to synchronize the information on your iQue handheld with the Palm Desktop software using HotSync technology To connect your cradle on a PC compatible computer Plug th...

Страница 27: ...if applicable 5 To prepare for the rst HotSync operation to synchronize your new handheld with your new Palm Desktop software go to the HotSync Manager and choose Custom 6 Select your new user name i...

Страница 28: ...screen keyboard 1 Open any application such as the Address Book 2 Tap any record or tap New 3 Tap A on the front of your handheld to display the alphabetic keyboard or tap 1 on the front of your handh...

Страница 29: ...the handwriting software The rst time you turn on your handheld or perform a hard reset the Welcome application automatically guides you through the setup process When you complete setup the iQue 3600...

Страница 30: ...stroke was recognized For example after the rst vertical stroke of t a temporary l is shown There is a short time delay during which you must draw the second stroke Otherwise the temporary stroke is r...

Страница 31: ...es the letter n Start stroke at heavy dot Lift stylus here 5 Lift the stylus from the screen at the end of the stroke shape 6 Your handheld recognizes your stroke immediately and displays the letter a...

Страница 32: ...e numbers using Graf ti 2 strokes draw in the right side of the text input area Draw numbers here Draw numbers using the following strokes Writing Punctuation Marks and Other Special Characters Using...

Страница 33: ...es away the punctuation mark appears TIP Using an additional Shift stroke to nish writing the character as shown in the demo is optional but will make the character appear more quickly Draw punctuatio...

Страница 34: ...for words or phrases up to 45 characters long using ShortCut preferences For example you could create a ShortCut for your name or for the header of a memo All ShortCuts you create appear on the list...

Страница 35: ...activate the ShortCut 5 Tap the ShortCut Text area and enter the text you want to appear when you write the ShortCut characters You can add a space character after the last word in your ShortCut text...

Страница 36: ...character Then tap Done Tap on Graf ti 2 here Tap on a letter to tune Using Your Computer Keyboard At times you may prefer to use your computer keyboard rather than the on screen keyboard to enter inf...

Страница 37: ...ftware 2 Click to select the application where you want to import data 3 If you are importing records that contain a eld with category names do the following a Select All in the Category box at the to...

Страница 38: ...tions installed on your handheld appear in the Applications Launcher In addition to providing a way for you to open applications the Applications Launcher displays the current time battery level and a...

Страница 39: ...con 2 Tap the App menu and then tap Category 3 Tap the pick list for the application you want to categorize Choose a category from the list 4 Tap Done To display applications by category 1 Tap the Hom...

Страница 40: ...icon 3 Tap the Options menu and then tap Preferences 4 Enter the desired preference settings and tap OK Assigning Applications to Buttons Buttons Preferences allows you to assign different applicatio...

Страница 41: ...ap OK To change what the full screen pen stroke activates 1 Tap the Home icon Then tap the Prefs icon 2 Tap the pick list in the upper right corner and choose Buttons 3 In the Buttons Preferences scre...

Страница 42: ...ick the applications you want to add to your iQue and they will be installed the next time you perform a HotSync operation A variety of additional third party applications such as games and other soft...

Страница 43: ...rom your computer 7 Click Done A message appears to indicate that the application or applications will be installed the next time you perform a HotSync operation 8 Perform a HotSync operation to insta...

Страница 44: ...ot assigning a password lets you view private entries when you Show Records from the Security dialog box Lock and turn off your handheld so that a password must be entered before you can use the devic...

Страница 45: ...ntil a password is entered Assigning and Editing Passwords You can assign a password to protect your private records and to lock your handheld Once you de ne a password you can change or delete it at...

Страница 46: ...held eld in the Security screen 3 Enter your current password and tap OK 4 Choose an option for when you want to lock your handheld Then tap OK 5 To turn off and lock your handheld immediately tap Loc...

Страница 47: ...Date Book The Date Book lets you quickly and easily schedule appointments or activities associated with a date or date and time When you open the Date Book it displays the current date and a list of t...

Страница 48: ...with a diamond You can schedule more than one untimed event on the same date Repeating events such as weekly meetings that are held on the same day at the same time each week Continuous events such as...

Страница 49: ...writing a number on the number side of the text input area 5 Set the duration of the event in either of the following ways Tap the time columns in the Set Time dialog box to set the Start Time Then t...

Страница 50: ...an schedule untimed events for any date Untimed events appear at the top of the list of times and are marked with a diamond To schedule an untimed event 1 Select the event date you want as described i...

Страница 51: ...ap the event and not the time next to the event Typically a continuous event is an untimed event 2 Tap Details 3 Tap the Repeat box to open the Change Repeat dialog box Tap the Repeat box 4 Tap Day We...

Страница 52: ...o delete 2 Tap Details The Event Details screen opens 3 Tap Delete The Repeating Event screen opens asking for con rmation of the delete TIP You can also select Delete Event from the Record menu This...

Страница 53: ...ange other repeat settings for example time alarm private of a repeating event and apply the change to all occurrences your handheld creates a new event The start date of this new event is the day on...

Страница 54: ...ed period of minutes hours or days before midnight of the day on which the untimed event begins For example you set a 5 minute alarm for an untimed event that occurs on February 4 The reminder messag...

Страница 55: ...enu icon Tap the inverted tab at the top of the Date Book screen to display the menu bar In the text input area drag a diagonal line from the lower left to upper right to display the Command toolbar T...

Страница 56: ...ook views do one of the following Press the Date Book application button repeatedly to cycle through all the Date Book views Tap a view icon in the lower left area of the Date Book screen Date Book Vi...

Страница 57: ...schedule To display Week View 1 Tap the Week view icon or press the Date Book button until the Week view appears Week view icon 2 Tap the left and right navigation controls to move forward or backward...

Страница 58: ...ting an event The Week view displays the time span de ned by the Start Time and End Time in the Date Book Preferences settings If you have an event before or after this time span a bar appears at the...

Страница 59: ...that day in the Day view Tap the scroll arrows in the upper right corner to move forward or backward a month Tap Go To to open the date selector and select a different month Use the scroll buttons on...

Страница 60: ...into the To Do List application You can change the category of To Do items shown Tap on the pick list and select the new category See Using the To Do List later in this chapter for more information on...

Страница 61: ...r new entries Preferences include display starting time display ending time and alarm characteristics See Setting Alarm Options earlier in this chapter for more information on alarm preferences To cha...

Страница 62: ...tegories so that you can organize and view them in logical groups For more information see Categorizing Records in Chapter 5 Sort your To Do List items by due date priority level or category Attach no...

Страница 63: ...ront of your handheld to display the To Do List 2 Tap New Tap New Enter new To Do List item 3 Enter the text of the To Do List item The text can be longer than one line TIP You can add a name address...

Страница 64: ...ies are not visible in the To Do List tap Show at the bottom of the list tap Show Priorities and tap OK 2 Tap the Priority number on the left side of the To Do List item 3 Tap the Priority number that...

Страница 65: ...m the current date No Date to remove the due date from the item or Choose Date to display the date selector and select a date 5 Tap Private to hide this item when Security is turned on For more inform...

Страница 66: ...pear from the list but are kept in the memory of your handheld You must purge com pleted items to remove them from memory Tap Show Only Due Items to show only the items that are currently due past due...

Страница 67: ...fax car and so on or e mail addresses for each name De ne which phone number appears in the Address List for each Address Book entry Attach a note to each Address Book entry so you can enter additiona...

Страница 68: ...ddress Book 4 Tap the First Name eld to move to it You can move to any eld by tapping it directly Enter the individual s rst name in the First Name eld 5 If you want to be able to sort the Address Boo...

Страница 69: ...text input area of the screen drag a diagonal line from the lower left to upper right to display the Command toolbar then write a T in the text input area to initiate the Duplicate Record command 3 Ed...

Страница 70: ...you want to assign to the entry Tap Private to hide the entry when Security is turned on 5 To attach a note to an entry tap Note enter information in the text input area and tap OK 6 To delete an ent...

Страница 71: ...ss Edit screen 5 Tap OK in the Rename Custom Fields dialog box 6 Tap Done To control the Address Book display on returning to the application 1 In the Address list or in Address view tap the Menu icon...

Страница 72: ...ation into other applications To open the Memo Pad 1 Tap the Applications Launcher icon 2 Tap the Memo Pad icon Creating Memos A record in the Memo Pad is called a memo A memo can contain up to 4 000...

Страница 73: ...ew or edit the text in the memo 3 Tap Done To move through a memo you are reviewing 1 In the Memo List tap the text of the memo you want to review If the memo is longer than the display window a scrol...

Страница 74: ...umber you entered Use this button if you make a mistake while entering a number in the middle of a calculation This button enables you to re enter the number without starting the calculation over The...

Страница 75: ...ing Recent Calculations The Recent Calculations command lets you review the last series of calculations and helps you con rm a chain of calculations To display recent calculations 1 In the Calculator...

Страница 76: ...in edit mode a blinking cursor appears within the information and the information appears on a dotted gray line called an edit line You can enter text in any of the ways described in Chapter 2 Enterin...

Страница 77: ...record 1 Select the desired record 2 Do one of the following Tap the Menu icon tap the Record menu and then tap the Delete command The Delete command differs depending on the application you are using...

Страница 78: ...2 weeks 3 weeks or 1 month For the Date Book or To Do list select Save Archive Copy on PC to save a copy of purged records in an archive le on your desktop Selecting this option transfers purged reco...

Страница 79: ...ner of the screen then tap the category you want to display Address Book category pick list TIP Pressing the Address Book To Do List or Memo Pad buttons on your handheld toggles through the categories...

Страница 80: ...in the text input area Tap OK To rename a category tap it in the list to select it Tap Rename enter a new name in the text input area and Tap OK To delete a category tap it in the list to select it T...

Страница 81: ...of the following From the Address screen enter the rst few letters of the name you want to locate Use the scroll buttons on the front of the device to scroll a screen at a time Holding down a scroll...

Страница 82: ...splay the record in which you want to insert a phone number The record can be in the Date Book the To Do List or the Memo Pad 2 Do one of the following Tap the Menu icon Tap Options and then tap Phone...

Страница 83: ...e Sort By pick list and select an option 4 Tap OK To sort records in the Address Book and Memo Pad 1 Open the application to display the list screen 2 Do one of the following Tap the Menu icon From th...

Страница 84: ...l records private Private records can be either masked or hidden Private records remain visible and accessible until you select a security setting to Hide records Private record names are covered with...

Страница 85: ...nge Security dialog box tap Hide Records in the Current Privacy pick list then tap OK To display private records 1 Do one of the following Tap the Applications Launcher icon then tap Security From wit...

Страница 86: ...rs long To attach a note 1 Display the entry to which you want to add a note 2 In Address Book only tap Edit 3 Tap Details 4 Tap Note then enter the desired note 5 Tap Done A note icon appears to the...

Страница 87: ...line from the lower left to upper right to display the Command toolbar In the text area write an F the shortcut for the Font command 3 Tap the font style you want then tap OK Getting Information on an...

Страница 88: ...g on your hardware con guration Alarms continue until you snooze or dismiss them If enabled you can silence the alarm by tapping anywhere on the screen or pushing any button Attention Manager will alw...

Страница 89: ...Sound Effects Some applications allow you to set the song or sound effect to use and how many times to play it The example that follows illustrates how to set alarm preferences for the Date Book Sett...

Страница 90: ...draws a line through the text lines pauses for a moment and them removes the item from the list although the original data remains in the application The Reminders list screen displays three buttons t...

Страница 91: ...creen in the menu bar of applications that allow it under the following conditions While viewing a Reminders dialog screen you tap the Done or the Snooze button A subtle alarm is present The indicator...

Страница 92: ...sure the iQue is not reading or writing data on the card 2 Gently push the SD card down into the slot then release it so the card pops partially out of the slot 3 Pull the card out of the iQue Display...

Страница 93: ...o memory and launched If the application is already resident in main memory it is not copied again just launched To display information about an application on a card 1 Tap the Home icon Then tap the...

Страница 94: ...plication on an expansion card to your handheld 1 Tap the Home icon Then tap the Menu icon 2 Tap the App menu and select Copy 3 Select the source and the destination using the From and the Copy To pic...

Страница 95: ...tap Done TIP Some applications and databases are copy protected and cannot be beamed These applications are listed with a lock icon next to them To delete an application on an expansion card 1 Tap th...

Страница 96: ...und on the expansion card To use Card Info 1 Tap the Home icon Then tap the Card Info icon 2 To rename the card tap the Card Info tab in the upper left corner of the screen and select Rename Card 3 En...

Страница 97: ...xpansion card will destroy its data 6 To display help for Card Info tap Card Info in the upper left corner of the screen and select Help Then scroll through the tips that are displayed 8 To view infor...

Страница 98: ...onnected devices may be different Beaming a Record To beam a record business card or category of records 1 Locate the record business card or category you want to beam 2 Tap the Menu icon 3 Tap Record...

Страница 99: ...dheld Receiving Beamed Information To receive beamed information 1 Turn on your handheld 2 Point the IR port directly at the IR port of the transmitting handheld to open the Beam Status dialog box 3 T...

Страница 100: ...forming the following steps Performing the First Local HotSync Operation You must perform your rst HotSync operation with a local direct connection rather than using a modem The following steps assume...

Страница 101: ...igned only for a rst time HotSync operation before you assign a user name to a particular handheld To create a user pro le 1 Open Palm Desktop software 2 From the Tools menu choose Users 3 Click Pro l...

Страница 102: ...the HotSync Manager synchronizes data even when Palm Desktop software is not running Available Only When Palm Desktop software Is Running Starts HotSync Manager and monitors requests automatically whe...

Страница 103: ...ur handheld or Palm Desktop software or to avoid synchronizing a particular type of le because you do not use it In addition to the conduits for Date Book Address Book To Do List and Memo Pad Palm Des...

Страница 104: ...op You simply enable infrared communication on your laptop and handheld and follow the steps in Performing an IR HotSync Operation later in this section Preparing your Computer for Infrared Communicat...

Страница 105: ...ated port It is the channel through which the actual infrared communication takes place between your computer and your handheld 6 Deselect all other check boxes in the Options tab 7 Click Apply then c...

Страница 106: ...Sync icon to start the IR HotSync operation Returning to Using the Cradle for HotSync Operations It is easy to return to using the cradle for HotSync operations To return to cradle HotSync operations...

Страница 107: ...dheld for use with your modem Serial to Modem or IrCOMM to Modem See Chapter 10 Setting Connection and Network Preferences Preparing Your Computer You must perform a few steps to prepare your computer...

Страница 108: ...g Your Handheld In addition to preparing your computer you must perform a few steps to prepare your handheld for a modem HotSync operation To prepare your handheld for a modem HotSync operation 1 Tap...

Страница 109: ...r device synchronize during a HotSync operation 1 Tap the Home icon Then tap the HotSync icon 2 Tap the Menu icon 3 Tap Options and then tap Conduit Setup 4 In the Conduit Setup dialog box tap the che...

Страница 110: ...ystem Administrator Everything you need to connect to your company s dial in server network modem is included with Palm Desktop software and the handheld software You need to activate the feature howe...

Страница 111: ...Link The File Link feature lets you import Address Book and Memo Pad information into your handheld from a separate external le such as a company phone list HotSync Manager stores the data in a separ...

Страница 112: ...are available to various end user applications running on the handheld The Connection Preferences screen displays a list of available con gurations that can be modi ed to re ect the required settings...

Страница 113: ...rs at the top of the screen 4 Tap the Connect to pick list and select the device you want to connect to 5 Tap the Via pick list and select the type of connection 6 In the Dialing pick list tap TouchTo...

Страница 114: ...e Prefs icon 2 Tap the pick list in the upper right corner of the screen and select Network 3 Tap the Service pick list Tap the prede ned service template you want to use 4 Tap the User Name eld Only...

Страница 115: ...service tap the Use Calling Card check box On the Use Calling Card line enter three commas Each comma delays transmission of your calling card number for two seconds to compensate for the delay before...

Страница 116: ...ect connection type SLIP for Serial Line Internet protocol CSLIP for Compressed Serial Line Internet protocol 5 Tap the Idle Timeout pick list to specify how long your handheld waits to drop your conn...

Страница 117: ...if so what they are 2 In the Network Preferences screen with a service template selected tap Details 3 Tap the Query DNS check box to deselect it 4 Choose one of the following options If your system...

Страница 118: ...structs your handheld to wait for speci c characters from the TCP IP server before executing the next command Send Transmits speci c characters to the TCP IP server to which you are connecting Send CR...

Страница 119: ...eturn and line feed from the remote computer before executing the next command in the script You can use the backslash character to specify that the next character be transmitted as a literal characte...

Страница 120: ...d If a number is required but not entered the connection may fail See Entering DNS Numbers and IPAddresses in this chapter To expand the display of progress messages during login 1 Tap the Home icon T...

Страница 121: ...g 3 1 Setting Preferences 3 3 Applications Launcher 3 1 3 5 Changing the Display 3 2 Attention Manager 6 1 6 4 Auto Shutoff Interval 1 14 B Backlight 1 2 1 5 Battery Charging 1 3 Battery Icon 1 2 Beam...

Страница 122: ...7 Rescheduling 4 7 Timed 4 2 4 4 Untimed 4 4 4 5 Expansion Card 7 1 7 6 Expansion Card Slot 1 3 External Antenna Connector 1 3 External Keyboard 2 10 F File Link 9 12 Find 5 6 5 7 Fonts 5 12 Formats...

Страница 123: ...esses 10 6 Login Script 10 7 10 8 Service Templates 10 4 10 5 Troubleshooting Connections 10 9 Notes 5 11 Numeric Keyboard 2 1 2 2 O On Screen Keyboard 2 1 Opening Applications 1 7 P Palm Desktop Soft...

Страница 124: ...Handheld to Stay on While in the Cradle 1 14 Soft Reset 1 6 Sorting Records 5 8 5 9 Sounds and Volumes 1 15 Speaker 1 2 Stay on While in the Cradle 1 14 Stylus 1 3 1 4 Subtle Alarms 6 4 Synchronizing...

Страница 125: ...ternational Inc 1200 E 151st Street Olathe KS 66062 U S A Garmin Europe Ltd Unit 5 The Quadrangle Abbey Park Industrial Estate Romsey SO51 9DL U K Garmin Corporation No 68 Jangshu 2nd Road Shijr Taipe...

Отзывы: