


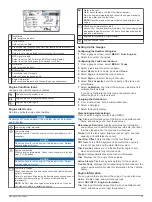


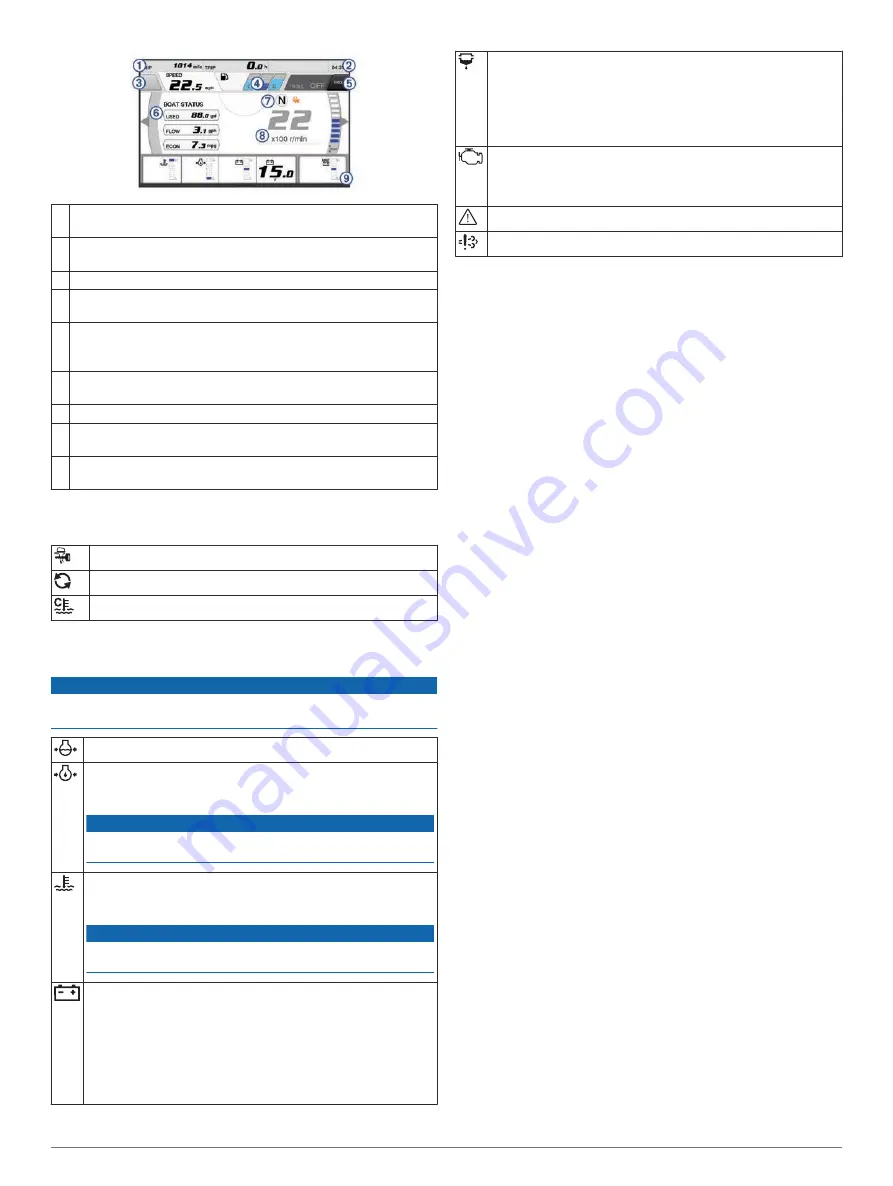
À
Data fields
Hold to replace the data.
Á
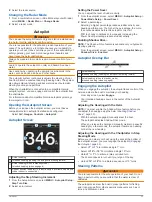
Current time
Hold to view trip data.
Â
Press to set the joystick button Set Point functions (Helm Master
®
).
Ã
Tank level information
Hold a tank to view detailed tank level sensor information.
Ä
GPS signal strength
Select to set the Fish Point high RPM limit (Helm Master).
Select to set the trolling speed (Command Link Plus
®
).
Å
Data fields
Hold to replace the data.
Æ
Shift position
Ç
Tachometer and trim angle
Hold to change the background.
È
Engine information
Hold to replace the data and change the gauge appearance.
Engine Condition Icons
Orange icons indicate engine conditions.
Yamaha security system is on.
Engines are under synchronization control.
Engines are warming up.
Engine Alert Icons
Red icons indicate engine abnormalities.
NOTICE
Consult your Yamaha dealer if the problem cannot be located
and corrected.
Low cooling water pressure.
Low oil pressure.
Stop the engine. Check the engine oil level, and add more oil if
necessary.
NOTICE
Do not continue to run the engine if this indicator is on. Serious
engine damage will occur.
Engine overheating.
Stop the engine immediately. Check the cooling water inlet, and
clear it if it is blocked.
NOTICE
Do not continue to run the engine if this indicator is on. Serious
engine damage will occur.
Low battery voltage.
Check the battery and battery connections, and tighten all loose
battery connections.
Return to port soon if tightening the battery connections does not
increase the battery voltage. Consult your Yamaha dealer
immediately.
NOTE:
Do NOT stop the engine when this alert is on. If you do,
you may not be able to restart the engine.
Water in the fuel.
Water has collected in the fuel filter (fuel separator).
Stop the engine immediately and consult the engine manual to
drain the water from the fuel filter.
NOTE:
Gasoline mixed with water might cause damage to the
engine.
Check engine/maintenance alert.
Consult your Yamaha dealer immediately. The check engine alert
also appears when more than 100 hours have elapsed since the
previous maintenance.
Engine alert notification. (Helm Master)
Engine emission issue.
Setting Up the Gauges
Configuring the Number of Engines
1
From a gauges screen, select
MENU
>
Num. Engines
.
2
Select the number of engines.
Configuring the Tank Level Sensors
1
From a gauges screen, select
MENU
>
Tanks
.
2
Select a tank level sensor to configure.
3
Select
Name
, enter a name, and select
Done
.
4
Select
Type
, and select the type of sensor.
5
Select
Style
, and select the style of sensor.
6
Select
Tank Capacity
, enter the capacity of the tank, and
select
Done
.
7
Select
Calibration
, and follow the on-screen instructions to
calibrate the tank levels.
If you do not calibrate the tank levels, the system uses
default settings for the tank levels.
Changing the Data Shown
1
From a data screen, hold a customizable item.
2
Select a data type.
3
Select the data to display.
Yamaha Engine Data Settings
From a Yamaha engine screen, select MENU.
Trip
: Displays information about the trip, such as distance and
hours, and allows you to reset these values.
Maintenance Reminder
: Displays maintenance information,
and enables you to set the maintenance intervals, and reset
the time elapsed since the previous maintenance.
Tanks
: Sets the tank name, fluid type, sensor style, and tank
capacity, and calibrates the sensor.
Fuel Flow Offset
: Sets the offset for the fuel flow data.
Off Timer
: Turns off the system one hour after the engine is
turned off. Available on the Helm Master system.
Trim Zero Set
: Allows you to initialize the trim angle to zero
when all motors are fully trimmed down.
Tanks
: Displays detailed tank level sensor information.
Trim
: Displays the trim angle of the engines.
Active Alarms
: Displays any active alarms for the engines.
Trouble Code
: Displays the corresponding trouble codes for the
active engine alarms. Provide this information to the Yamaha
dealer.
Engine Information
You can view information about the engine. You can also view
alarms, trouble codes, and maintenance logs.
Select
NAV INFO
>
Engine Information
.
Trip
: Displays information about the trip, such as distance and
hours, and allows you to reset these values.
Gauges and Graphs
39
Содержание GPSMAP 1000 Series
Страница 1: ...GPSMAP 1000 1200SERIES Owner sManual...
Страница 8: ......
Страница 70: ...support garmin com June 2018 190 02145 00_0D...