Page 6-6
G1000 / GFC 700 System Maintenance Manual - 300/B300 Series King Air
Revision 1
190-00716-01
6.11 GSA 80 and GSA 9000 Servos
Removal:
1.
Gain access to the desired servo(s).
2.
Disconnect the servo harness connector.
3.
Use a socket or open-wrench to loosen and remove the servo attachment bolts.
4.
Carefully remove the servo and place a protective cover on the output gear.
5.
Place a protective cover over the GSM 86 or GSM 9100 servo gearbox.
Reinstallation:
1.
For GSA 80 servos only, perform the following steps:
a)
Inspect the servo output gear for abnormal wear.
b)
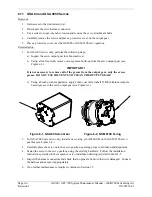
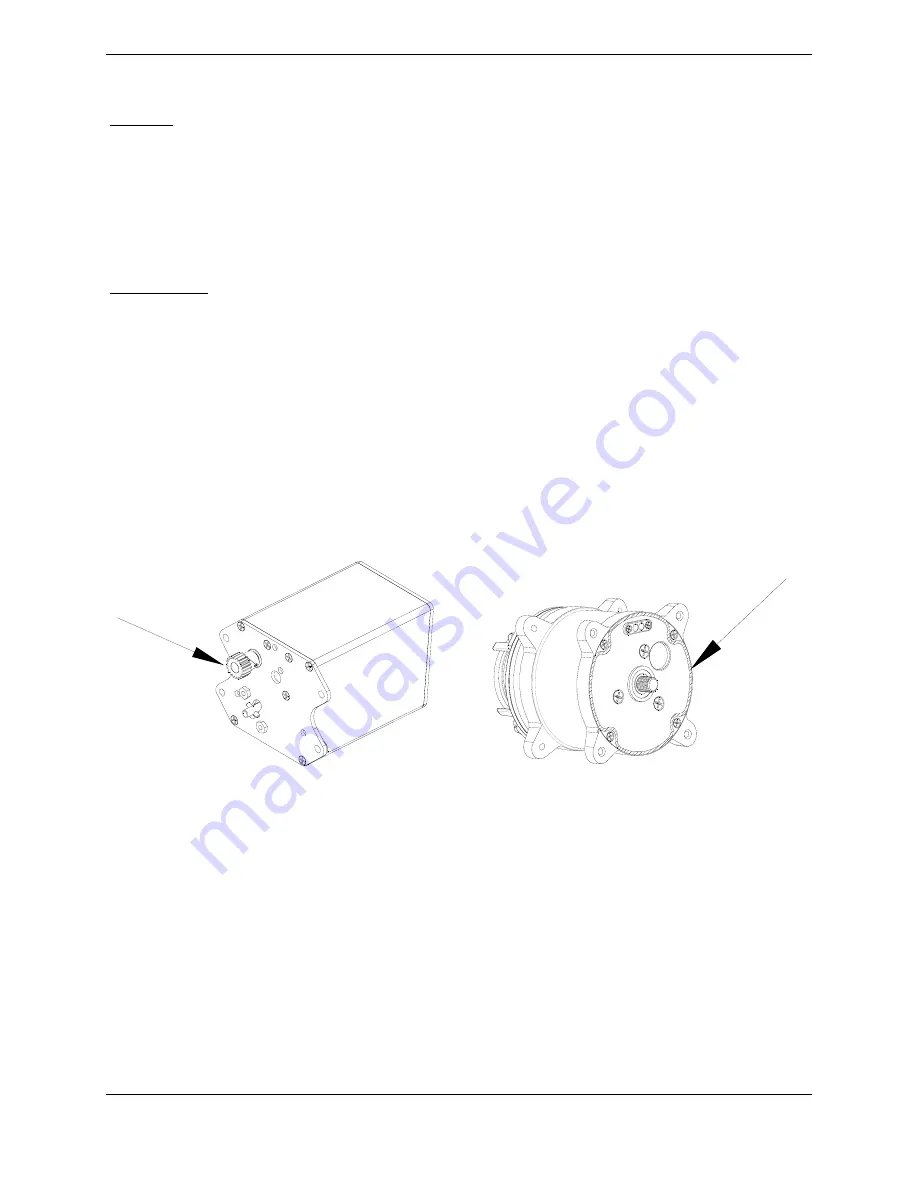
Using a lint-free cloth, remove excess grease build-up from the servo output gear (see
Figure
6-2
.)
IMPORTANT!
It is not necessary to remove all of the grease from the output gear, only the excess
grease. DO NOT USE SOLVENTS TO CLEAN THE OUTPUT GEAR!
c)
Using a brush or other applicator, apply a thin coat of Aeroshell 33MS (Lithium-complex
based) grease to the servo output gear (see Figure 6-1.)
Figure 6-1, GSA 80 Servo Gear
Figure 6-2, GSM 9100 O-ring
2.
For GSA 9000 yaw servo only, install a new o-ring p/n AS568-043 on the GSM 9100 servo
gearbox (see Figure 6-2.)
3.
Carefully place the servo onto the servo gearbox, ensuring proper orientation and alignment.
4.
Fasten the servo to the servo gearbox using the existing hardware. Follow the installation
instructions provided in the respective servo installation drawing(s) listed in Table 1-2.
5.
Inspect the harness connectors and check that no pins are bent or otherwise damaged. Connect
the harness and secure it appropriately.
6.
If no further maintenance is required, continue to Section 7.9.
Содержание Cessna Caravan G1000
Страница 2: ...This page intentionally left blank...
Страница 89: ......

