background image

Operation, Maintenance and Installation Manual

KG 491 CA

Gas Cooktop

Содержание KG491110CA

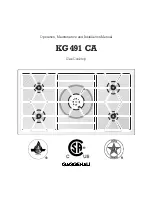
Страница 1: ...Operation Maintenance and Installation Manual KG 491 CA Gas Cooktop...

Страница 2: ......

Страница 3: ...Principle Page 9 6 Operation Page 10 11 7 Settings Table Page 12 8 Cookware Recommendations Page 13 9 Wok Cookware Recommendations Page 14 10 Cleaning and Care Page 15 17 11 Maintenance Page 18 12 Tr...

Страница 4: ...vicinity of this or any other appliance WHAT TO DO IF YOU SMELL GAS Do not try to light any appliance Do not touch any electrical switch do not use any phone in your building Immediately call your gas...

Страница 5: ...den to use high pressure or steam jet cleaning devices Note The name plate is attached to the bottom of the unit and to the inside of the housing Only for Installation in USA This installation must co...

Страница 6: ...wed to sit or stand on any part of the appliance Do not store items of interest to children above the cooktop or at the back of it If children should climb onto the appliance to reach these items they...

Страница 7: ...ers keep the ports clean It is necessary to clean these when there is a boil over or when the burner does not light even though the electronic igniters click See care and maintenance section Clean the...

Страница 8: ...t and burn easily Foodstuffs that are prepared in fat and oil must only be prepared under constant supervision Technical modifications reserved Operating for the First Time Remove the packaging from t...

Страница 9: ...not heat up any empty pots or pans It is not permitted to use roasting pans frying pans or grill stones heated simultaneously by several burners because the resulting heat build up may damage the appl...

Страница 10: ...g zone wok 9 Control knob for rear right cooking zone 10 Control knob for front right cooking zone Flame setting 0 OFF High setting of outer and inner flame ring Low setting of outer flame ring High s...

Страница 11: ...e will automatically re ignite the burner During a disturbance the appliance will cut off the gas supply as a safety measure to prevent unburned gas escaping The flame setting is infinitely variable b...

Страница 12: ...e can be set continuously between full and low by slowly turning the control knob Should the flame go out during operation e g because of a draught the appliance will automatically re ignite the burne...

Страница 13: ...Switching off Fully turn the control knob to the OFF position The electronics of the appliance switch the gas supply off if all control knobs are in the off position 11...

Страница 14: ...ooking Rice pulses Reheating Soup casserole vegetables in a sauce Switch to the high setting in order to reach the required temperature quickly Then switch back to a lower setting The output of the in...

Страница 15: ...tion is particularly improved in the low setting Using the correct size of pots and pans for the burner ensures improved cooking performance and energy efficiency To ensure an even distribution of hea...

Страница 16: ...edients cut into small pieces are cooked as briefly as possible under strong heat and constant stirring In the large round pan everything can be stirred and turned faster and with greater ease than in...

Страница 17: ...appliance before operating it for the first time and after every use 10 Cleaning and Care burner assembly wok burner burner head cover burner ring burner head electrode burner base burner assembly no...

Страница 18: ...steel care agents uniformly and thinly on the hob not on the control panel This will ensure an even surface and will keep your hob in a good condition for a long period of time Make sure the burner p...

Страница 19: ...shed stainless stainless steel Soak burnt in remainders with a steel trough always polish in the direction shot blasted little detergent solution of the polish lines brushed After cleaning polish dry...

Страница 20: ...d then turned back on again Before calling the service engineer check the trouble shooting guide on page 19 to see if you can rectify the problem yourself If your appliance still does not work please...

Страница 21: ...t off valve open Is the burner dry and clean Is there an air pocket in the gas supply line after first in stallation or changing the LP propane gas tank LP propane gas is the gas tank empty Wait until...

Страница 22: ...racket to DIN 1999 conical cylindrical Technical data electrical Rated consumption 15 W Voltage AC 120 V Frequency 60 Hz Technical modifications reserved Nozzle full burn outer 1 55 110 A Nozzle low b...

Страница 23: ...ies US CA US CA Gas family Natural gas LPG Prop Pressure 6 W C 1 5 kPa 10 W C 2 5 kPa Total output 5 burners 58 000 BTU 17 kW 58 000 BTU 17 kW Nozzle table large burner Nozzle full burn outer 0 97 0 6...

Страница 24: ...available pressure As this gas hob is not intended for connection to an exhaust gas system pay attention to the applicable installation conditions The appliance may be installed in kitchen combinatio...

Страница 25: ...maintained when installing the gas cooktop shall be A minimum 12 300 mm B minimum 12 300 mm C minimum 30 762 mm clearance between the top of the cooking surface and the bottom of exhaust hood D minim...

Страница 26: ...ure that the connecting lead cannot come into contact with hot parts of the gas hob or other hot parts Warning this appliance is equipped with a three prong grounding plug for your protection against...

Страница 27: ...fits into the threaded nut on the hob The longer tapered U S A thread is for the incoming gas supply Vent the gas line check for leaks The gas pressure regulator is supplied with the unit and comes s...

Страница 28: ...top must be 90 As shown in the installation sketch drill the 35 mm 13 8 holes to secure the control knobs in the cabinet front If the cabinet front is thicker than 26 mm 11 32 the front must be routed...

Страница 29: ...into the holes secure from the rear with the nuts Take care to install control knobs in the correct order Undo trough securing nuts and carefully detach the trough Note if a flexible gas connection is...

Страница 30: ...l knobs Be careful that the broader pin of the control knob fits the broader fitting of the spindle There are four equal spindles and one that is longer use the longer spindle for the wok burner cente...

Страница 31: ...29...

Страница 32: ...rner rings burner head covers and burner heads Undo trough securing nuts three 7 mm nuts on each burner and two Torx T20 on the wok burner and carefully detach the trough Loosen both cover plates slid...

Страница 33: ...with the O ring by hand Check whether the O rings of the new nozzle seats are fitted correctly Fully push nozzles onto the supply lines Note do not bend supply lines Push the burners onto the supply...

Страница 34: ...hange the screw in nozzle and tighten it firmly Push the burners onto the supply lines Push the safety springs back on Screw the burner back on the trough Loosen the locking screw and adjust the air r...

Страница 35: ......

Страница 36: ...551 McFADDEN AVENUE HUNTINGTON BEACH CA 92649 USA Y 800 828 9165 FAX 714 901 0979 www gaggenau usa com GAGGENAU HAUSGER TE GMBH CARL WERY STR 34 81739 M NCHEN GERMANY Y 089 45 90 03 FAX 089 45 90 23 4...

Отзывы: