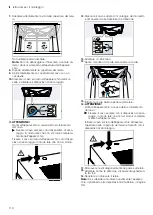
background image

Istruzioni per il montaggio

 it

103

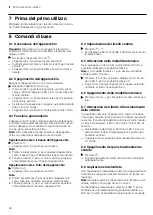
14.2 Smaltimento delle batterie/delle pile

Le batterie/Le pile devono essere gestite nell'ottica di
un riciclaggio rispettoso dell'ambiente. Non gettare bat-
terie/pile nei rifiuti domestici!

Smaltire le batterie/le pile nel rispetto dell'ambiente.
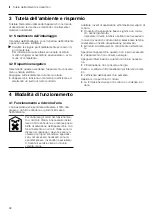
Soltanto per Paesi UE:

Secondo le direttive europee
2006/66/CE, le batterie difettose o
esaurite vanno raccolte separatamen-
te e smaltite per il riciclo ecocompati-
bile.

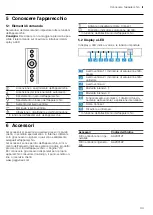
15  Istruzioni per il montaggio

Osservare queste informazioni durante il montaggio
dell'apparecchio.

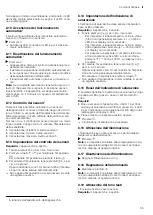
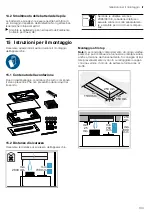
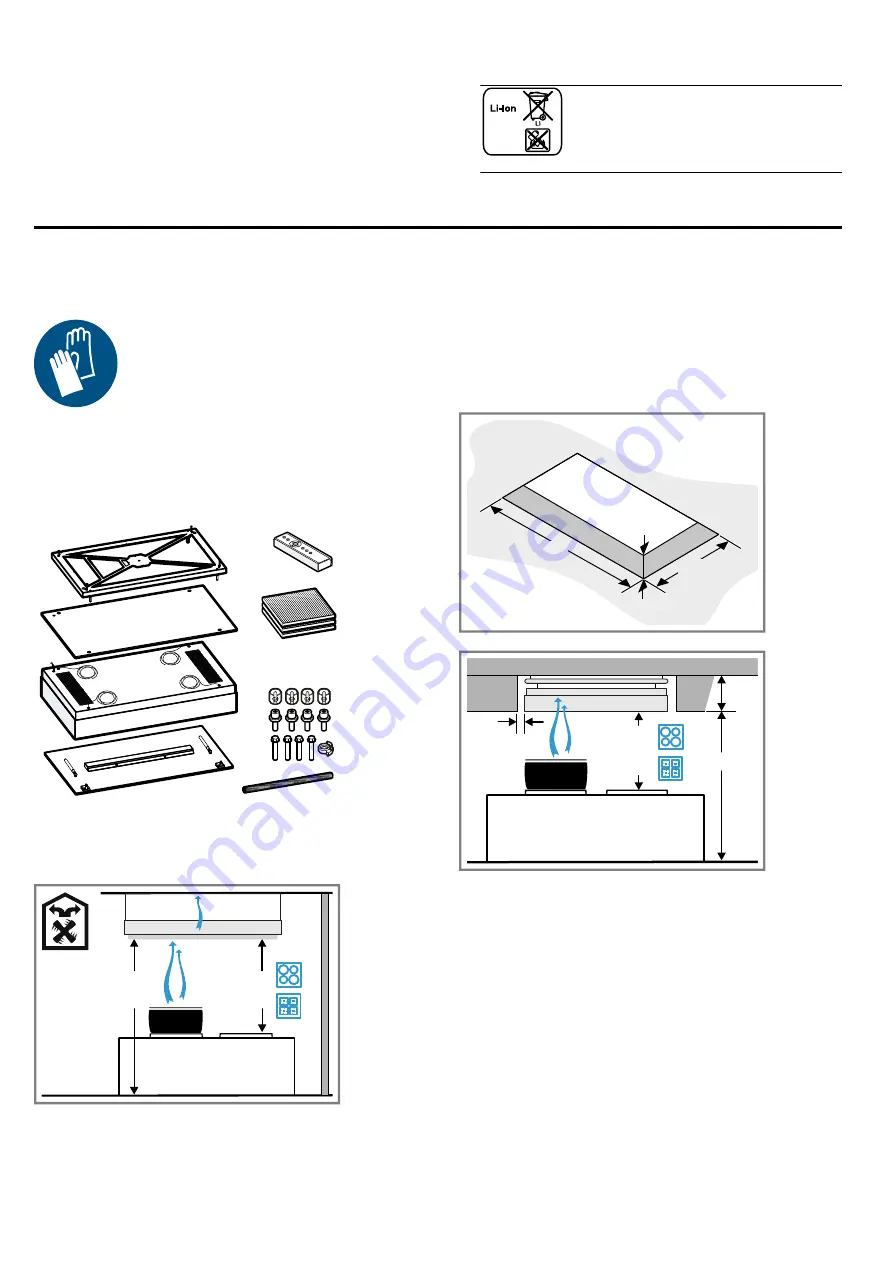
15.1 Contenuto della confezione

Dopo il disimballaggio controllare che tutti i componen-
ti siano presenti e che non presentino danni dovuti al
trasporto.

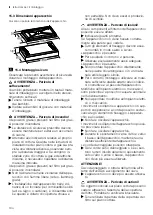
15.2 Distanze di sicurezza

Osservare le distanze di sicurezza dell'apparecchio.

min

700 mm

min

2000 mm

Montaggio a filo top

Nota: 

A seconda del comportamento di cottura, dall'ap-

parecchio può continuare a fuoriuscire umidità residua
anche al termine del funzionamento. Si consiglia di trat-
tare preventivamente il vano in cui alloggiata la cappa
con una vernice, in modo da evitare la formazione di
muffa.

253 mm

min

1100 mm

min
650 mm

min

25

mm

253

mm

min

2000

mm

min

700

mm

Содержание AC270101

Страница 1: ...uikershandleiding en installatie instructies 45 fr Manuel d utilisation et notice d installation 67 it Manuale utente e istruzioni d installazione 89 AC270101 Deckenl ftung Ceiling mounted ventilation...

Страница 2: ...stel lungsort verantwortlich Verwenden Sie das Ger t nur um Kochdunst abzusaugen im privaten Haushalt und in geschlossenen R umen des h uslichen Umfelds bis zu einer H he von 2000 m ber dem Meeresspie...

Страница 3: ...Ger t abgestellte Gegenst nde k n nen herabfallen Keine Gegenst nde auf das Ger t stellen Ver nderungen am elektrischen oder me chanischen Aufbau sind gef hrlich und k n nen zu Fehlfunktionen f hren...

Страница 4: ...falsch beanspruchen k nnen diese abbrechen Nicht an Designelementen ziehen Keine Gegenst nde auf Designelemente stellen oder an diese h ngen Auslaufende Batterien besch digen die Fernbedienung Die Ba...

Страница 5: ...der in den Raum zur ck gef hrt Um die Ger che im Umluftbetrieb zu binden m ssen Sie einen Geruchsfilter einbauen Die verschiedenen M glich keiten das Ger t im Umluftbetrieb zu betreiben entnehmen Sie...

Страница 6: ...nd Funktio nen 8 1 2 3 4 5 6 7 1 L fterstufe 1 S ttigungsanzeige Fettfilter 2 L fterstufe 2 S ttigungsanzeige Geruchsfilter 3 L fterstufe 3 4 Intensivstufe 1 5 Intensivstufe 2 6 Automatikbetrieb1 L ft...

Страница 7: ...r t aufw rts bis zur zu letzt gespeicherten Position zu bewegen f r ca 3 Sekunden gedr ckt halten um das Ge r t vollst ndig aufw rts zu bewegen 8 4 L fterstufe einstellen oder dr cken a In der LED Anz...

Страница 8: ...Anzeige die LED 2 leuchtet Um den Umluftbetrieb regenerierbarer Filter ein zustellen dr cken bis in der LED Anzeige die LED 3 leuchtet Um die elektronische Steuerung wieder auf Be trieb ohne Umluftfil...

Страница 9: ...uneh men Wird das Ger t nicht mit dem Heimnetzwerk verbun den funktioniert das Ger t wie ein Ger t ohne Netz werkanbindung und ist weiterhin ber die Fernbedie nung bedienbar Tipps Beachten Sie die mit...

Страница 10: ...Sie die Installation ber die Home Connect App starten wenn Sie in Ihrem lo kalen Netzwerk sind Nach erfolgreicher Installation werden Sie ber die Home Connect App informiert Hinweise W hrend des Downl...

Страница 11: ...eitshinweise der Ge brauchsanleitung Ihres Ger ts und stellen Sie sicher dass diese auch dann eingehalten werden wenn Sie das Ger t ber die kochfeldbasierte Haubensteuerung bedienen Tipp Die Bedienung...

Страница 12: ...it einem Schwammtuch und hei er Sp llauge rei nigen 3 Mit einem weichen Tuch nachtrocknen 11 4 Aluminium reinigen 1 Die Informationen zu den Reinigungsmitteln beach ten Reinigungsmittel Seite 12 2 Mit...

Страница 13: ...ellen dass die Verriegelungen der Filterab deckung einrasten 11 11 Geruchsfilter f r Umluftbetrieb Geruchsfilter erhalten Sie beim Kundendienst oder im Online Shop Verwenden Sie nur Original Geruchsfi...

Страница 14: ...ache und St rungsbehebung Ger t funktioniert nicht Netzstecker der Netzanschlussleitung ist nicht eingesteckt Schlie en Sie das Ger t am Stromnetz an Beleuchtung funktio niert nicht Unterschiedliche U...

Страница 15: ...erem Kundendienst Ihrem H ndler oder auf unse rer Webseite Wenn Sie den Kundendienst kontaktieren ben tigen Sie die Erzeugnisnummer E Nr und die Fertigungs nummer FD Ihres Ger ts Die Kontaktdaten des...

Страница 16: ...e Teile auf Trans portsch den und die Vollst ndigkeit der Lieferung 15 2 Sicherheitsabst nde Beachten Sie die Sicherheitsabst nde des Ger ts min 700 mm min 2000 mm Fl chenb ndiger Einbau Hinweis Je na...

Страница 17: ...die Gipskar tonplatten oder hnliche Leichtbaustoffe montiert werden F r die ordnungsgem e Montage ein aus reichend stabiles an die baulichen Gege benheiten und das Ger tegewicht ange passtes Material...

Страница 18: ...chten Empfohlene Deckenh he bis 3 50 m Das Ger t erfasst den Kochdunst mit zunehmendem Abstand zur Kochstelle schwerer F r eine optimale Leistung wird ein Abstand von maximal 1500 mm empfohlen Die Bre...

Страница 19: ...r Bohrungen keine Stromleitungen Gasrohre oder Wasserrohre befinden 4 Vier L cher mit einem Durchmesser von 6 mm f r die Befestigung bohren 5 Die Bohrlochtiefe entsprechend der Schraubenl nge bohren R...

Страница 20: ...ich nicht vollst ndig im Ge r t aufrollt Das ger teseitige Kabel durch die ffnung in der Rahmenabdeckung f deln und mit der beiliegenden Zugentlastung fixieren 7 Die Zugentlastung am ger teseitigen Ka...

Страница 21: ...shalter vom Ger t entfernen 22 Die Spannungsversorgung herstellen 23 Um die Referenzfahrt zu starten auf der Fernbedie nung die Taste dr cken Eine Referenzfahrt ermittelt die korrekte Ist Position anh...

Страница 22: ...hubtisch oder eine andere geeignete Vorrichtung unter dem Ger t positionieren Den Scherenhubtisch nicht auf das Kochfeld stellen 4 Den Scherenhubtisch so weit nach oben fahren bis die Seile des Ger ts...

Страница 23: ...en und die Seile herausziehen 15 Die Seile aus der Rahmenabdeckung f deln 16 ACHTUNG Ger teschaden durch aufgerolltes Kabel Das Kabel immer mit der Zugentlastung fest klemmen damit es sich nicht volls...

Страница 24: ...s The installer is responsible for en suring that the appliance works perfectly at its installation location Only use this appliance For extracting cooking vapour In private households and in enclosed...

Страница 25: ...ance may have sharp edges Carefully clean the appliance interior Items placed on the appliance may fall off Do not place any objects on the appliance Changes to the electrical or mechanical as sembly...

Страница 26: ...ing batteries may damage the remote control Remove the batteries if you are not using the re mote control Safely dispose of the empty or defective batteries in an environmentally friendly manner There...

Страница 27: ...conveyed back into the room To bind odours in circulating air mode you must install an odour filter The dif ferent options for operating the appli ance in circulating air mode can be found in our cat...

Страница 28: ...matic mode 1 fan run on time interval vent ilation 7 Home Connect 8 Infrared receiver 1 Depending on the appliance specifications 6 Accessories You can buy accessories from the after sales service fro...

Страница 29: ...run for a short time and then switches off automatically The fan run on removes remaining odours and is used to dry the odour filter after the cooking process a LED 1 for the fan setting lights up in...

Страница 30: ...of the ventilation Press Note Colour temperature settings are available in the Home Connect app provided the appliance has this function 8 17 Switching off the lighting Switch off the lighting with 8...

Страница 31: ...the process Requirements Wi Fi on the router is activated The appliance receives signals from the WLAN home network Wi Fi at its installation location The Home Connect app is installed on your mobile...

Страница 32: ...initial registration Unique appliance identification consisting of app liance codes as well as the MAC address of the Wi Fi communication module installed Security certificate of the Wi Fi communicati...

Страница 33: ...ore cleaning it ATTENTION Unsuitable cleaning products may damage the sur faces of the appliance Do not use harsh or abrasive detergents Do not use cleaning products with a high alcohol content Do not...

Страница 34: ...orn dirt You can obtain grease solvents from after sales service or the online shop 3 Use a brush to clean the grease filters 4 Rinse the grease filters thoroughly 5 Allow the grease filters to drain...

Страница 35: ...and troubleshooting The appliance is not working The mains plug of the power cord is not plugged in Connect the appliance to the power supply The lighting does not work Different causes are possible C...

Страница 36: ...r retailer or on our website If you contact Customer Service you will require the product number E Nr and the production number FD of your appliance The contact details for Customer Service can be fou...

Страница 37: ...ing all parts check for any damage in transit and completeness of the delivery 15 2 Safety clearances Comply with the safety clearances for the appliance min 700 mm min 2000 mm Flush installation Note...

Страница 38: ...ed directly onto plasterboard or similar lightweight ma terials To ensure correct installation you must use a material which is sufficiently stable and suitable for both the structural conditions and...

Страница 39: ...imally detect the cooking vapours install the appliance in the middle of the hob When securing cables ensure that the maximum di stance between the frame cover and the top edge of the appliance is 1 2...

Страница 40: ...of 6 mm for the fix ing 5 Drill the hole depth in accordance with the length of the screws Fitting the frame 1 Screw the two opposite screws into the ceiling until they protrude out of the ceiling by...

Страница 41: ...up Always secure the cable firmly using the strain relief so that it does not coil up fully in the appli ance Thread the cable on the appliance through the opening in the frame cover and use the strai...

Страница 42: ...the ends of the cable behind the frame cover 20 Securely tighten the frame cover with the lock nuts Do not use a tool to avoid damaging the frame cover 21 Remove the spacer from the appliance 22 Conne...

Страница 43: ...far as it will go 3 Place a scissor lift table or another suitable device under the appliance Do not place the scissor lift table on the hob 4 Move the scissor lift table up until the tension on the...

Страница 44: ...the cable tensioner and pull out the cables 15 Thread the cables out of the frame cover 16 ATTENTION There is a risk of damage to the appliance if the cable is coiled up Always secure the cable firml...

Страница 45: ...e installateur is verantwoordelijk voor een goede werking op de plaats van op stelling Gebruik het apparaat uitsluitend om kookdamp af te zuigen voor huishoudelijk gebruik en in gesloten ruimtes binne...

Страница 46: ...jke onderdelen heet De hete onderdelen nooit aanraken Zorg ervoor dat er geen kinderen in de buurt zijn Het apparaat wordt heet tijdens het gebruik Het apparaat voor het schoonmaken laten afkoelen WAA...

Страница 47: ...een natte doek rei nigen Verkeerde reiniging beschadigt de oppervlakken Reinigingsinstructies in acht nemen Geen scherpe of schurende reinigingsmiddelen ge bruiken Roestvrijstalen oppervlakken uitslu...

Страница 48: ...van het apparaat verhoogt Het kookdeksel erop plaatsen De kookdampen en de condens verminderen 4 Functies 4 1 Gebruik met circulatielucht De aangezogen lucht wordt door de vetfilters en een geurfilter...

Страница 49: ...6 7 1 Ventilatorstand 1 verzadigingsindicatie vetfilter 2 Ventilatorstand 2 verzadigingsindicatie geurfil ter 3 Ventilatiestand 3 4 Intensiefstand 1 5 Intensiefstand 2 6 Automatisch bedrijf1 ventilat...

Страница 50: ...t omhoog tot aan de laatst opgeslagen positie te bewegen gedurende ca 3 seconden ingedrukt houden om het apparaat volledig omhoog te bewegen 8 4 Ventilatorstand instellen of indrukken a In de led indi...

Страница 51: ...led 2 brandt Om de circulatiefunctie regenereerbare filter in te stellen indrukken tot op de led indicatie de led 3 brandt Om de elektronische besturing opnieuw op be drijf zonder circulatiefilter om...

Страница 52: ...araat niet verbonden met het thuisnet werk dan functioneert het apparaat als een apparaat zonder netwerkaansluiting dat nog steeds via de af standsbediening kan worden bediend Tips Neem de meegeleverd...

Страница 53: ...uw lokale netwerk bent Over een suc cesvol uitgevoerde installatie wordt u via de Ho me Connect app ge nformeerd Opmerkingen Tijdens de download kunt u uw apparaat gewoon blijven gebruiken Afhankelijk...

Страница 54: ...de gebruiksaanwijzing van uw apparaat in acht en zorg er voor dat deze ook in acht worden genomen als u het apparaat via de afzuigregeling van het kookveld be dient Tip De bediening van uw apparaat he...

Страница 55: ...ngsmiddelen Pagina 55 2 Met een vaatdoekje en warm zeepsop reinigen 3 Met een zachte doek nadrogen 11 4 Aluminium reinigen 1 De informatie over de reinigingsmiddelen in acht ne men Reinigingsmiddelen...

Страница 56: ...anteservice of in de online shop Gebruik alleen originele geurfilters Accessoires Pagina 49 Geurfilter vervangen Vereiste De vetfilters zijn gedemonteerd 1 De geurfilter verwijderen 2 De nieuwe geurfi...

Страница 57: ...tandsbediening werkt niet Batterijen zijn leeg Batterijen van de afstandsbediening vervangen Pagina 56 In de led indicatie knipperen na het uit schakelen van het apparaat de leds 1 tot 5 drie keer Bat...

Страница 58: ...pparaat daarvoor de vetfilter demonteren op de bovenkant van het apparaat Om uw apparaatgegevens en de servicedienst tele foonnummers snel terug te kunnen vinden kunt u de gegevens noteren 14 Afvoeren...

Страница 59: ...Hier vindt u de afmetingen van het apparaat 15 4 Veilige montage Neem bij het monteren van het apparaat de veiligheidsaanwijzingen in acht WAARSCHUWING Kans op verstikking Kinderen kunnen verpakkingsm...

Страница 60: ...en neergaande bewegingen van het apparaat voldoende afstand tot het appa raat houden Beschadigde kabels kunnen breken Bij beschadigde kabels of ongewone gelui den tijdens het omhoog of omlaag bewe gen...

Страница 61: ...ktrisch veilig te kunnen aansluiten dient u deze aanwijzingen in acht te nemen WAARSCHUWING Kans op elektrische schok Het apparaat moet op elk gewenst moment van de stroom kunnen worden afgesloten Het...

Страница 62: ...chroeven tot deze ca 7 mm uit het plafond uitsteken 900 mm 492 mm De juiste positie van de schroeven en van het frame in acht nemen 2 Het frame door de schroeven aan het plafond lei den 3 Het frame zo...

Страница 63: ...snoerontlasting bevestigen 7 De snoerontlasting aan de kabel aan apparaatzijde lossen en de kabel eruit trekken 8 De in de fabriek bevestigde snoerontlasting verwij deren De snoerontlasting bewaren 9...

Страница 64: ...oop te starten op de afstandsbe diening op de toets drukken Een referentieloop bepaalt de correcte werkelijke positie aan de hand van een referentieschakelaar a Het apparaat beweegt omhoog 24 Als het...

Страница 65: ...apparaat ontlast zijn Opmerkingen Het apparaat zo op de schaarheftafel positione ren dat het apparaat op het frame ligt Om de vetfilters niet te beschadigen het appa raat niet op de vetfilters leggen...

Страница 66: ...ijd met de trekontlasting vastklem men zodat deze zich niet volledig oprolt in het apparaat De kabel aan apparaatzijde door de opening in de frameafdekking halen en met de snoerontlasting be vestigen...

Страница 67: ...instructions de montage Le monteur est responsable du fonctionnement correct sur le lieu o l appareil est install Utilisez l appareil uniquement pour aspirer les vapeurs de cuisson pour un usage priv...

Страница 68: ...s fonctionner les grands br leurs de plus de 5 kW avec la plus grande flamme pendant plus de 15 minutes par ex un wok L appareil doit uniquement tre utilis avec des tables gaz d une puissance totale a...

Страница 69: ...dans le compartiment de nettoyage du lave vaisselle N utilisez jamais de nettoyants caustiques fortement alcalins ou acides Notamment n utilisez aucun produit de nettoyage d ori gine commerciale ou i...

Страница 70: ...on d nergie Utilisez uniquement la vitesse intensive en cas de besoin En cas de vapeurs de cuisson intensives s lection nez d s que possible une vitesse de ventilation plus importante Les odeurs se r...

Страница 71: ...e ventilation 1 indicateur de saturation du filtre graisse 2 Vitesse de ventilation 2 indicateur de saturation du filtre odeur 3 Vitesse de ventilation 3 4 Vitesse intensive 1 5 Vitesse intensive 2 6...

Страница 72: ...erni re position m moris e Appuyez sur pendant env 3 secondes pour d placer l appareil enti rement vers le haut 8 4 R gler la vitesse de ventilation Appuyez sur ou a La LED de la vitesse de ventilatio...

Страница 73: ...que la LED 2 s allume dans l affichage LED Pour r gler le mode de recirculation de l air filtre r g n rable appuyez sur jusqu ce que la LED 3 s allume dans l affichage LED Pour que la commande lectro...

Страница 74: ...t pas reli au r seau domestique il fonctionne comme un appareil sans connexion r seau et il peut encore tre utilis depuis la t l commande Conseils Pour ce faire veuillez consulter les documents Home C...

Страница 75: ...n t l chargement r us si vous pouvez galement d marrer l installation avec l appli Home Connect si vous tes dans votre r seau local Apr s une installation r ussie l appli Home Connect vous en informe...

Страница 76: ...z les consignes de s curit figu rant dans cette notice d utilisation de votre appareil et assurez vous qu elles sont respect es lorsque vous uti lisez l appareil via la commande de la hotte de cuisine...

Страница 77: ...ce apr s vente ou sur la boutique en ligne 11 3 Nettoyage des surfaces laqu es 1 Respectez les informations sur les produits de net toyage Produits de nettoyage Page 77 2 Nettoyez avec un tissu ponge...

Страница 78: ...sous le filtre graisse interceptez ce dernier 1 Ins rez le filtre graisse 2 Basculez les filtres graisse vers le haut puis encli quetez les verrous 3 Assurez vous que les verrous s encliquettent 4 Fer...

Страница 79: ...fonctionnements D faut Cause et d pannage L appareil ne fonc tionne pas La fiche secteur du cordon d alimentation secteur n est pas branch e Branchez l appareil au r seau lectrique L clairage ne fonc...

Страница 80: ...apr s vente vous avez besoin du num ro de produit E Nr et du num ro de fabrication FD de votre appareil Vous trouverez les donn es de contact du service apr s vente dans la liste ci jointe ou sur not...

Страница 81: ...u trans port et pour vous assurer de l int gralit de la livraison 15 2 Distances de s curit Respectez les distances de s curit de l appareil min 700 mm min 2000 mm Montage fleur de plan Remarque Selon...

Страница 82: ...personnes sont n cessaires pour d pla cer l appareil Utilisez exclusivement des moyens appro pri s L appareil est lourd L appareil ne doit pas tre directement mont dans les placopl tres ou autres ma...

Страница 83: ...blage fixe conform ment aux conditions de la cat gorie de surtension III et aux r glementations d installation Lors de l installation de l appareil veiller ce que le cordon d alimentation secteur ne s...

Страница 84: ...ntez pas l appareil directement dans les pla coplatres ou autres mati res l g res du plafond sur baiss 2 La profondeur des trous perc s doit correspondre la longueur des vis 3 Utilisez les vis fournie...

Страница 85: ...stance sur l appareil et placez le ca pot du cadre sur celui ci 5 Passez les c bles travers le capot du cadre 6 ATTENTION Dommages de l quipement dus au c ble enroul Serrez toujours le c ble l aide d...

Страница 86: ...lacez le dans la d charge de traction L N 17 Fermez le cache du c ble 18 Soulevez doucement le capot du cadre 19 Placez les extr mit s du c ble derri re le capot du cadre 20 Vissez la main le capot du...

Страница 87: ...e capot du filtre vers le haut puis enclen chez le D monter l appareil AVERTISSEMENT Risque de blessure Des pi ces l int rieur de l appareil peuvent pr senter des ar tes vives Portez des gants de prot...

Страница 88: ...l appareil avec la d charge de traction de mani re ce qu il ne s en roule pas 12 D branchez le c ble de la borne de raccordement et retirez le tuyau de protection L N 13 Desserrez les quatre pinces de...

Страница 89: ...ca riportate nelle istruzioni di montaggio L installatore responsabile del corretto fun zionamento nel luogo di installazione Utilizzare l apparecchio soltanto per aspirare il vapore di cottura in cas...

Страница 90: ...re grande Non utilizzare mai un bruciatore grande con pi di 5 kW con la fiamma al massimo per oltre 15 minuti ad es wok L apparecchio deve essere combinato solo con piani di cottura a gas con una pot...

Страница 91: ...ella vasca di lavaggio della lavastoviglie possono provocare esplosioni Non utilizzare mai detersivi alcalini altamen te corrosivi o a elevato contenuto di acidi In particolare non utilizzare mai dete...

Страница 92: ...se necessario In caso di vapori di cottura intensi selezionare tempe stivamente un livello di aspirazione pi elevato Gli odori si distribuiscono minormente nell ambien te Spegnere l apparecchio quando...

Страница 93: ...5 6 7 1 Livello ventola 1 indicatore di saturazione filtro grassi 2 Livello ventola 2 indicatore di saturazione filtro antiodore 3 Livello ventola 3 4 Modalit intensivo 1 5 Modalit intensivo 2 6 Funz...

Страница 94: ...hio si sposta verso l alto Nota Preme brevemente per spostare l apparecchio verso l alto fino all ultima posizione memorizzata Tenere premuto per ca 3 secondi per spostare completamente verso l alto l...

Страница 95: ...emorizzata si sente un segnale acustico 8 14 Impostazione dell indicazione di saturazione L indicazione di saturazione deve essere impostata in base al filtro utilizzato Requisito L apparecchio spento...

Страница 96: ...w home connect com Per poter utilizzare Home Connect stabilire innanzitutto il collegamento alla rete domestica WLAN Wi Fi1 e all app Home Connect Collegamento automatico dell apparecchio con la rete...

Страница 97: ...zazione eliminazione di guasti aggiornamenti ri levanti per la sicurezza essenziale essere registrati come utenti di Ho me Connect che l app sia installata sul proprio disposi tivo mobile e che sia st...

Страница 98: ...pp Home Connect Seguire le istruzioni fornite nell app Collegamento diretto degli apparecchi tra loro Collegamento degli apparecchi tramite la rete do mestica WLAN Nota Osservare le avvertenze di sicu...

Страница 99: ...anno di spugna 3 Asciugare con un panno morbido 11 4 Pulizia dell alluminio 1 Osservare le informazioni relative ai prodotti per la pulizia Detergenti Pagina 99 2 Pulire utilizzando un panno morbido e...

Страница 100: ...rtura filtro 5 Accertarsi che i bloccaggi della copertura filtro si in nestino in posizione 11 11 Filtro antiodore per funzionamento a ricircolo d aria I filtri antiodore sono disponibili presso il se...

Страница 101: ...l apparecchio dan neggiato deve essere sostituito da personale tecni co appositamente formato 12 1 Anomalie di funzionamento Anomalia Causa e ricerca guasti L apparecchio non funziona La spina non ins...

Страница 102: ...garanzia in ciascun Paese sono re peribili presso il nostro servizio di assistenza clienti presso il proprio rivenditore o sul nostro sito Internet Quando si contatta il servizio di assistenza clienti...

Страница 103: ...vare queste informazioni durante il montaggio dell apparecchio 15 1 Contenuto della confezione Dopo il disimballaggio controllare che tutti i componen ti siano presenti e che non presentino danni dovu...

Страница 104: ...ndossare guanti protettivi Se l apparecchio non viene fissato corretta mente alla parete pu cadere Tutti gli elementi di fissaggio devono esse re montati in modo saldo e sicuro L apparecchio pesante P...

Страница 105: ...ai l apparecchio da un commutatore esterno ad es un timer ester no o un telecomando Se l apparecchio incassato la spina del cavo di alimentazione deve essere libera mente accessibile Qualora non fosse...

Страница 106: ...enza ostacoli duran te la manutenzione scegliere un luogo di installazio ne facilmente accessibile Le superfici dell apparecchio sono delicate Evitare danneggiamenti durante il montaggio 15 8 Montaggi...

Страница 107: ...tto L N 3 Infilare 4 corde nei dadi di sicurezza Non inserire i dadi di sicurezza nelle aperture per non danneggiare l interruttore di finecorsa dell appa recchio 4 Per proteggere l apparecchio dai gr...

Страница 108: ...apparecchio a causa dello srotolamento del cavo Fissare il cavo sempre con il dispositivo di anco raggio in modo tale che non si srotoli completa mente nell apparecchio Infilare il cavo dal lato dell...

Страница 109: ...il filtro antiodore nella posizione corretta 10 Inserire il filtro grassi Non piegare il filtro grassi per evitare di danneggiar lo 11 Sollevare la copertura del filtro e innestare la chiusu ra Smonta...

Страница 110: ...il dispo sitivo di ancoraggio in modo tale che non si srotoli 12 Staccare il cavo sul lato di montaggio dal morsetto e rimuovere il tubo flessibile di protezione L N 13 Allentare i 4 bloccanti 14 Apr...

Страница 111: ......
Страница 112: ...1739 M nchen GERMANY www gaggenau com 9001522262 9001522262 de en nl fr it 010610 Valid within Great Britain Imported to Great Britain by BSH Home Appliances Ltd Grand Union House Old Wolverton Road W...

Отзывы: