background image

BDA INSTALLATION 


DO NOT APPLY A.C. POWER TO THE BDA UNTIL CABLES ARE 
CONNECTED TO BOTH PORTS OF THE BDA AND THE ANTENNAS. 


1. Mount the BDA on the wall with the RF connectors pointing DOWN. Using 
appropriate screws and anchors, attach the BDA to the wall at the four mounting 
holes on the side flanges. 


2. Ensure that the isolation between the donor antenna and the service antenna is at 
least 12 dB greater than the BDA gain. 

(Use the higher of the Uplink and Downlink 

gains reported on the BDA test data sheet). 


3. Connect the cable from the donor antenna to the BDA connector labeled “BASE” 
and the cable from the service antennas to the BDA connector labeled “MOBILE”. 
 
 
4. Open the adjustment access panels on the sides of the BDA and verify that both of 
the attenuator’s are positioned to its maximum setting (30 dB). Close the panels. 
 
 
5.  Connect the AC power cord to the BDA and then to the power source. Verify that 
the “Power ON” lamp is illuminated.  
 
 
Installation of the BDA is now complete. To adjust the gain controls to suit the 
specific signal environment, refer to the next section of the manual. 
 

Note: For repeat installations of existing equipment, make sure the attenuation 
is positioned to its maximum setting (30 dB). After verification of the 
attenuation, follow the above steps starting with step 1. 


Page 8 

Содержание BDA-PS7-2W-80-A

Страница 1: ...INSTALLATION AND OPERATING MANUAL BDA PS7 PS8 2 10W 80 A DUAL BAND BI DIRECTIONAL AMPLIFIER ...

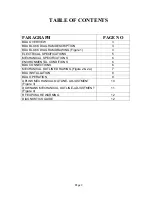
Страница 2: ...CTRICAL SPECIFICATIONS 5 MECHANICAL SPECIFICATIONS 6 ENVIRONMENTAL CONDITIONS 6 BDA CONNECTIONS 6 MECHANICAL OUTLINE DRAWING Figure 2 2a 7 BDA INSTALLATION 8 BDA OPERATION 9 UPLINK MECHANICAL OUTLINE ADJUSTMENT Figure 3 10 DOWNLINK MECHANICAL OUTLINE ADJUSTMENT Figure 4 11 RF EXPOSURE WARNING 12 DIAGNOSTICS GUIDE 12 Page 2 ...

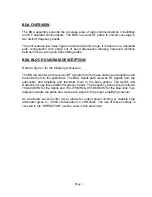
Страница 3: ...nlink path receives RF signals from the base station and amplifies and transmits them to the subscriber The BDA Uplink path receives RF signals from the subscriber and amplifies and transmits them to the base station The Uplink and Downlink occupy three distinct frequency bands The frequency bands are as follows 794 824 MHz for the Uplink and 764 776 MHz 851 869 MHz for the Downlink Two triplexers...

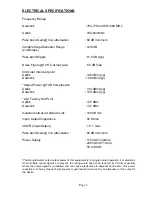
Страница 4: ...k 32 dBm Isolation between Up Down Link 100 dB min Input Output Impedance 50 Ohms VSWR Input Output 1 5 1 max Pass band Gain min attenuation 80 dB minimum Power Supply 110VAC 1 42Amp 240VAC 0 71 Amp 50 to 60 Hz The Manufacturer s rated output power of this equipment is for single carrier operation For situations when multiple carrier signals are present the rating would have to be reduced by 3 5 d...

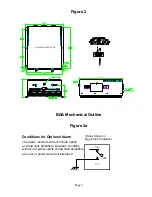
Страница 5: ... connector provides failure alarm output contacts see diagram next page as well as an optional 12 VDC 250mA auxiliary output The RF connections are made via two type N female connectors The RF connector labeled BASE must be connected to the antenna pointing towards the base station The RF connection labeled MOBILE must be connected to the antenna facing the area to be covered by the BDA The RF con...

Страница 6: ...Shown in Non Alarm Condition The alarm monitors current of both uplink and downlink amplifiers An alarm condition will occur if either uplink or downlink amplifiers are over or under its current tolerance Page 7 Conditions for Optional Alarm IN BUILDING REPEATER ...

Страница 7: ...a to the BDA connector labeled BASE and the cable from the service antennas to the BDA connector labeled MOBILE 4 Open the adjustment access panels on the sides of the BDA and verify that both of the attenuator s are positioned to its maximum setting 30 dB Close the panels 5 Connect the AC power cord to the BDA and then to the power source Verify that the Power ON lamp is illuminated Installation ...

Страница 8: ...equires no periodic maintenance There are no user serviceable components inside the BDA This section covers possible problems that may be related to the installation or operating environment a Gain Reduction Possible causes Bad RF cables and RF connections to antennas damaged antennas b Excessive Intermodulation or Spurious Possible causes Amplifier oscillation caused by insufficient isolation The...

Отзывы: