1
G-TEL WP500 Weatherproof Phone Instructions
INSTALLATION (
Mounting Diagram on Page 2 / reverse side)
1.
Ensure the telephone wire is routed to the location of where
the phone is to be installed. It is recommended that the
telephone wire be protected with ½” EMT conduit. The
phone provides a top or bottom entry point for ½” EMT
conduit connectors.
2.
Open the front door of phone.
3.
Using a Phillips-head driver, unscrew each of the 10 Phillips-
head fasteners from the main apparatus of the phone.
4.
Pull apart and set aside the main apparatus from the phone
housing.
5.
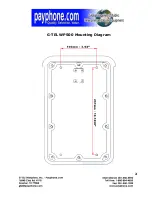
Position the rear of the phone housing at the desired installation location of the wall and
trace each of the four mounting holes onto the wall. Remove the phone housing and drill
four holes at the traced mounting points.
6.
Anchor the phone housing to the drilled holes in the wall using appropriate mounting
hardware (not supplied).
7.
The telephone wire can then be fed into the phone via the top or bottom conduit entry
points.
8.
Connect the proper active pair of telephone wire that originates from the Telco interface
or PBX to the two terminal screws located at the rear of the main apparatus. Take the
handset off-hook to ensure dial tone is present.
9.
Place the main apparatus back onto the rear of the phone housing and secure it with the
10 Phillips-head fasteners or optional Tamper-Resistant security fasteners (sold
separately).
PROGRAMMING SPEED DIAL NUMBERS
1.
Take the handset off-hook and check for dial tone.
2.
Press the STORE key.
3.
Enter the 1
st
speed dial number you wish to store exactly as it would normally be dialed
from this line / location (maximum length of each stored number is 16 digits).
4.
Press the STORE key again, and then press any key 0~9 you wish to associate with the
1
st
speed dial number.
5.
Repeat steps 2 thru 4 to program additional speed dial numbers. Ensure that you assign
different, unused 0~9 keys to each new speed dial number being programmed.
ACCESSING SPEED DIAL NUMBERS
1.
Take the handset off-hook and check for dial tone.
2.
Press the PICK key.
3.
Press any key 0~9 which is associated to the speed dial number being accessed.
Содержание WP500
Страница 2: ...2 G TEL WP500 Mounting Diagram ...


