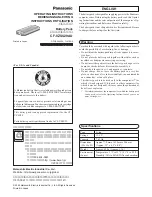
• Mains Power
110~240V AC 50/60Hz 0.7A
DC Power
12~14V DC 6A
•
Output:
Ni-MH Batteries
4~8 Cells (4.8~9.6V)
(8 cells mains only)
•
Charge Rates
0.5A, 1.0A, 2.0A, 3.5A & 5.0A
•
Charge Termination
Delta Peak Voltage Detection
•
Included Charge Leads: Tamiya/Molex Charge Lead
TRX Charge Lead
T Type Charge Lead
Rx Charge Lead
NX86
NiCd/NiMH DELTA PEAK AC/DC CHARGER
OPERATING INSTRUCTIONS
www.
l
ogic
rc
.com
Logic RC Ltd, 12-18 Hartham Lane, Hertford, SG14 1QN, UK
1.
Connect a suitable battery charge lead to the charger by clamping the bare ends of the charge lead into the charger
output, ensuring the correct polarity.
2.
Connect either the mains or 12V input power lead into the relevant socket on the back of the charger and connect this
power lead to the appropriate power source.
3.
Select the correct charge rate for the battery pack being charged.
4.
Connect the battery to be charged to the output. When connected, the Red ‘Charging’ LED will glow to indicate fast
charging.
5.
When the battery is fully charged, the peak circuitry will terminate the fast charge and the Green ‘Finished’ LED will
glow to indicate that the battery is now fully charged.
The approximate charging time for a fully discharged pack can be calculated by:-
Time (hours) = Battery Capacity (mAh) / Charge Rate (mA) x 1.2
•
DO NOT charge packs that cannot accept fast charging at the selected rate.
•
ALWAYS monitor the battery pack being charged and disconnect from the charger if the pack becomes excessively
hot.
•
NEVER leave the charger unattended whilst charging.
•
DO NOT fast charge batteries immediately after use while they are still warm. Allow to cool to ambient temperature
before charging.
•
This charger should only be used to charge NiCd or NiMH batteries.
•
DO NOT charge non-rechargeable or Lithium batteries using this charger.
•
This appliance can be used by children aged from 8 years and above and persons with reduced physical, sensory or
mental capabilities or lack of experience and knowledge if they have been given supervision or instruction concerning
the use of the appliance in a safe way and understand the hazards involved. Children shall not play with the appliance.
Cleaning and user maintenance shall not be made by children without supervision.
SAFETY PRECAUTIONS
CHARGING YOUR BATTERY
English
SPECIFICATIONS


