background image

TX150 S5

Operating Manual

9

Introduction

Features

Onboard SAS controller with Integrated Mirroring Enhanced functionality

An eight-channel SAS controller with “Integrated Mirroring Enhanced” (IME) 
functionality is provided to operate the four hard drives. IME also provides RAID 
functionality for configuration of the internal hard drives (RAID level 1, 1E). 

I

A separate utility is available to the controller for IME configuration. For 
further information, refer to the “Integrated RAID for SAS User’s Guide” 
on the 

ServerBooks

 CD (select “Controllers” from the menu).

The RAID functionality can optionally be expanded with a corresponding PCI 
expansion module (zero-channel RAID controller). In addition to RAID levels 0, 
1 and 10, this controller also offers the option of configuring RAID-5 or RAID-50. 
The ZCR controller uses the Onboard SAS controller using logic that is specially 
integrated on the system board.

Onboard SATA controller

A four-channel SATA controller is integrated on the system board; up to four 
SATA hard disk drives can be connected to the controller. The LSI SATA RAID 
software supports RAID levels 0, 1 and 10.

I

The controller has its own configuration utility. More detailed information 
may be found in the “LSI SATA Software RAID User’s Guide” manual (on 
the 

ServerBooks

 CD under “Controller”).

An eight-channel PCI SATA RAID controller can optionally be used for 
increased data security and availability of the SATA server variant. The PCI 
SATA RAID controller supports RAID Level 5.

I

The controller has its own configuration utility. More detailed information 
may be found in the “LSI Logic MegaRAID SAS Software User’s Guide” 
manual (on the 

ServerBooks

 CD under “Controller”).

Содержание PRIMERGY TX150 S5

Страница 1: ...PRIMERGY TX150 S5 Server Operating Manual Edition august 2006 ...

Страница 2: ...according to DIN EN ISO 9001 2000 To ensure a consistently high quality standard and user friendliness this documentation was created to meet the regulations of a quality management system which complies with the requirements of the standard DIN EN ISO 9001 2000 cognitas Gesellschaft für Technik Dokumentation mbH www cognitas de Copyright and Trademarks Copyright 2006 Fujitsu Siemens Computers Gmb...

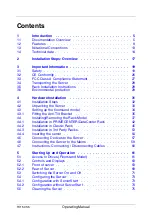
Страница 3: ...4 3 1 Fitting the Anti Tilt Bracket 35 4 4 Installing Removing the Rack Model 37 4 4 1 Installation in PRIMECENTER DataCenter Rack 42 4 4 2 Installation in Classic Rack 45 4 4 3 Installation in 3rd Party Racks 53 4 4 4 Inserting the server 54 4 5 Connecting Devices to the Server 57 4 6 Connecting the Server to the Mains 58 4 7 Instructions Connecting Disconnecting Cables 60 5 Starting Up and Opera...

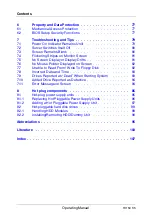
Страница 4: ... 6 No Mouse Pointer Displayed on Screen 82 7 7 Unable to Read From Write To Floppy Disk 82 7 8 Incorrect Date and Time 83 7 9 Drives Reported as Dead When Starting System 83 7 10 Added Drive Reported as Defective 84 7 11 Error Message on Screen 84 8 Hot plug components 85 8 1 Hot plug power supply units 85 8 1 1 Replacing Hot Pluggable Power Supply Units 86 8 1 2 Adding a Hot Pluggable Power Suppl...

Страница 5: ...utomatic Server Reconfiguration and Restart ASR R Security functions in the BIOS Setup and on the system board protect the data on the server against manipulation Additional security is provided by the lockable drive cover on the floorstand model and the lockable rack door on the rack model The rack model occupies 5 height units in the rack 1 1 Documentation Overview I PRIMERGY manuals are availab...

Страница 6: ...DF file available on the ServerBooks CD Safety notes and other important information manual print version delivered together with the system PDF file available on the ServerBooks CD Ergonomics manual PDF file available on the ServerBooks CD Returning used devices manual PDF file available on the ServerBooks CD Helpdesk leaflet with worldwide helpdesk telephone numbers Technical Manual for the D239...

Страница 7: ...ID User Manual PDF file available on the ServerBooks CD Global Array Manager Client Software User s Guide PDF file available on the ServerBooks CD Global Array Manager Server Software User s Guide PDF file available on the ServerBooks CD Integrated Mirroring User s Guide PDF file available on the ServerBooks CD Further sources of information Technical Manual for the relevant rack Manual for the mo...

Страница 8: ...rface This allows hard disk drive modules to be easily plugged in or pulled out SATA server variant The server has a drive bay in which up to four SATA disk drive modules can be installed Each hard disk drive module HDD module can accommodate a SATA hard disk drive with a maximum height of 1 inch The module is connected to the SATA backplane without cables via the SATA interface This allows hard d...

Страница 9: ... offers the option of configuring RAID 5 or RAID 50 The ZCR controller uses the Onboard SAS controller using logic that is specially integrated on the system board Onboard SATA controller A four channel SATA controller is integrated on the system board up to four SATA hard disk drives can be connected to the controller The LSI SATA RAID software supports RAID levels 0 1 and 10 I The controller has...

Страница 10: ...at the operation can continue with no interruptions The defective power supply unit can be replaced during operation hot plugging Both power supply unit versions automatically adjust to a mains voltage in the range 100 V 240 V High level of availability and data security When memory data is accessed 1 bit errors in the main memory are identified and automatically corrected with the ECC Error Corre...

Страница 11: ...protected by HTTPS SSL 128 bit Remote Storage via USB Remote power on Wake On LAN Intrusion detection Temperature monitoring of the CPU and the surrounding area Watchdog timer for Automatic Server Reconfiguration and Restart ASR R in the event of failure of memory modules or processors Power monitoring End of life monitoring of fans with prompt notification before failure Watchdog timer for operat...

Страница 12: ...ntegrated on the system board allow remote monitoring and maintenance as well as fast restoration of operability in the event of errors Remote monitoring and maintenance avoids time consuming and costly on site repairs and reduces service costs This leads to a reduction in the total cost of ownership and an excellent return on investment for the remote management solution The administrator can acc...

Страница 13: ...or software programs quotation marks indicate names of chapters and terms that need to be emphasized Ê indicates activities that must be performed in the order given V ATTENTION indicates that if you ignore the information given at this point your health the correct functioning of your system or the security of your data may be at risk I indicates supplementary information remarks and tips ...

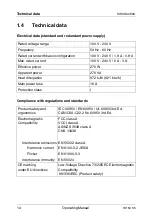
Страница 14: ... power 270 W Apparent power 276 VA Heat dissipation 972 kJ h 921 btu h Main power fuse 16 A Protection class I Product safety and ergonomics IEC 60950 EN 60950 UL 60950 3rd Ed CAN CSA C22 2 No 60950 3rd Ed Electromagnetic Compatibility FCC class A VCCI class A AS NZS 3548 class A CNS 13438 Interference emissions EN 55022 class A Harmonic current EN 6100 3 2 JEIDA Flicker EN 61000 3 3 Interference ...

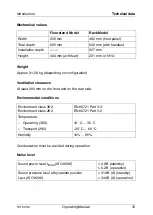
Страница 15: ...evel Floorstand Model Rack Model Width 205 mm 482 mm front panel Total depth 605 mm 642 mm with handles Installation depth 607 mm Height 444 mm with feet 221 mm or 5 HU Environment class 3K2 Environment class 2K2 EN 60721 Part 3 3 EN 60721 Part 3 2 Temperature Operating 3K2 Transport 2K2 10 C 35 C 25 C 60 C Humidity 10 85 Sound power level LWAd ISO 9296 4 8 B standby 5 2 B operation Sound pressure...

Страница 16: ......

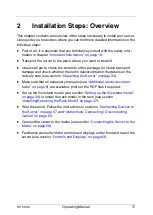
Страница 17: ...ils on the delivery note see section Unpacking the Server on page 33 Ê Make sure that all necessary manuals see Additional server documen tation on page 6 are available print out the PDF files if required Ê Set up the floorstand model see section Setting up the floorstand model on page 34 or install the rack model in the rack see section Installing Removing the Rack Model on page 37 Ê Wire the ser...

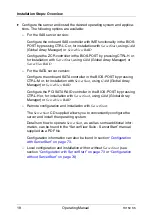
Страница 18: ...L M or for installation with ServerStart using GAM Global Array Manager or ServerView RAID Configure the PCI SATA RAID controller in the BIOS POST by pressing CTRL H or for installation with ServerStart using GAM Global Array Manager or ServerView RAID Remote configuration and installation with ServerStart The ServerStart CD supplied allows you to conveniently configure the server and install the ...

Страница 19: ...u can install the server in the intended surroundings contact your sales outlet or our customer service team V CAUTION The activities described in these instructions may only be performed by specialist technical personnel Repairs to the server may only be carried out by authorized specialist personnel Any unauthorized openings and improper repairs could expose the user to risks electric shock ener...

Страница 20: ...on V CAUTION If the rack model is integrated into an installation that draws power from an industrial power supply network with an IEC309 connector the power supply s fuse protection must comply with the requirements for non industrial power supply networks for the type A connector The device automatically adjusts itself to a mains voltage between 100 V und 240 V Ensure that the local mains voltag...

Страница 21: ...that they do not create a potential hazard make sure no one can trip over them and that they cannot be damaged When connecting the server refer to the relevant instructions in this manual Never connect or disconnect data transmission lines during a storm risk of lightning strike Make sure that no objects e g jewelery paperclips etc or liquids can get inside the server risk of electric shock short ...

Страница 22: ...llation can be obtained from our customer service center or your sales outlet The components marked with a warning notice e g lightning symbol may only be opened removed or exchanged by authorized qualified personnel Exception Hot pluggable power supply units can be replaced The warranty is void if the server is damaged during installation or replacement of system expansions Only set screen resolu...

Страница 23: ...must be disposed of in accordance with local regulations concerning special waste The battery must be disposed of in accordance with local regulations concerning special waste Replace the lithium battery on the system board in accordance with the instructions in the technical manual for the system board see Literature on page 103 All batteries containing pollutants are marked with a symbol a cross...

Страница 24: ...es sharp CD DVD fragments can pierce the cover of the CD DVD drive equipment damage and can fly out of the device danger of injury particularly to uncovered body parts such as the face or neck I You can prevent mechanical damage and damage to the CD DVD drive as well as premature CD DVD wear by observing the following sugges tions Only insert CDs DVDs in the drive when needed and remove them after...

Страница 25: ...always discharge static build up e g by touching a grounded object before working with such components Any devices or tools that are used must be free of electrostatic charge Wear a suitable grounding cable that connects you to the external chassis of the system unit Always hold components with ESDs at the edges or at the points marked green touch points Do not touch any connectors or conduction p...

Страница 26: ...manual and the other documentation such as the Technical Manual CD close to the device All documentation must be included if the equipment is passed on to a third party 3 2 CE Conformity The system complies with the requirements of the EC directives 89 336 EEC regarding Electromagnetic Compatibility and 73 23 EEC Low Voltage Directive This is indicated by the CE marking CE Communauté Européenne ...

Страница 27: ...t inter ference will not occur in a particular installation If this equipment does cause harmful interference to radio or television reception which can be determined by turning the equipment off and on the user is encouraged to try to correct the interference by one or more of the following measures Reorient or relocate the receiving antenna Increase the separation between equipment and the recei...

Страница 28: ...connecting cables observe the relevant instructions in the Important Information chapter of the technical manual for the corresponding rack The technical manual is supplied with the corresponding rack When installing the rack make sure that the anti tilt mechanism is correctly fitted For safety reasons no more than one unit may be removed from the rack at any one time during installation and maint...

Страница 29: ...il they are needed as well as during long breaks and after completion of work Packaging information Do not throw away the packaging You may need it later for transporting the system If possible the equipment should only be transported in its original packaging Information on handling consumables Please dispose of printer consumables and batteries in accordance with the applicable national regulati...

Страница 30: ...tsu Siemens Computers branch or from our recycling center in Paderborn Fujitsu Siemens Computers Recycling Center D 33106 Paderborn Tel 49 5251 8 18010 Fax 49 5251 8 18015 The device must not be disposed of with domestic waste This device is labeled in compliance with European directive 2002 96 EC on waste electrical and electronic equipment WEEE This directive sets the framework for returning and...

Страница 31: ...treme environmental conditions see section Technical data on page 14 Protect it from dust humidity and heat The server must be given time to acclimatize to its operating environment acclimatization time before commencing operation Temperature difference C operating environment outside Minimum acclimatization time hours 5 3 10 5 15 7 20 8 25 9 30 10 Table 1 Acclimatization time ...

Страница 32: ...del see section Setting up the floorstand model on page 34 or installing the rack model in the rack in accordance with the layout arrangement created by the system architect on the order lists see section Installing Removing the Rack Model on page 37 Ê Wiring the server Follow the instructions in the Technical Manual for the relevant rack section Connecting Devices to the Server on page 57 and sec...

Страница 33: ...ld retain the original server packaging in case further transportation is necessary Ê Unpack all individual parts For the floorstand model the hard drive cover is packaged in a separate box Ê Check the delivery for any damage during transport Ê Check whether the items delivered match the details on the delivery note The rating plate can be found towards the top of the server Notify your supplier i...

Страница 34: ...s must be adhered to The server must be accessible at the rear for connection to other devices e g memory subsystem The mains plug must be accessible easily and safely There must be a clearance of at least 200 mm in front of and behind the server to ensure adequate ventilation of the subsystem Ê The HDD modules are provided with a transport lock 1 Remove this before starting up the server figure 2...

Страница 35: ...ket I For safety reasons risk of tipping the anti tilt bracket must be fitted on the rear of the server on floorstand models with hot plug power supply units Figure 3 Fitting the Anti Tilt Bracket Ê Position the server on the anti tilt bracket in such a way that the rubber feet fit into the openings in the bracket 1 ...

Страница 36: ...36 Operating Manual TX150 S5 Setting up the floorstand model Hardware Installation Figure 4 Securing the anti tilt bracket Ê Secure the anti tilt bracket using the two knurled screws 1 ...

Страница 37: ...d Rack requirements The Fujitsu Siemens Computers GmbH PRIMECENTER Rack DataCenter Rack and 19 Classic Rack provide full support for installation of the PRIMERGY server system Installation in most current rack systems from other manufacturers 3rd party racks is also supported To accommodate the ventilation concept and ensure proper ventilation any unused areas in the rack must be sealed using dumm...

Страница 38: ... to ensure that they can be adjusted to different rack depths Enhanced cable management in the lateral rack area 19 Classic Rack Direct laterally bolted telescopic rails Cable management using an articulated cable carrier Installation of the telescopic rails in the different racks is described in the next sections Installation of the cable management is described in detail in the Technical Manual ...

Страница 39: ...Rack depth comparison PRIMECENTER Rack 940 1000 mm B Rack width comparison PRIMECENTER Rack 700 mm C Clearance for 19 installation level C1 Front 19 installation level C2 Rear 19 installation level D Cable routing area cable area depth and ventilation E Space for front panel and ventilation F Space for right and left support systems P PRIMERGY rack installation depth a1 Front left support upright ...

Страница 40: ...feature to ensure that they can be adjusted to different rack depths No support for cable management system included in installation kit Climatic conditions To ventilate the server an unimpeded air inlet on the front of the rack and an air outlet on the rear of the rack are required In principle the ventilation concept is based on the necessary cooling being provided by the horizontal self ventila...

Страница 41: ...TX150 S5 Operating Manual 41 Hardware Installation Installing Removing the Rack Model Figure 5 Mechanical requirements ...

Страница 42: ...nformation about rack installation can be found in the Technical Manual for the corresponding rack see Literature on page 103 Figure 6 Preparing the rails Ê Slightly pull apart 1 the telescopic rails a Ê As shown 2 secure one end of the telescopic rail to the variable rail Ê Pull the telescopic rails further apart 3 until the second fixing hole is visible in an oval opening in the telescopic rail ...

Страница 43: ...tter orientation the height units are marked on the support uprights PRIMECENTER Rack only Figure 7 Fitting the support bracket Ê Place the support bracket at the appropriate height on the left rear support upright by inserting the positioning nub n in the corresponding hole of the support upright Ê Secure the bracket with two screws inc plug washers No nuts are required to secure the telescopic r...

Страница 44: ...n the front support upright and releasing them again The rail automatically adjusts to the rack depth Ê Secure the rail on the support upright a and the support bracket b with two M5x10 screws inc plug washers in each case Ê Repeat the above steps with the right hand rail it is secured to the front and rear right support upright Ê Fit the PRIMECENTER DataCenter Rack cable management system artic u...

Страница 45: ...reparing the rails Ê As shown in the Figure place the telescopic rail 1 on the carrier rail b Ê Slightly pull apart 1 the telescopic rails a until the first fixing hole lower row of holes is visible in the first oval opening on the telescopic rail and screw the two rails together 2 Ê Push the telescopic rails a slightly together until the left hand end of the second oval opening lower row of holes...

Страница 46: ...the spring nuts for fixing the rails in the groove on the support upright at the marked fixing points Ê Adjust the position of the nuts in the groove until they engage at the correct position Figure 10 Suspending the rail in the Classic Rack There is a small positioning hook a at each end of the carrier rails Ê Use these hooks to suspend one of the prepared rails in the holes on the support uprigh...

Страница 47: ...lied Allen key no 5 secure the rails to the left and right support uprights in the rack with two M5 screws each Note that the guide nubs on the telescopic rails must fit into the holes in the support uprights next to the spring nuts Ê Repeat this procedure for the second telescopic rail Ê Insert the server see section Inserting the server on page 54 ...

Страница 48: ...k the articulated cable guide is only secured to the support upright not to the server Ê To secure the articulated cable guide place two spring nuts in the groove in the rear right support upright The installation height must correspond to the height of the connecting cables on the server Figure 12 Fitting the articulated cable guide Ê Secure the articulated cable guide to the rear right support u...

Страница 49: ... the Figure and secure them to the articulated cable guide with cable ties 1 V CAUTION To prevent damage to fiber channel fiber optic cables they must be encased in a protective hose see Routing the fiber channel fiber optic cable on page 51 Securing the cables to the articulated cable guide ensures that the articulated cable guide extends accordingly when removing the server ...

Страница 50: ...0 S5 Installing Removing the Rack Model Hardware Installation This allows the server to be removed later without making any further prepara tions see Figure 14 on page 50 Figure 14 Server with articulated cable guide extracted ...

Страница 51: ...mounting kit has a separable design Figure 15 Fitting the protective hose Ê Separate the outer protective sheath 1 from the inner sheath Ê Carefully place the fiber optic cable 3 in the inner protective sheath 2 Ê Push the outer protective sheath 1 over the inner protective sheath V CAUTION The sheath openings must be arranged in an opposing direction as shown in the sectional view A B ...

Страница 52: ... cable with protective hose Ê Route the fiber optic cable in the articulated cable guide as shown in the Figure and secure it with cable ties 1 V CAUTION Make sure that the radii are designed in such a way that no damage can occur to the protected fiber optic cable with the articulated cable guide extended or retracted ...

Страница 53: ...tions V CAUTION For installation in 3rd party racks it must be ensured that an air flow from the front to the back of the rack is guaranteed Ê Fit the required original parts support bracket or cable management system I Under certain circumstances you will not be able to use some of the parts from the rack installation kit supplied you will need to use original 3rd party rack parts instead Ê Fit t...

Страница 54: ...allation 4 4 4 Inserting the server V CAUTION At least two people are needed to position the server in the rack Figure 17 Extending the telescopic rail Ê Extend the fitted telescopic rails completely to the front They must click into place so that they cannot be pushed backwards ...

Страница 55: ...on the front panel Ê Slide the server slightly in the direction of the arrow 2 until the hooks 3 engage When doing this ensure that the telescopic rails are kept in a locked position Ê Secure the server to the telescopic rails with one M3x6 screw on each side 4 The following steps can then be carried out by one person only Ê Unlock the telescopic rails 5a 5b on both sides and slide the server into...

Страница 56: ...r Ê Insert the cage nuts for securing the front panel into the corresponding holes on the front support uprights and secure the server with four knurled screws Ê Route the cables once the server has been inserted as described in the Technical Manual for the rack To remove the server follow this procedure in reverse ...

Страница 57: ...rd ports are indicated by symbols and color coding Figure 20 Standard ports I Some of the devices that can be connected may require special drivers see the documentation for the connected device Ê Connect the data cables to the server and peripherals An additional USB port is located on the front of the server see Figure 24 on page 63 1 Mouse port PS 2 green 5 USB port 1 and 2 black 2 Parallel por...

Страница 58: ...pply unit a second power supply unit can be added during operation to achieve a redundant power supply If one power supply unit is defective the other then guarantees unimpaired operation Each hot pluggable power supply unit can be replaced during operation see Hot plug power supply units on page 85 V CAUTION The server is automatically set to a mains voltage in the range of 100 V 240 V You may on...

Страница 59: ...1 Ê Connect the power plug to a grounded shockproof socket 2 on the internal supply network or to the multiple socket outlet in the rack see Technical Manual for rack I If the server has two hot pluggable power supply units the server can be connected to the mains with phase redundancy In this case each of the power supply units is either connected to two different phases or to two separate circui...

Страница 60: ...f all power and equipment switches Ê Disconnect all power plugs from the grounded shockproof sockets Ê Plug all cables into the server and peripherals Secure the data transmission cable connections e g nut retention Ê Plug all data communication cables into the utility sockets Ê Plug all power cables into the grounded shockproof sockets Disconnecting cables Ê Turn off all power and equipment switc...

Страница 61: ...eration V CAUTION Observe the safety instructions in chapter Important Information on page 19 5 1 Access to Drives Floorstand Model Enabling access to the accessible drives Figure 22 Access to the accessible drives Ê Slide the drive cover downwards 1 ...

Страница 62: ...Slide up the drive cover as far as possible 1 Ê Remove the hard disk drive cover 2 3 To replace the hard disk drive cover follow these instructions in reverse I To prevent access to the HDD modules the server can be locked The drive cover cannot then be pushed upwards and the hard disk drive cover cannot be removed The key can be found on the rear of the server ...

Страница 63: ...ED ID indicator 2 Power on indicator 9 USB connection 3 Hard disk drive activity indicator 10 Hard disk drive indicators see Figure 25 on page 66 4 Global error indicator 11 Floppy disk drive indicator 5 NMI button 12 CD DVD drive indicator 6 Reset button 13 Key lock floorstand model only 7 Identification button ID button ID RST NMI I D RST NMI I D RST NMI 1 2 3 4 5 6 8 9 7 13 12 11 10 11 10 12 ...

Страница 64: ...pressing the On Off button standby Further information can be found under Other on off options on page 72 I The On Off button does not disconnect the server from the mains voltage To disconnect from the mains completely remove the power plug NMI NMI button I Do not press The NMI button may only be used by service personnel RST Reset button Pressing the reset button reboots the system ID ID button ...

Страница 65: ...red Flashes orange when a critical event has occurred Details of the event can be found in the BIOS Setup in the System Event Log or using ServerView The indicator also flashes in standby mode Lights up orange when a prefailure event has been detected Details of the event can be found in the System Event Log or using ServerView The indicator also lights up in standby mode If the event is still acu...

Страница 66: ...icator Lights up green when the storage medium is being accessed Floppy disk drive indicator Lights up green when the storage medium is being accessed Hard disk drive indicators Figure 25 Indicators on the HDD module LED green HDD BUSY Lit HDD in active phase drive active drive being accessed Not lit HDD inactive ...

Страница 67: ...g restored after changing a hard disk drive Fast flashing HDD Identify SATA Server Variant Not lit No HDD error Lit HDD Faulty or Rebuild Stopped drive defective needs replacing a rebuild process was stopped or the HDD module is not correctly inserted Slow flashing HDD Rebuild the data is being restored after changing a hard disk drive Fast flashing HDD Identify Fast flashing four times pause HDD ...

Страница 68: ... Log or using ServerView The indicator also flashes in standby mode Lights up orange when a prefailure event has been detected Details of the event can be found in the System Event Log or using ServerView The indicator also lights up in standby mode If the event is still acute after a power failure the indicator is activated after the restart 2 ID indicator blue Lights up synchronously on the fron...

Страница 69: ...ive indicator service LAN Lights green if a LAN link exists Does not light up if a LAN link does not exist Flashes green when a LAN transfer occurs 3 LAN transfer rate indicator standard LAN Lights yellow for a LAN transfer rate of 1 Gbps Lights green for a LAN transfer rate of 100 Mbps Does not light up for a LAN transfer rate of 10 Mbps 4 LAN link Active indicator standard LAN Lights green if a ...

Страница 70: ... Each of the three columns in the table indicates the status of the power supply unit with the voltage on and off and with the server on and off If the LED indicators are different an error has occurred For diagnosis consult the Service Supplement or a service engineer Mains voltage off Mains voltage on Mains voltage on Server off Standby mode Server on Top green LED Off On On Center orange LED Of...

Страница 71: ...4 on page 63 lights up orange Standby mode when the server is connected to the mains Starting up for the first time Ê Press the On Off button item 1 in Figure 24 on page 63 The power on indicator lights up green item 2 in Figure 24 on page 63 Ê Insert the ServerStart CD and or an installation disk in the corresponding drive Ê Follow the on screen instructions see also section Configuration with Se...

Страница 72: ...can be switched on and off in the following ways Specified switch on time switch off time The ServerView program allows you to set a time at which the server is to be automatically switched on or off Ring indicator The server is switched on by an internal or external modem Wakeup on LAN WOL The server is switched on by a command from the LAN After power failure The server is automatically switched...

Страница 73: ... RAID for SAS User s Guide on the ServerBooks CD select Controllers from the menu The ServerStart CD supplied allows you to conveniently configure the server and install the operating system The menu guided configuration includes the server configuration with the SCU and the RAID controller configuration with the GAM Global Array Manager or ServerView RAID I Descriptions of operating systems not c...

Страница 74: ...art manual see Literature on page 103 5 4 2 Configuration without ServerStart Configuring IME RAID Level 1 The server has an onboard SAS controller with Integrated Mirroring Enhanced functionality I A separate utility is available to the controller for IME configuration For further information refer to the Integrated RAID for SAS User s Guide on the ServerBooks CD select Controllers from the menu ...

Страница 75: ...e related manual 5 5 Cleaning the Server V CAUTION Switch the server off and disconnect the power plugs from the grounded shockproof sockets Do not clean any interior parts yourself leave this job to a service technician Do not use any cleaning agents that contain abrasives or may corrode plastic Ensure that no liquid enters the system Ensure that the ventilation areas of the server and the monito...

Страница 76: ......

Страница 77: ...object with a steel cable running through a clip on the back The rack model is protected against unauthorised access by means of a lockable rack door 6 2 BIOS Setup Security Functions The Security menu in the BIOS Setup provides you with various options for protecting your data from unauthorized access It allows you to assign access passwords or to prevent disks from being written or the BIOS from...

Страница 78: ......

Страница 79: ...ceed as follows Ê Make a list of the steps performed and the circumstances that led to the fault Also make a list of any error messages that were displayed Ê Switch off the server Ê Contact our customer service team 7 1 Power On Indicator Remains Unlit The power on indicator remains unlit after switching on Power cable incorrectly connected Ê Make sure that the power cable is correctly connected t...

Страница 80: ...te password Brightness control is set to dark Ê Set the brightness control on the monitor to light For detailed information refer to the Operating Manual supplied with your monitor Power cable or monitor cable not connected Ê Switch off the monitor and the server Ê Check whether the power cable is properly connected to the monitor and to the grounded socket Ê Check whether the monitor cable is pro...

Страница 81: ...ystem or the software for the screen controller for details of how to set the correct horizontal frequency for your monitor and follow the procedure accordingly 7 5 No Screen Display or Display Drifts The wrong horizontal frequency or resolution has been selected for the monitor or for the application program Ê Find out which horizontal frequency your monitor screen supports You will find the hori...

Страница 82: ... controller disabled The mouse controller on the system board must be enabled if you are using the mouse supplied Ê In the BIOS Setup check the settings in the Advanced menu under Peripheral Configuration Mouse Controller and if necessary change the setting to Enabled or Auto Detect 7 7 Unable to Read From Write To Floppy Disk Ê Check whether write protection for the floppy disk is activated Ê Che...

Страница 83: ...tem time under Linux and would overwrite the system time in the default setting on shutdown If the date and time are still wrong after the server has been switched off and back on again replace the lithium battery for a description refer to the D2399 Technical Manual for the system board or contact our customer service team 7 9 Drives Reported as Dead When Starting System RAID controller configura...

Страница 84: ... HDD Dummy Unit on page 90 or Ê Re insert a new HDD module in an available slot while the system is switched on RAID controller is not configured for this drive The drive was installed when the system was switched off Ê Reconfigure the RAID controller for the drive using the corresponding utility Information is provided in the documentation for the RAID controller or Ê Re insert the HDD module in ...

Страница 85: ...nd may only be performed by authorized specialist personnel The hot plug procedure increases the availability of system operation and guarantees a high degree of data integrity and failsafe performance 8 1 Hot plug power supply units With two hot pluggable power supply units if a defect occurs in one power supply unit the other unit ensures that operation continues unimpaired The defective power s...

Страница 86: ...nit Ê Press the locking clip for the installed power supply unit upwards in the direction of the arrow 1 Ê Push the handle in the direction of the arrow 2 until it unlocks and then remove the power supply unit from the slot Ê Slide the new power supply unit into the empty slot as far as it will go until it clicks into place Ê Connect the newly installed power supply unit I Make sure that the power...

Страница 87: ...supply unit Ê Remove the dummy unit from the second power supply unit slot To do this remove the screw securing the dummy unit push the dummy unit upwards and unhook it at the top V CAUTION Keep the dummy unit for future use If the power supply unit is removed and not replaced with a new unit then the dummy unit must be reinstalled due to cooling the applicable EMC regulations regula tions on elec...

Страница 88: ...om the carrier V CAUTION The HDD modules must be marked clearly so that they can be replaced in their original slots after an upgrade If this is not done existing data can be lost V CAUTION The hot plug function is only possible in conjunction with a corresponding RAID configuration Further information about RAID configuration or the RAID level can be found in the RAID controller documentation see...

Страница 89: ...blems occurring Only store and transport HDD modules within the limits stipulated in the specification When transporting HDD modules even over short distances always use the original packaging ESD labeling Never expose a HDD module to a temperature shock Avoid the formation of condensation inside and on the outside of the hard disk drive V CAUTION The HDD module must be acclimatized in its operati...

Страница 90: ...dummy unit Ê Press the upper and lower tabs on the dummy unit together see Figure 30 on page 90 until the locking mechanism disengages and remove the dummy unit from the slot To install a dummy unit follow the same procedure in reverse order V CAUTION Keep the dummy unit for future use If the HDD module is removed again and not replaced with a new module then the dummy unit must be reinstalled due...

Страница 91: ...locking an HDD module Ê Open the locking mechanism by pressing the locking button 1 I If the HDD modules are fitted with a transport lock 1 in the next figure remove this before you open the locking mechanism Ê Push the handle of the HDD module fully in the direction of the arrow Figure 32 Removing the transport lock ...

Страница 92: ...s Installing the HDD module Figure 33 Installing an HDD module floorstand model Ê With the handle extended carefully slide the HDD module as far as possible into the free slot 1 Ê Push the handle completely back to its original position 2 until the locking mechanism 3 is engaged ...

Страница 93: ...tly being accessed Observe the control LEDs for the corre sponding HDD module see Hard disk drive indicators on page 66 Ê Wait for at least 60 seconds I This period is necessary for the RAID controller to recognize that an HDD module has been removed and for the hard disk drive to come to a stop Ê Pull out the HDD module fully Ê Insert the new HDD module as described under Unlocking an HDD module ...

Страница 94: ......

Страница 95: ...ional Standards Institute ASR R Automatic Server Reconfiguration and Restart ATA Advanced Technology Attachments BIOS Basic Input Output System CC Cache Coherency CD Compact Disk CD ROM Compact Disk Read Only Memory CHS Cylinder Head Sector CMOS Complementary Metal Oxide Semiconductor COM Communications CPU Central Processing Unit ...

Страница 96: ...tile Disk ECC Error Checking and Correcting ECP Extended Capabilities Port EEPROM Electrically Erasable Programmable Read Only Memory EGB Elektrostatisch gefährdete Bauteile components in danger of electro static discharge EMP Emergency Management Port EPP Enhanced Parallel Port EMV Elektromagnetische Verträglichkeit electromagnetic compatibility EPROM Erasable Programmable Read Only Memory ...

Страница 97: ...le Allocation Table FPC Front Panel Controller FRU Field Replaceable Unit FSB Front Side Bus GAM Global Array Manager GUI Graphical User Interface HDD Hard Disk Drive HE Höheneinheit HSC Hot Swap Controller I C Inter Integrated Circuit I O Input Output ICM Intelligent Chassis Management ID Identification ...

Страница 98: ...hanced IPMI Intelligent Platform Management Interface iRMC integrated Remote Management Controller IRQ Interrupt Request Line LAN Local Area Network LBA Logical Block Address LCD Liquid Crystal Display LED Light Emitting Diode LUN Logical Unit Number LVD Low Voltage Differential SCSI LWL LichtWellenLeiter fiber optic cable MRL Manual Retention Latch ...

Страница 99: ...VRAM Non Volatile Random Access Memory OS Operating System PAM Promise Array Management PCI Peripheral Component Interconnect PDA Prefailure Detection and Analysing PDF Portable Data Format POST Power ON Self Test PS 2 Personal System 2 RAID Redundant Arrays of Independent Disks RAM Random Access Memory ROM Read Only Memory ...

Страница 100: ...rance Enclosures SAS Serial Attached SCSI SATA Serial Advanced Technology Attachment SBE Single Bit Error SCA Single Connector Attachment SCSI Small Computer System Interface SCU System Configuration Utility SDR Sensor Data Record SDRAM Synchronous Dynamic Random Access Memory SEL System Event Log S M A R T Self Monitoring Analysis and Reporting Technology ...

Страница 101: ...rating Manual 101 Abbreviations SMI System Management Interrupt SSU System Setup Utility SVGA Super Video Graphics Adapter USB Universal Serial Bus VGA Video Graphics Adapter WOL Wakeup on LAN ZCR Zero Channel RAID ...

Страница 102: ......

Страница 103: ...ternet can be found at the URL http manuals fujitsu siemens com The PRIMERGY server documentation can be accessed under the Industry standard servers navigation option 1 Safety notes and other important information 2 Ergonomics 3 Warranty 4 Returning used devices 5 System Board D2399 for TX150 S5 Technical Manual 6 BIOS Setup Description 7 PRIMERGY TX150 S5 Server Options Guide 8 Quick Start Hardw...

Страница 104: ...er Manual 15 ServerView RAID User Manual 16 PRIMECENTER Rack Technical Manual 17 DataCenter Rack Technical Manual 18 19 Rack Technical Manual 19 LSI SATA Software RAID User Manual 20 LSI Logic MegaRAID SAS Software User s Guide 21 LSI Logic MegaRAID SAS Device Driver Installation 22 Integrated RAID for SAS User s Guide 23 Embedded SATA Software RAID for ICH7R User s Guide 24 Global Array Manager C...

Страница 105: ...TX150 S5 Operating Manual 105 Literature 25 Global Array Manager Server Software User s Guide 26 Integrated Mirroring User Manual ...

Страница 106: ......

Страница 107: ... 63 Controls 63 Correcting faults 79 D Data manipulation 5 Data protection 77 Data security 10 Delivery note 17 33 Devices connecting to server 57 Disposal devices 30 Drive dead 83 defective 84 Dummy unit HDD module 90 93 DVD drive indicator 63 66 E ECC 10 Electrical data 14 Electromagnetic compatibility 14 Electromagnetic compatiblity 26 Electrostatic sensitive devices ESD 25 EMC 14 EMC regulatio...

Страница 108: ... time 31 89 carrier 90 dummy unit 88 handling 88 hard disk drive 90 hot pluggable 93 installing removing 90 Height units 43 45 Hot plug HDD module 88 93 power supply unit 58 I ID button 63 64 ID indicator 63 Identification button 63 Identification indicator 63 IME Integrated Mirroring Enhanced 73 74 Indicators CD 63 DVD 63 floppy disk drive 63 Global Error 63 65 68 hard disk drive 63 66 ID 63 ID i...

Страница 109: ... monitor port 57 mouse 57 parallel port 57 serial port 57 service LAN 57 USB port 57 63 Power on indicator 65 does not light 79 Power supply unit adding 87 dummy unit 87 hot plug 58 hot pluggable 85 indicators 70 redundant 58 replacing 86 standard 58 Power supply redundant 58 Property protection 77 Protective hose fiber channel fiber optic cable 51 R Rack installation kit 45 54 RAID controller not...

Страница 110: ...rty protection 77 rack installation kit 45 54 reset button 63 64 routing cables 44 safety standards 14 serial port 57 standards 14 starting up 61 switches itself off error 80 switching off 71 switching on 71 technical data 14 transportation 28 troubleshooting 79 unpacking 33 USB port 57 63 ventilation clearance 15 weight 15 Server management 11 ServerStart 11 ServerView 11 supported functions 11 S...

Страница 111: ...r Operating Manual TX150 S5 Comments Suggestions Corrections Submitted by Fujitsu Siemens Computers GmbH User Documentation 85521 Ottobrunn Germany Fax 49 700 372 00000 e mail manuals fujitsu siemens com http manuals fujitsu siemens com ...

Страница 112: ......

Страница 113: ...tsu com Copyright Fujitsu Technology Solutions 2009 Hinweise zum vorliegenden Dokument Zum 1 April 2009 ist Fujitsu Siemens Computers in den alleinigen Besitz von Fujitsu übergegangen Diese neue Tochtergesellschaft von Fujitsu trägt seit dem den Namen Fujitsu Technology Solutions Das vorliegende Dokument aus dem Dokumentenarchiv bezieht sich auf eine bereits vor längerer Zeit freigegebene oder nic...

Отзывы: